There are several options for REST clients that can be used just do a Google search (oh wait I meant Bing). For this post I am using the Advanced Rest Client Application within Chrome (sorry IE).
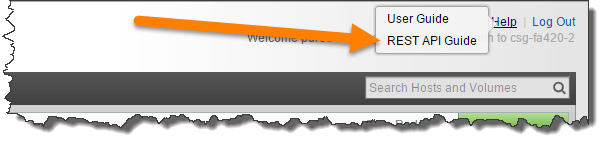
The best place to get started is to review the REST API documentation that is available from the FlashArray web management interface or from our Community.
To get started open up the Advanced REST client and you will see essentially a blank template.
![]()
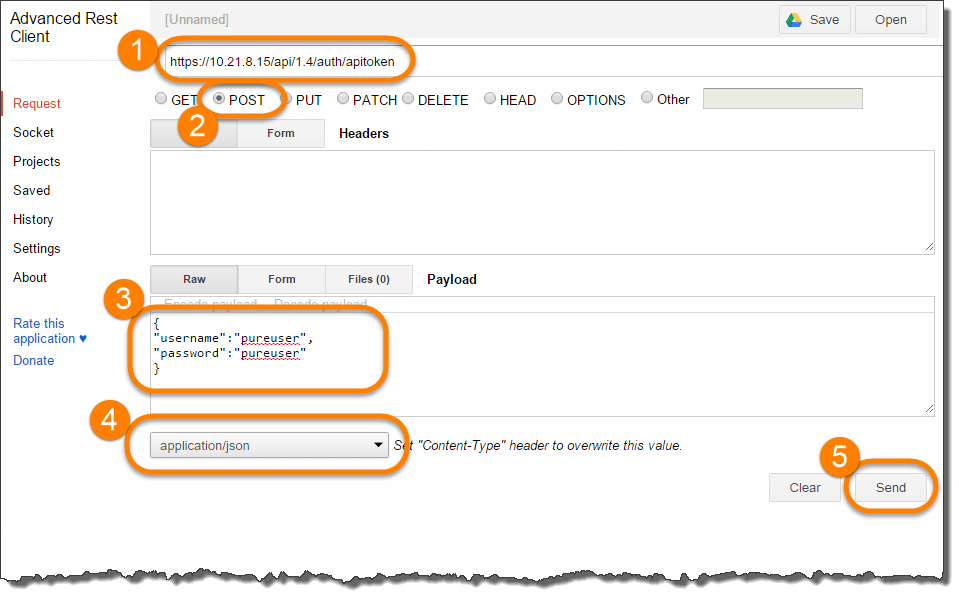
Using the DNS name or the IP address of your FlashArray we need to start by retrieving an API Token for a specific user. For this example we will use our default management account pureuser. Using the REST API documentation Authentication section as a reference the API call to use is POST https://myarray/api/1.4/auth/apitoken with a defined Payload. As you will notice from the documentation the Payload required for retrieving an API Token is:
|
1 2 3 4 |
{ "username": "pureuser", "password": "pureuser" } |
The below screenshot maps out step-by-step the different options to enter and select to retrieve the API Token for the pureuser account. Step 4 is very important to set the Content-Type to application/json as all of our return results are in JSON format.
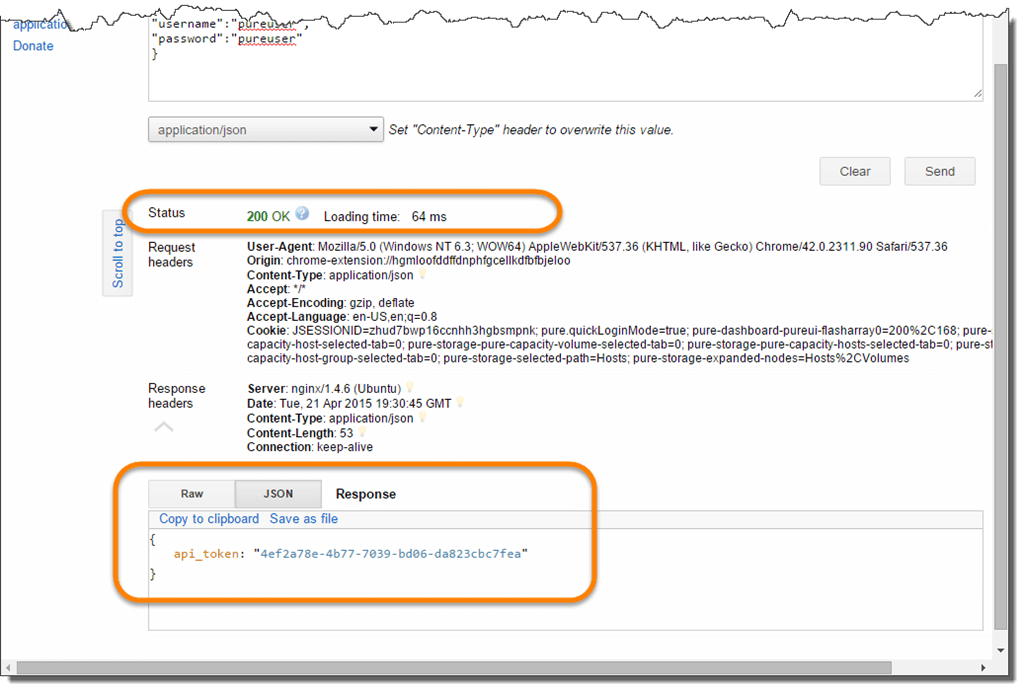
Once Step 5 Send has been clicked the FlashArray will respond with output directly back to the Advanced REST client as show below.
Note: The Purity Operating Environment introduced the REST API 1.0 with version 3.4.3. Depending on the version currently running on the FlashArray you may encounter the below error. The examples in this article use REST API 1.4 but if you do encounter this error you can use the URL https://myarray/api/api_version which will show all the supported versions of the REST API for that particular FlashArray. For example on my array it returns {“version”: [“1.0”, “1.1”, “1.2”, “1.3”, “1.4”]}. If you try this same URL in Internet Explorer a .json package will be downloaded with the same details.
|
1 2 3 |
{ "msg": "Invalid version, check /api/api_version to get supported versions." } |
Now we have an API Token and can create a session to the FlashArray. Using the API Token we pass that using the POST https://myarray/api/1.4/auth/session with the api_token variable as the Payload. See the below screenshot. The api_token in the Payload was taken from the previous step above. These tokens will be unique for every FlashArray and every API Token defined user.
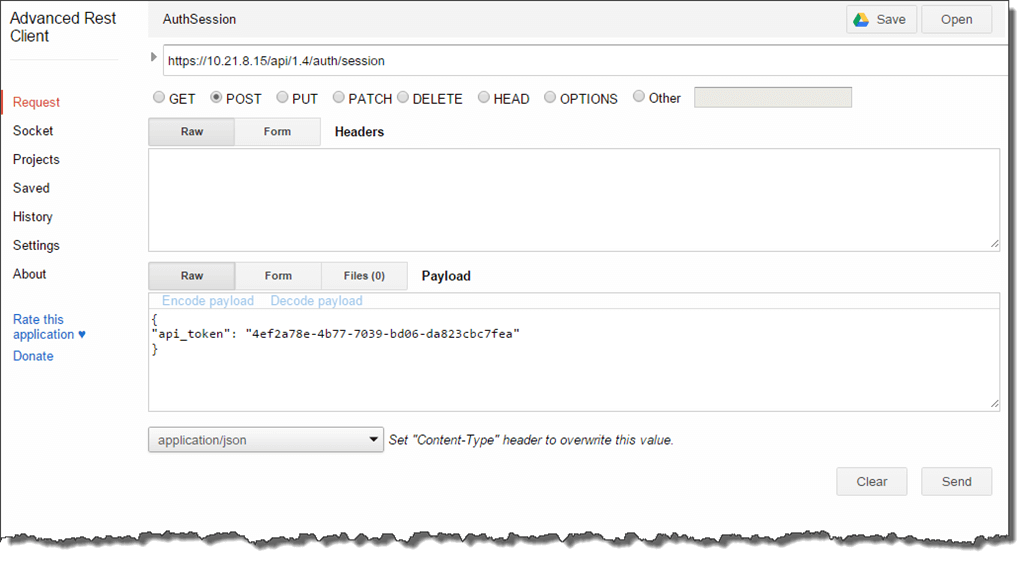
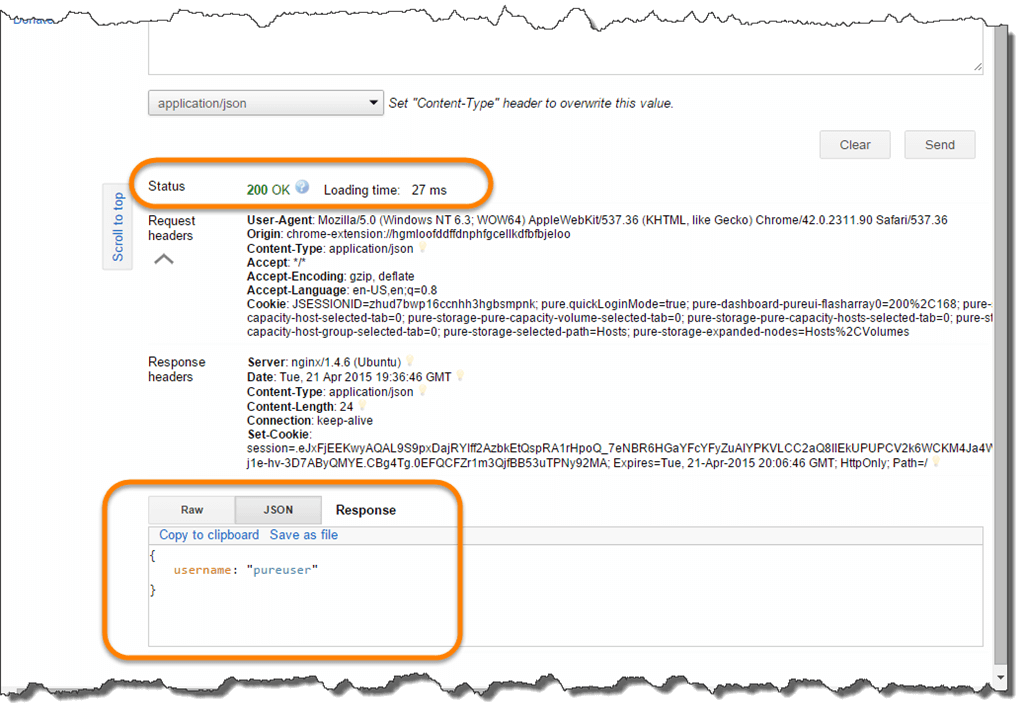
After sending the above request making sure to set POST and Content-Type to application/json we will get the following.
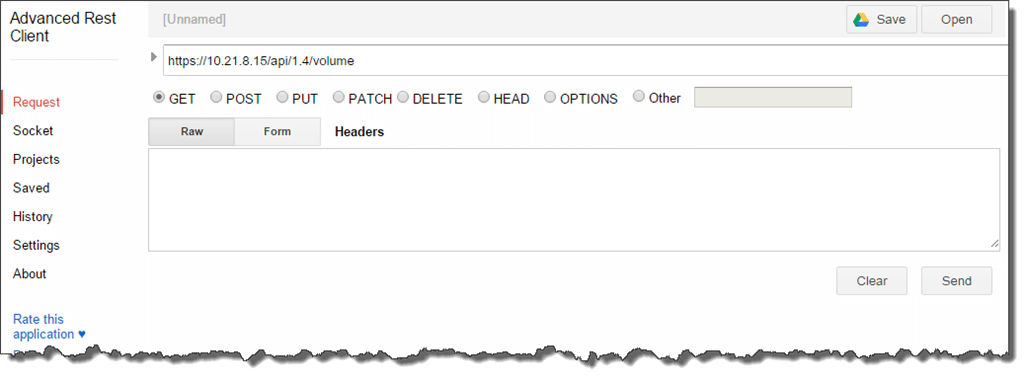
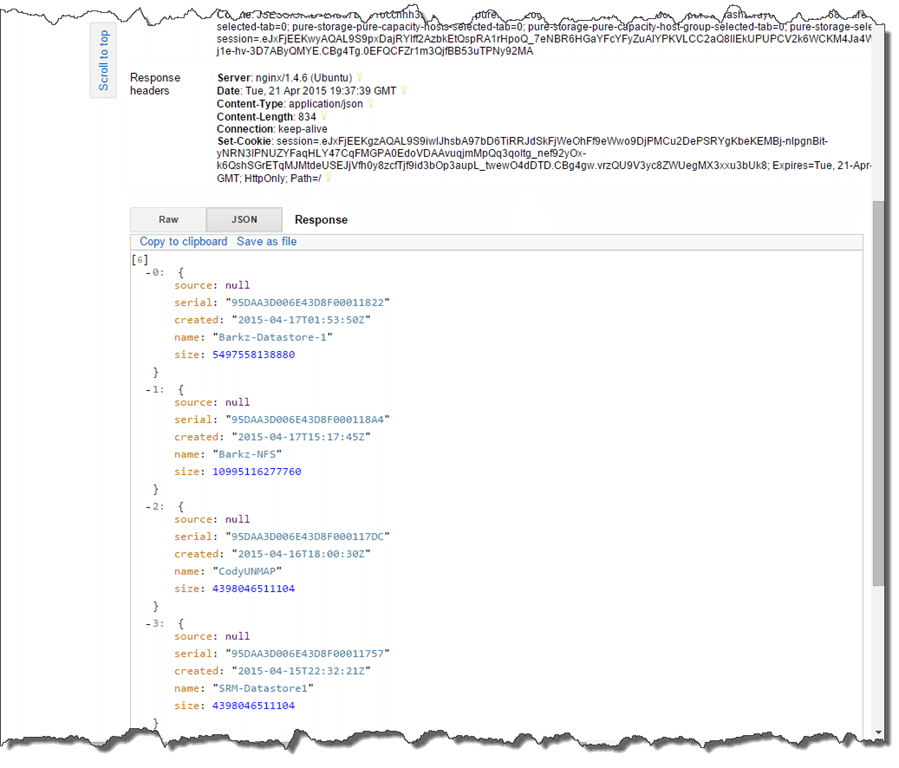
Now we have established a session with the FlashArray and can begin retrieving some information. Let’s get all the volumes that are currently created on this FlashArray using GET https://myarray/api/1.4/volume and click Send.
The results will be a list of all the volumes as show in the below screenshot.
One final thing to do is to create a new volume called BLOG-DEMO. Using the very same REST API call from above we just add the name of the volume we want to create to the end, then define the Size as the Payload.
|
1 2 3 |
{ “size” : “1G” } |

Hit Send and a new volume will be created and the successful results shown.

This was a quick primer on how to use any REST client to work with our REST API directly. Using the documentation as reference you can work perform any of the API calls just make sure you have an authenticated session.
May the REST be with you!
barkz