We introduced support for Storage Management Initiative Specification (SMI-S) with the release of Purity 4.6. I covered the Pure Storage SMI-S Provider Overview previously discussing how Windows Server 2012 R2 can be used as an SMI-S client with Windows PowerShell. In this blog post I show how to add our SMI-S Provider into Microsoft System Center Virtual Machine Manager (SCVMM) 2012 R2.
The following tasks will be performed:
- Enabling SMI-S service on the Pure Storage FlashArray.
- Add a new Storage Device using SMI-S.
- Create new Logical Unit.
Requirements:
- Deployed instance of Microsoft System Center Virtual Machine Manager 2012 R2.
- Pure Storage FlashArray//m or FlashArray FA-400 series running Purity 4.6 or greater.
Step 1
The first step is to ensure that the SMI-S services are enabled on the FlashArray. After logging into the FlashArray navigate to the System tab and select SMI-S. Enable the Service Location Protocol and the SMI-S Provider.
Once the Service Location Protocol and the SMI-S Provider are enabled log into the physical or virtual host that has Microsoft System Center Virtual Machine Manager 2012 R2 (SCVMM) deployed.
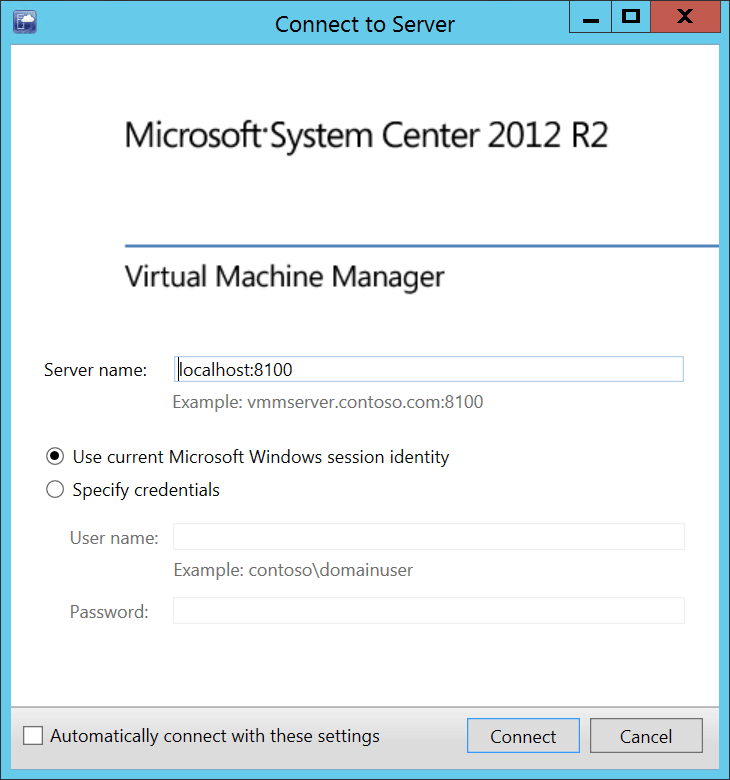
Step 2
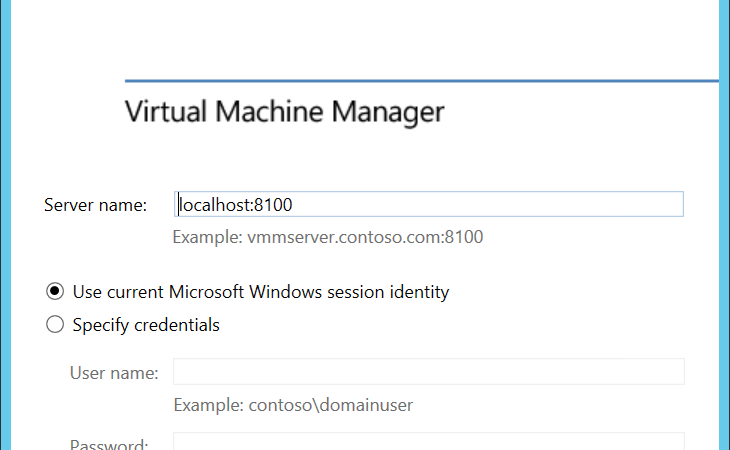
Login into SCVMM. In my example I use Windows session identity.
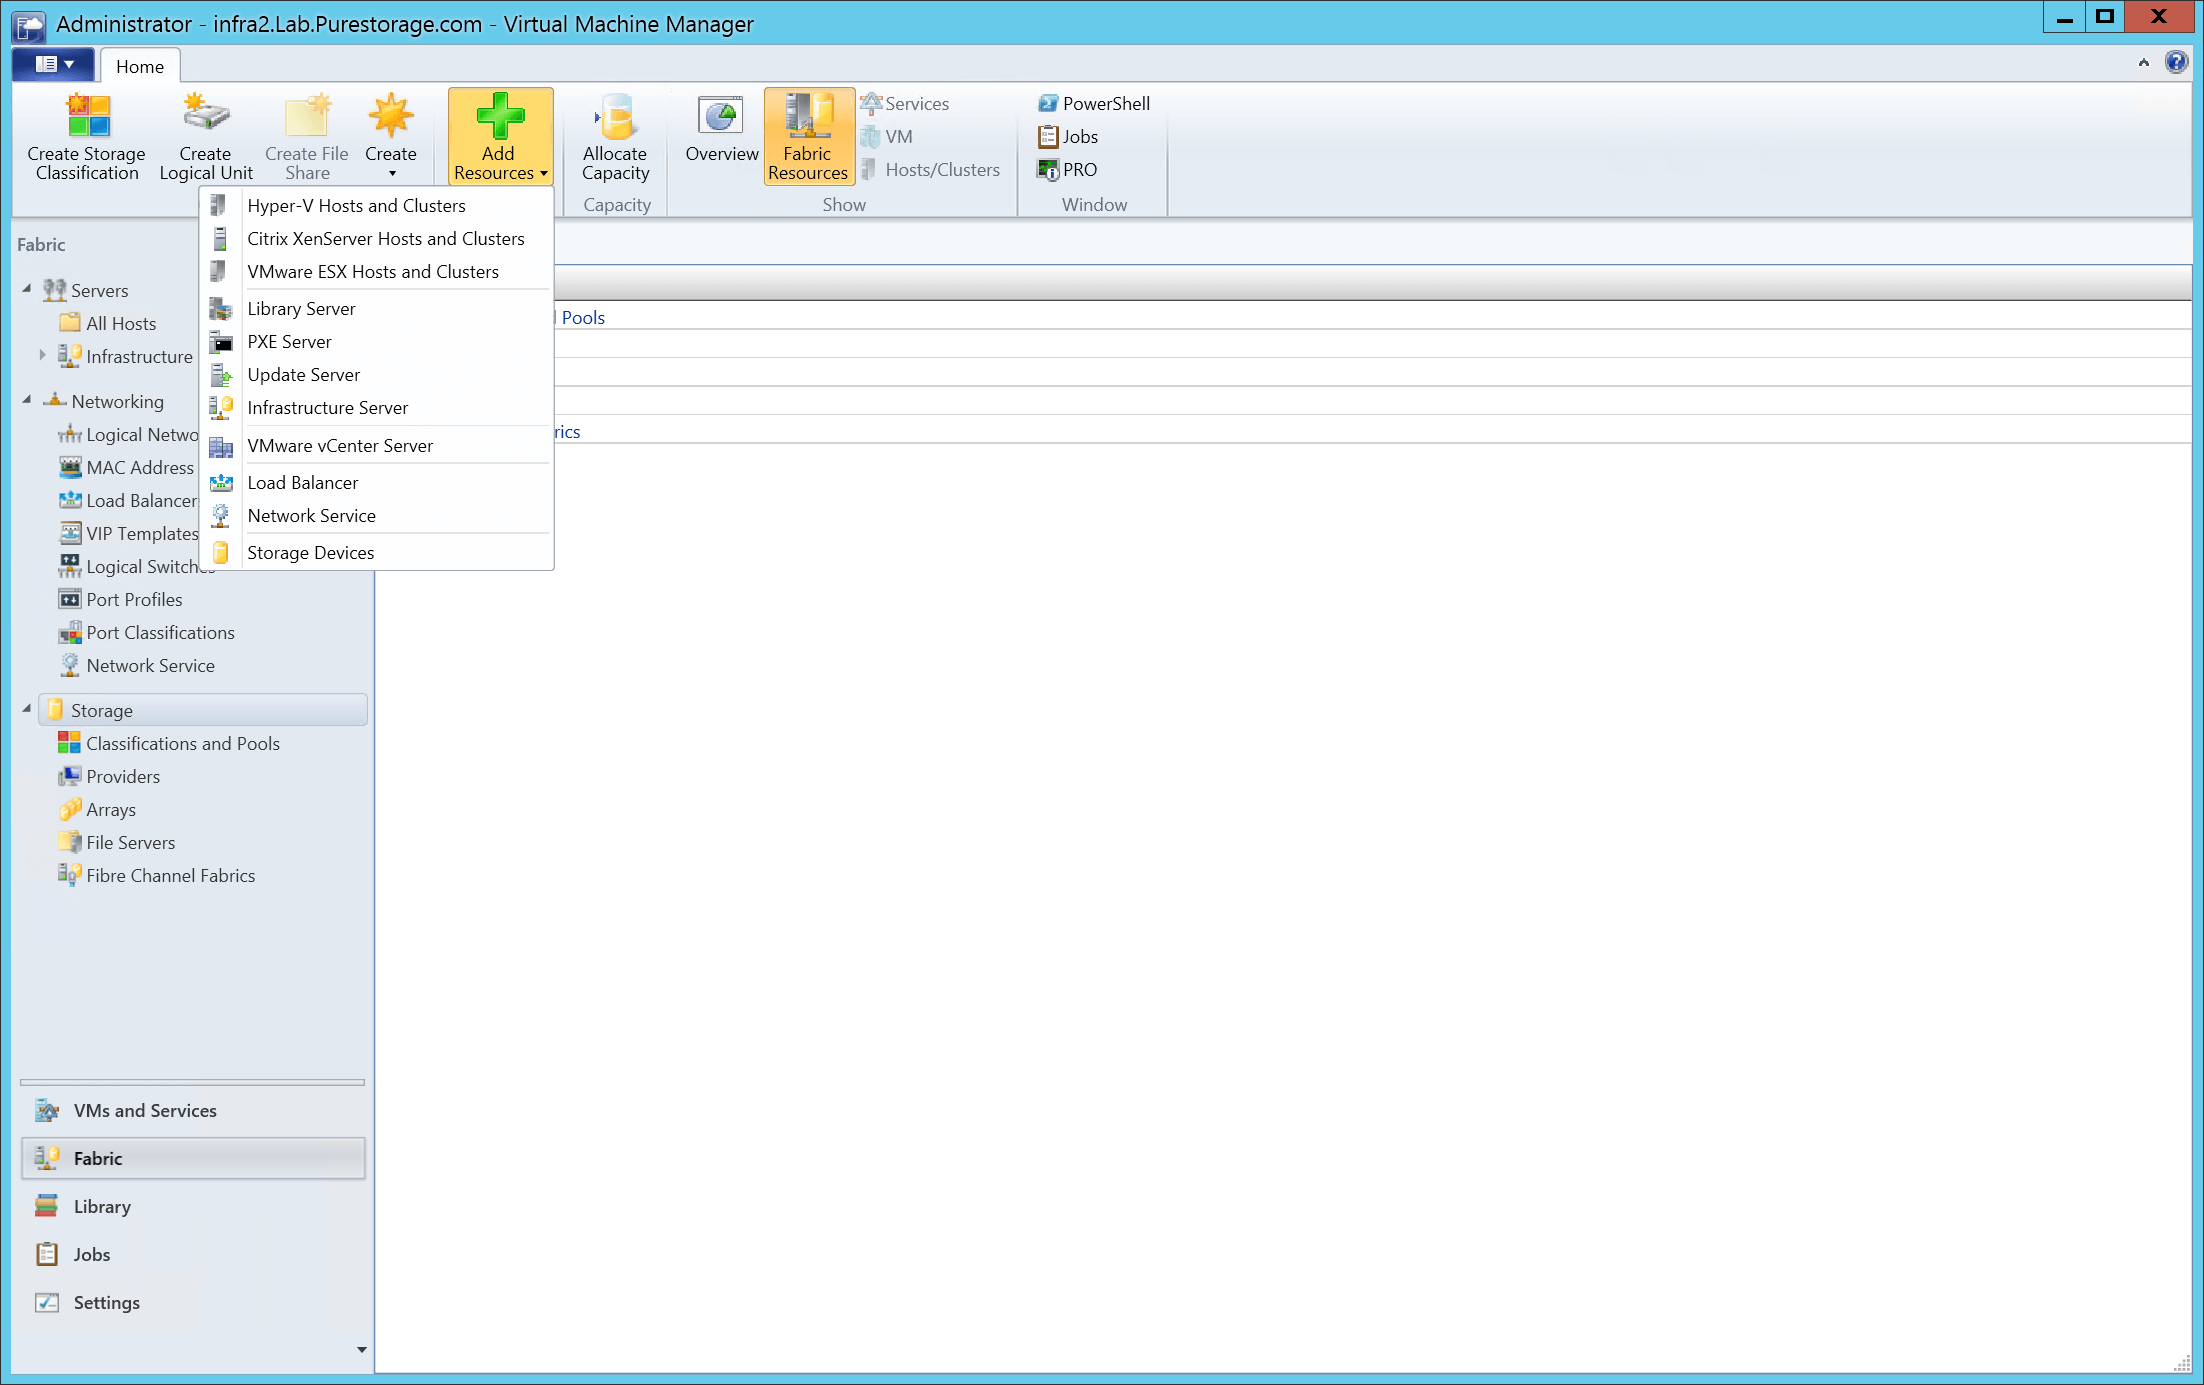
Step 3
After logging into SCVMM click Add Resources > Storage Devices to start the Add Storage Devices Wizard.
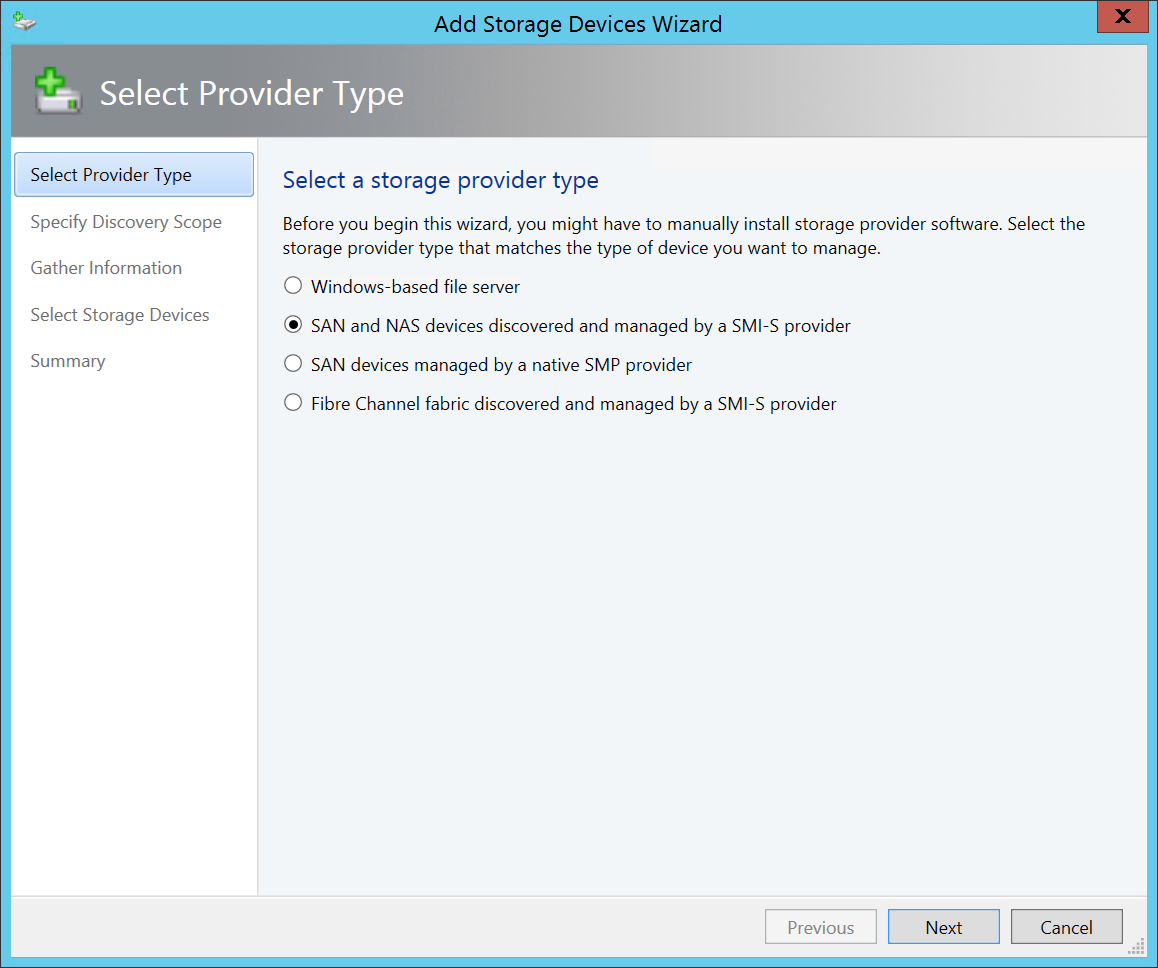
Step 4
The type of storage provider to select is SAN and NAS devices discovered and managed by a SMI-S Provider.
Step 5
Specifying the discovery scope is the most important step. There are several protocol options, in the Protocol dropdown select SMI-S CIMXML. You can either use an IP address or Fully Qualified Domain Name (FQDN) for the FlashArray. Select Use Secure Sockets Layer (SSL) connection and the TCP/IP port will automatically change from 5988 to 5989.
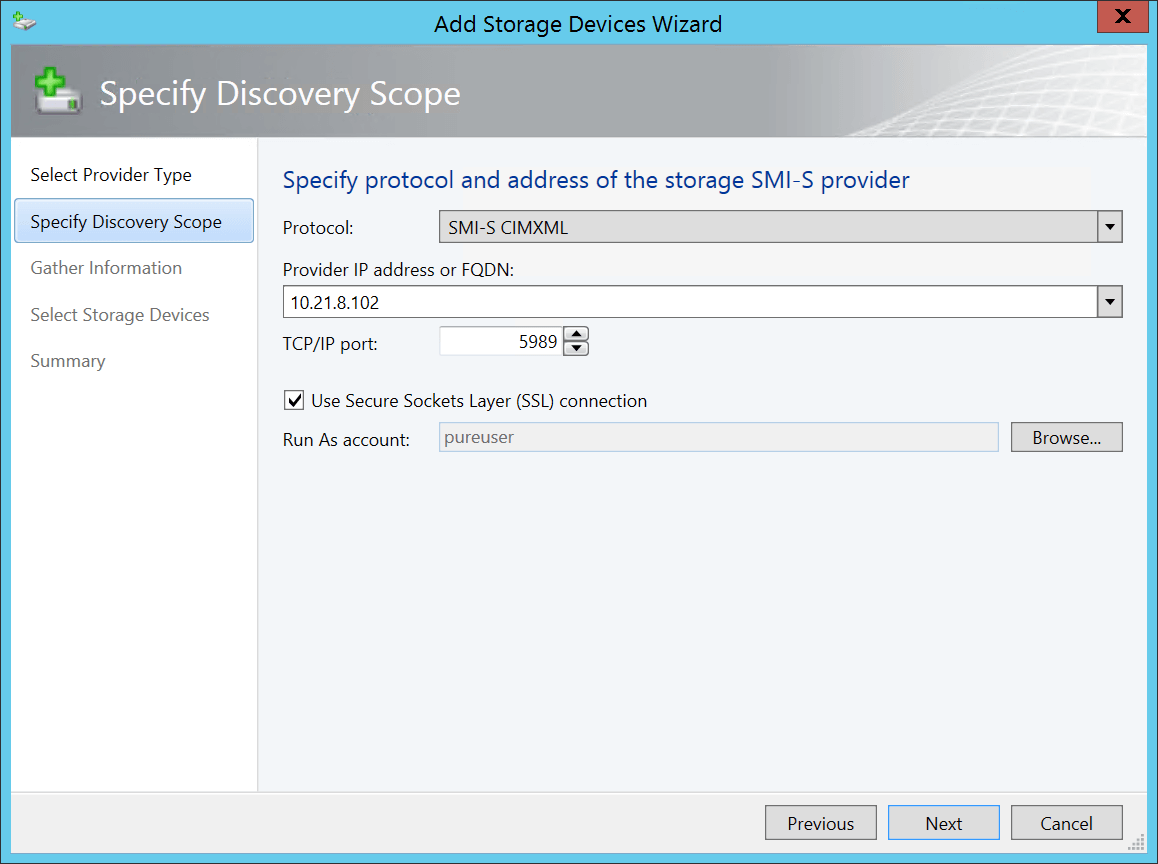
A Run As account needs to be selected using Browse… I created a Run As account named pureuser that maps to the default pureuser account for FlashArray Web management. To create a new account use the Create Run As Account with the proper credentials.

Click OK then Next to start the discovery and import task.
Step 6
During this step the wizard with show a progress bar as it discovers the FlashArray. Once the discovery has completed click Next.

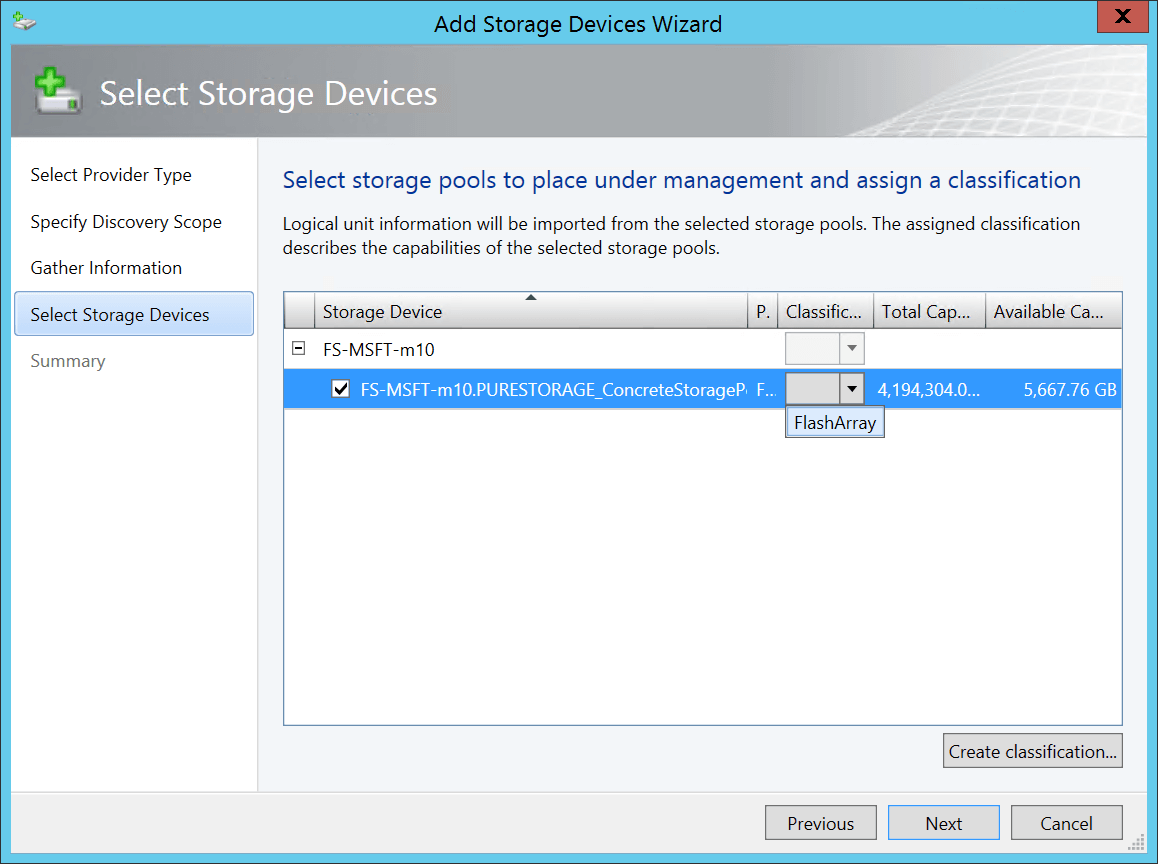
Step 7
In this step click the checkbox for the FlashArray that has been discovered and assign a Classification. A “classification” is meant to describe the capabilities of the selected storage pool. In the below example I created a Classification using the Create Classification button named FlashArray. This can be more descriptive if you desire such as adding a model number.
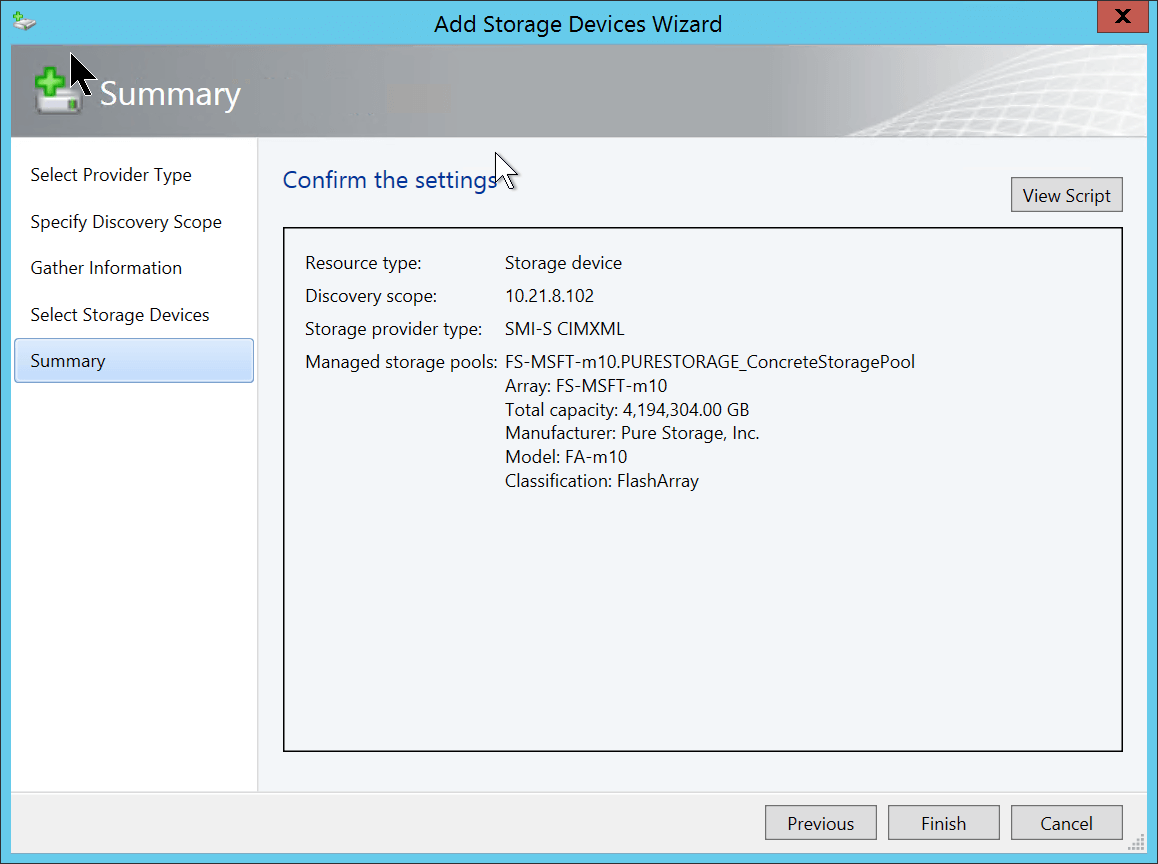
Step 8
The discovery and import has completed. Confirm the settings by clicking Finish and the FlashArray will be added to SCVMM.
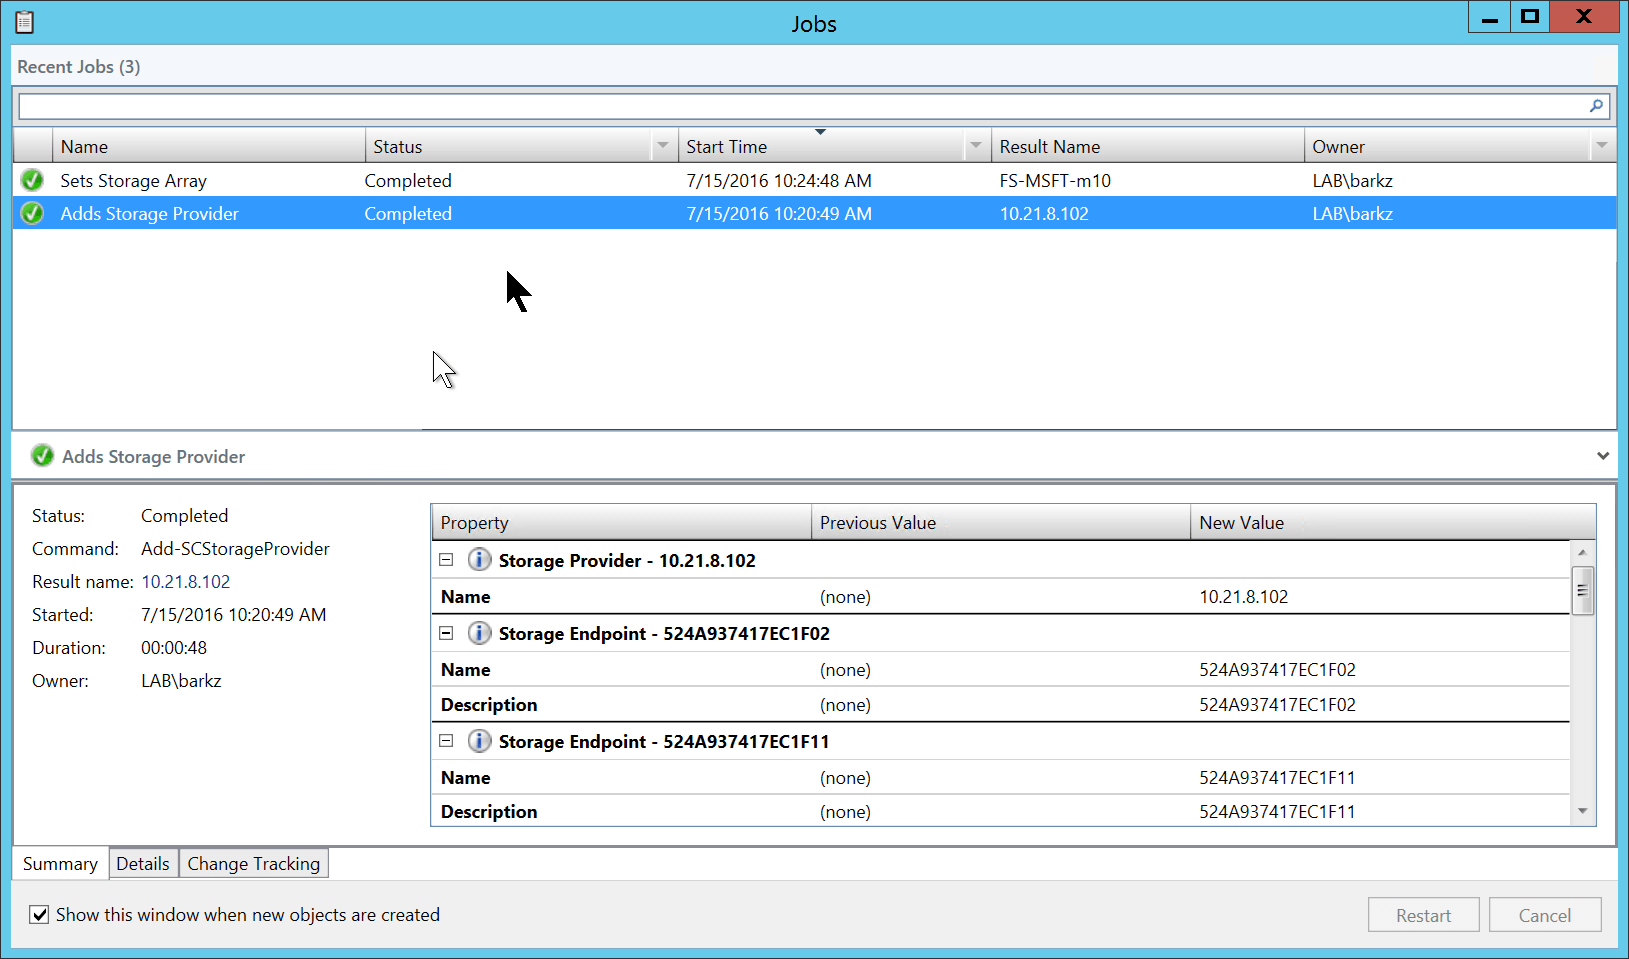
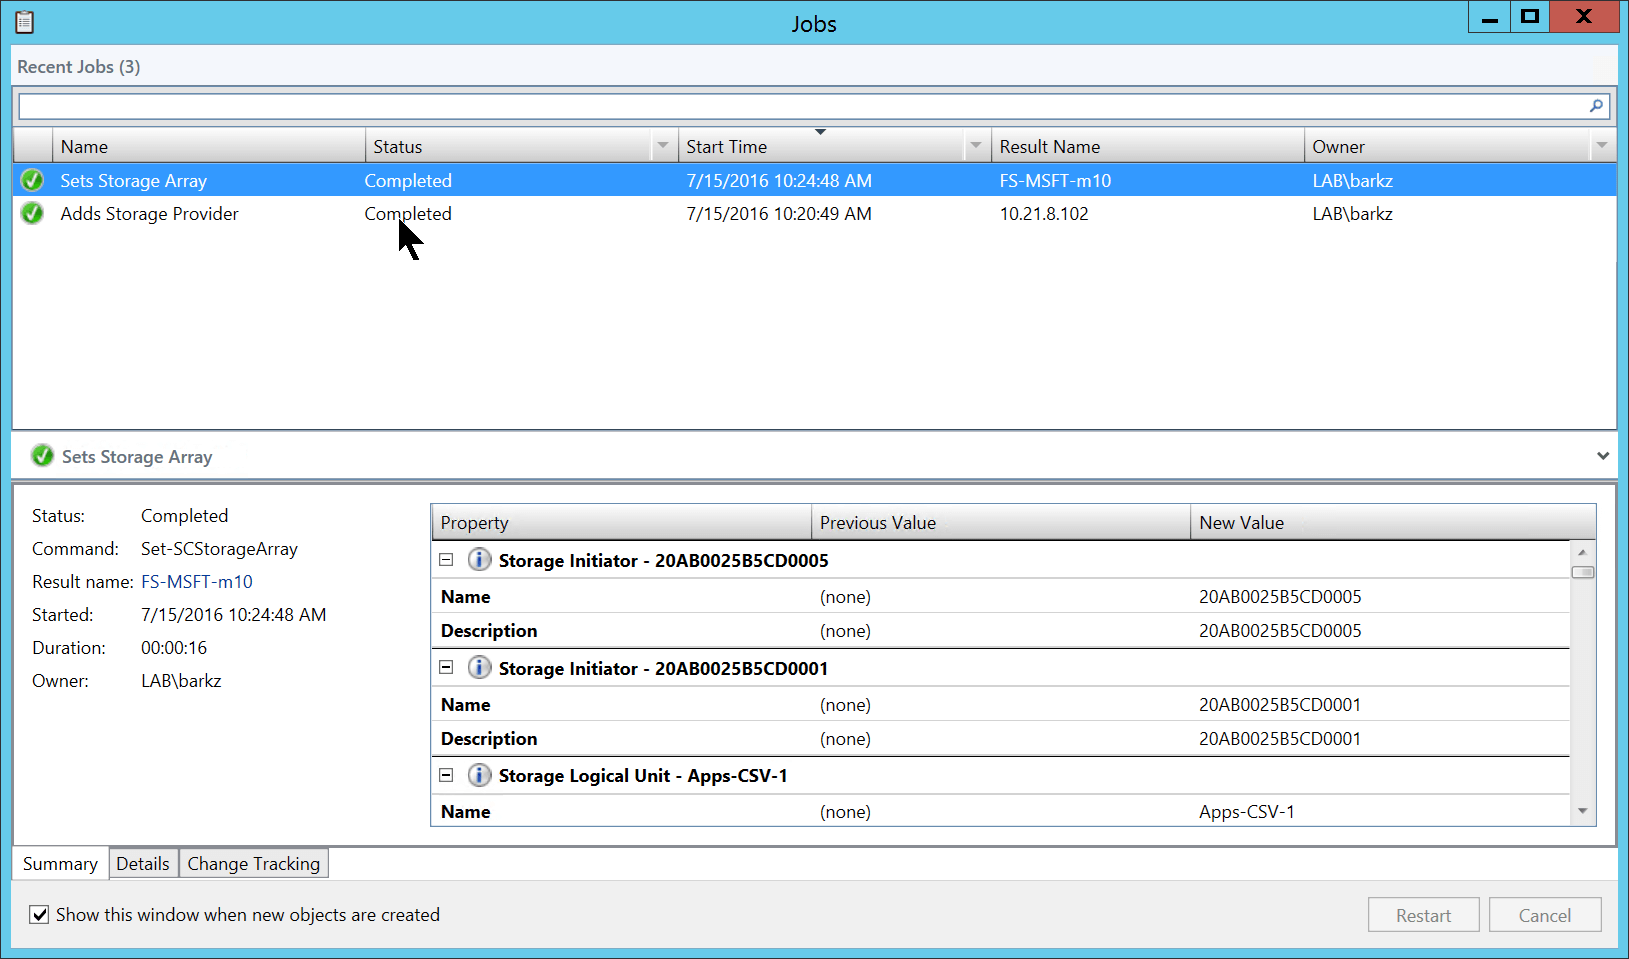
As part of the final step adding the FlashArray to SCVMM there are two Jobs that show further details about the FlashArray.
Below screenshot shows the FlashArray Endpoints and Provider details.
Below screenshot shows that initiators and logical units have been imported.
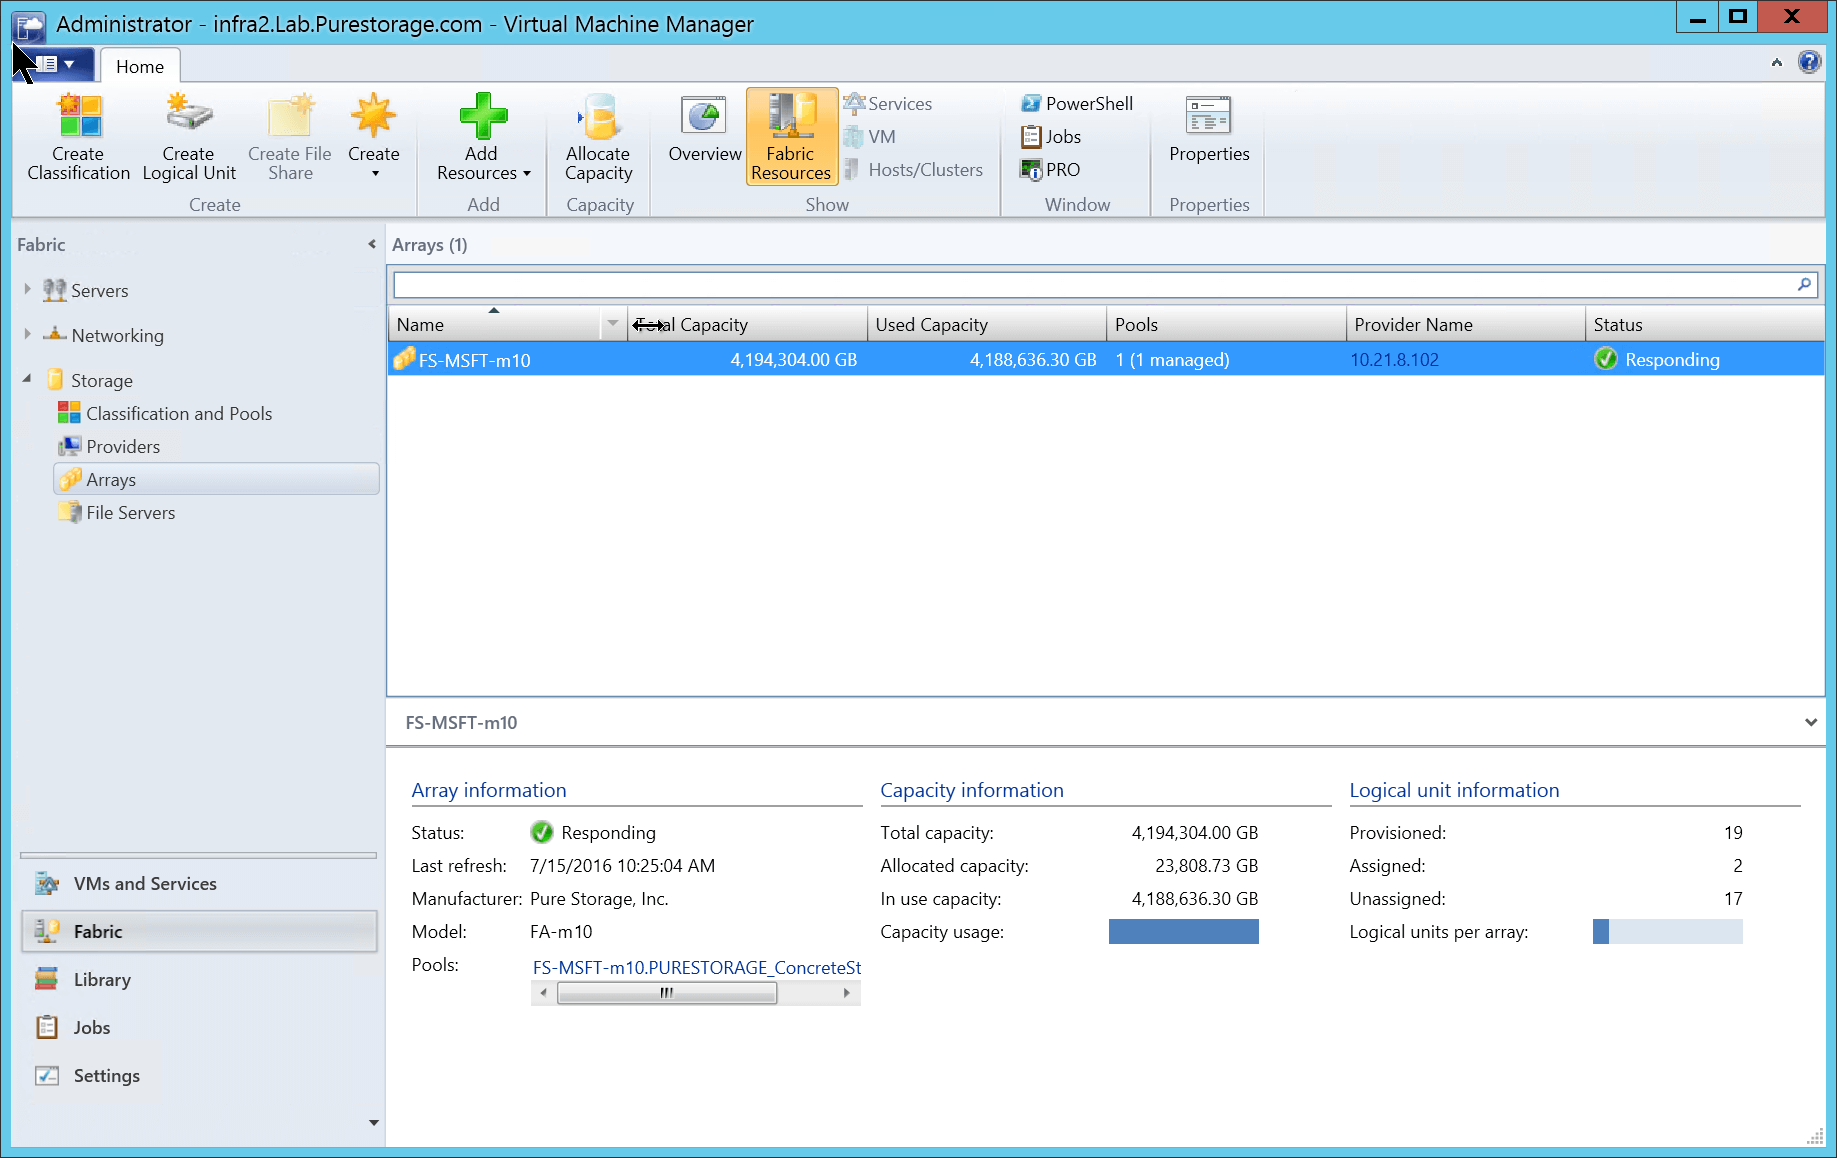
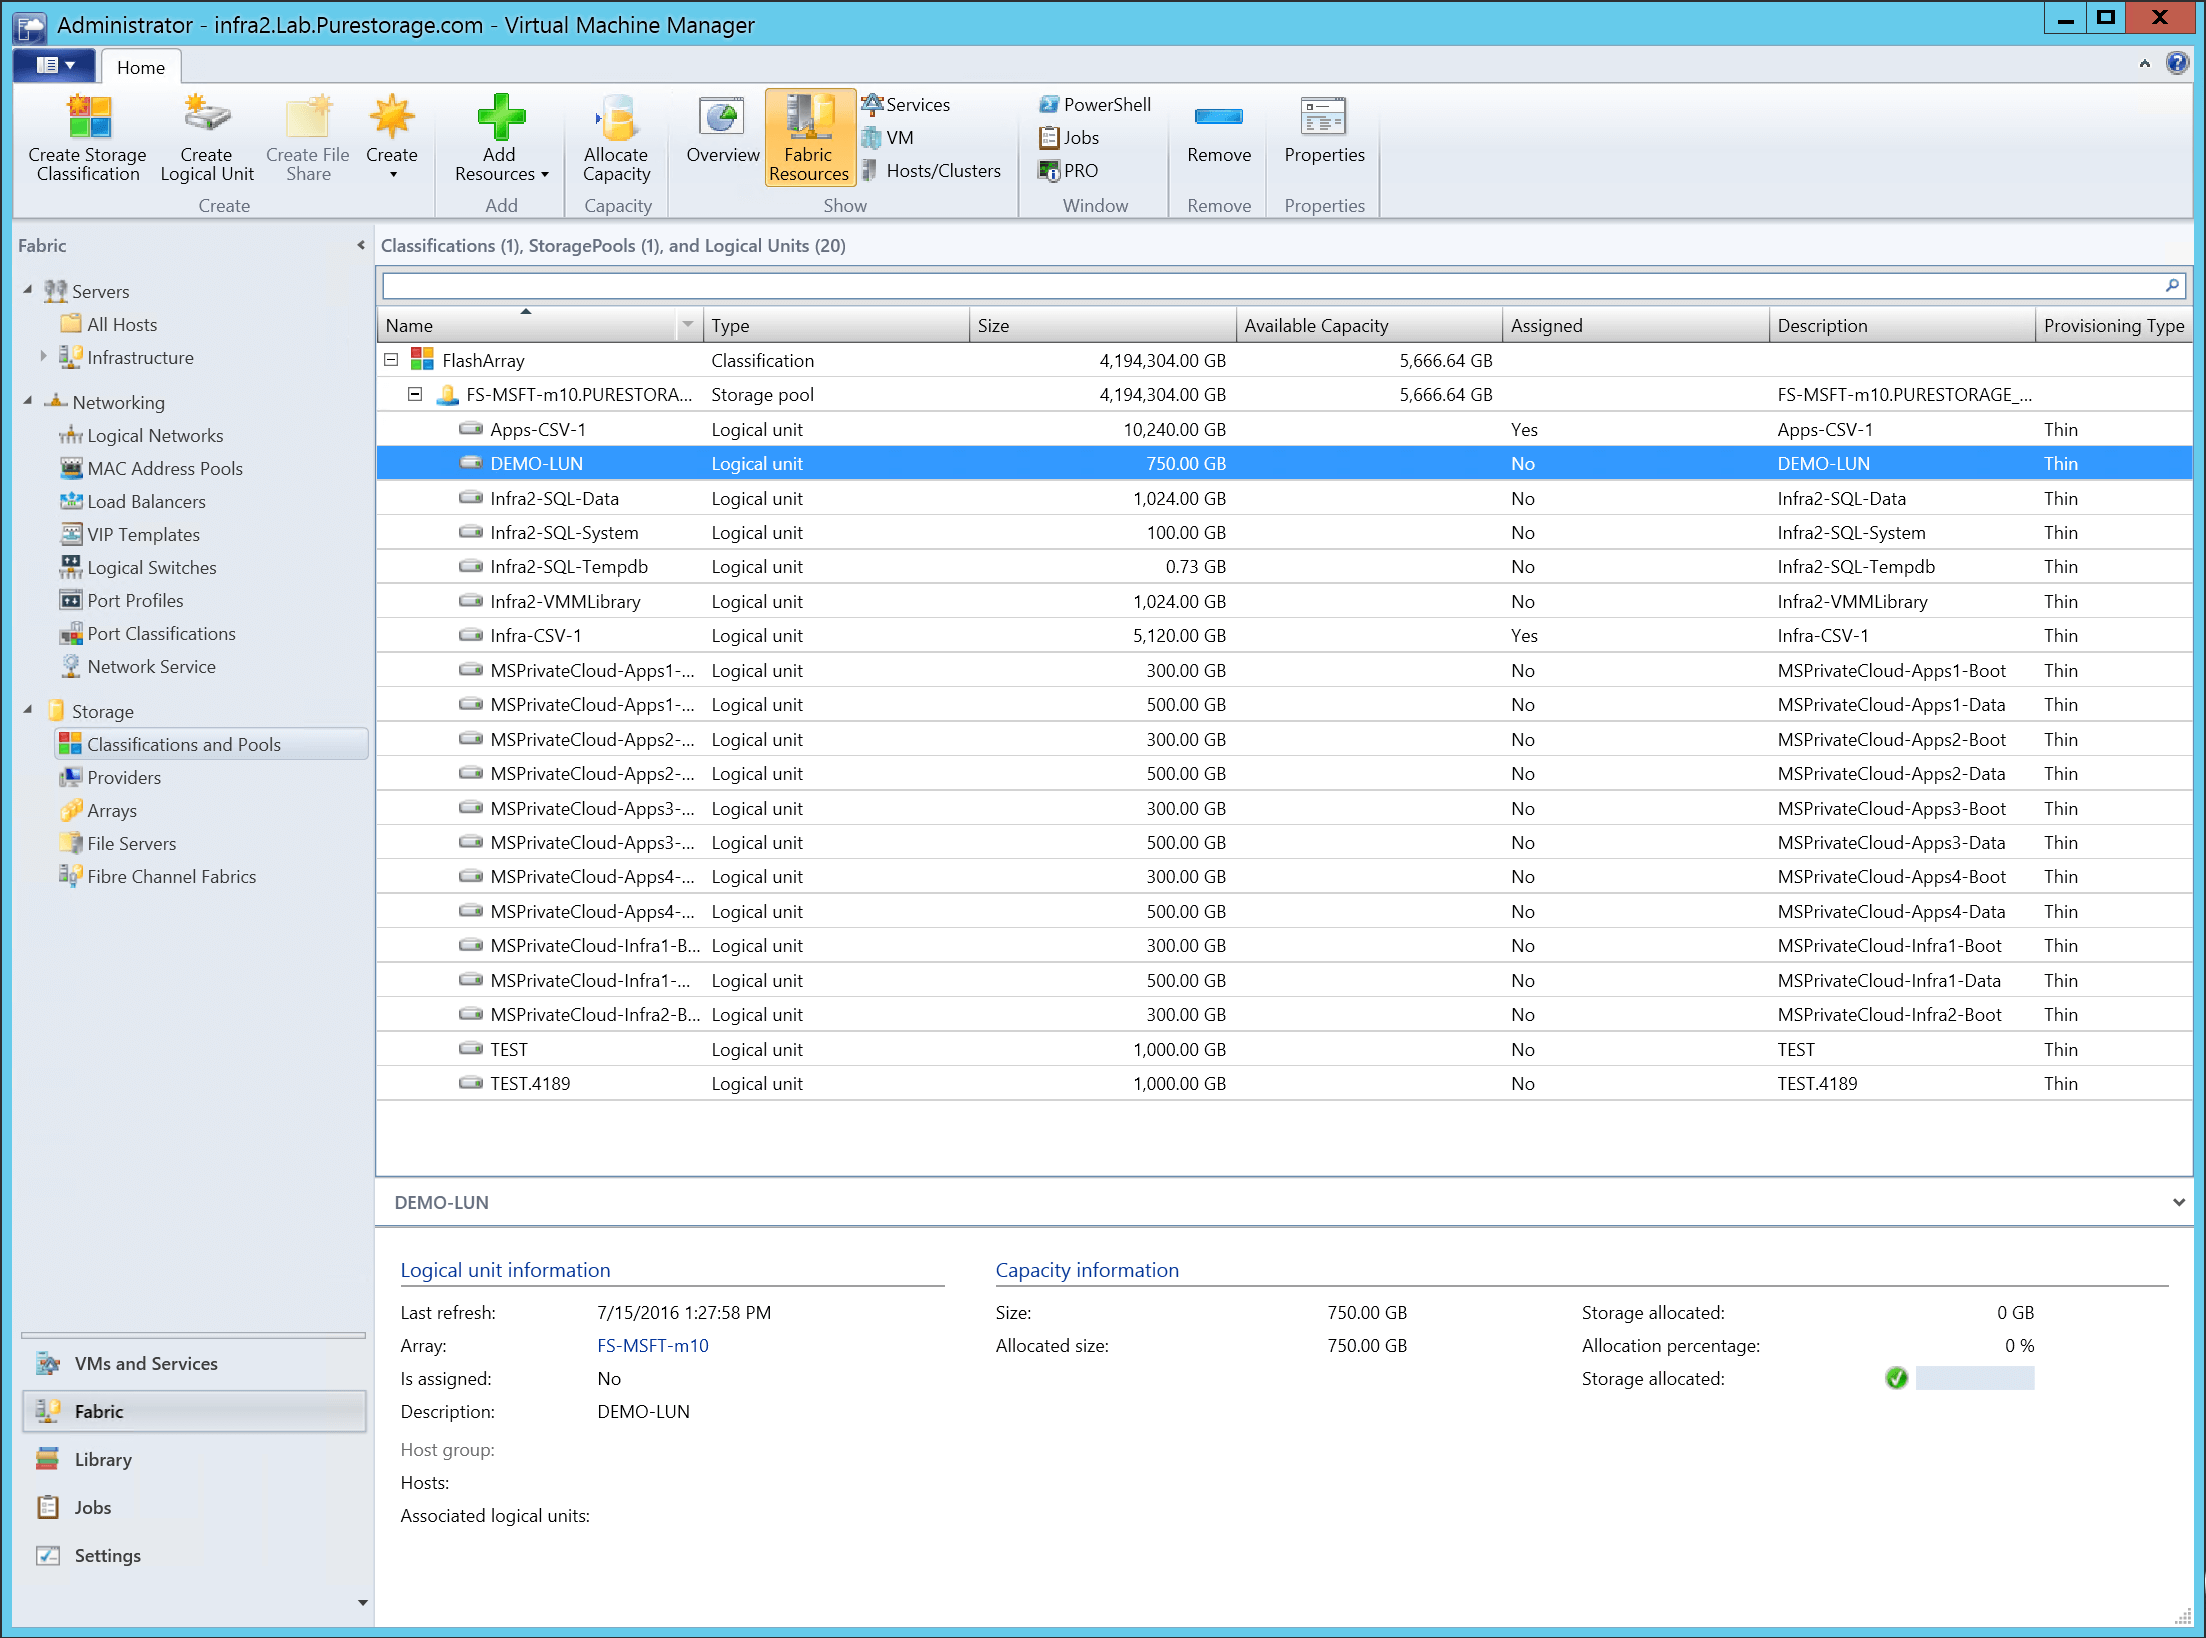
All objects have been discovered from the FlashArray and is now displayed in the SCVMM Storage area with the details of capacity, number of provisioned logical units and other relevant information.
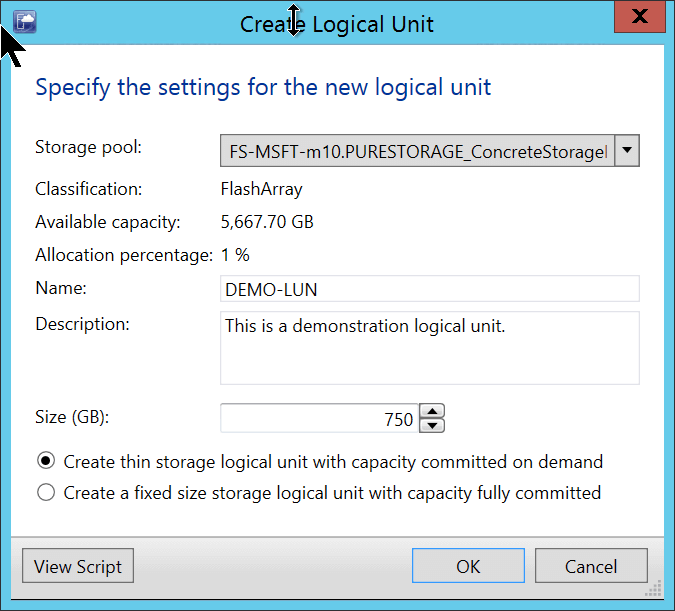
Step 9
Now we will create a Logical Unit (LUN) using the SMI-S Provider. The first release of the SMI-S Provider supports the Provisioning and Capacity management profile. For a full list of SMI-S profiles from SNIA click here.
On the toolbar click Create Logical Unit which will display a dialog box to enter the different values.
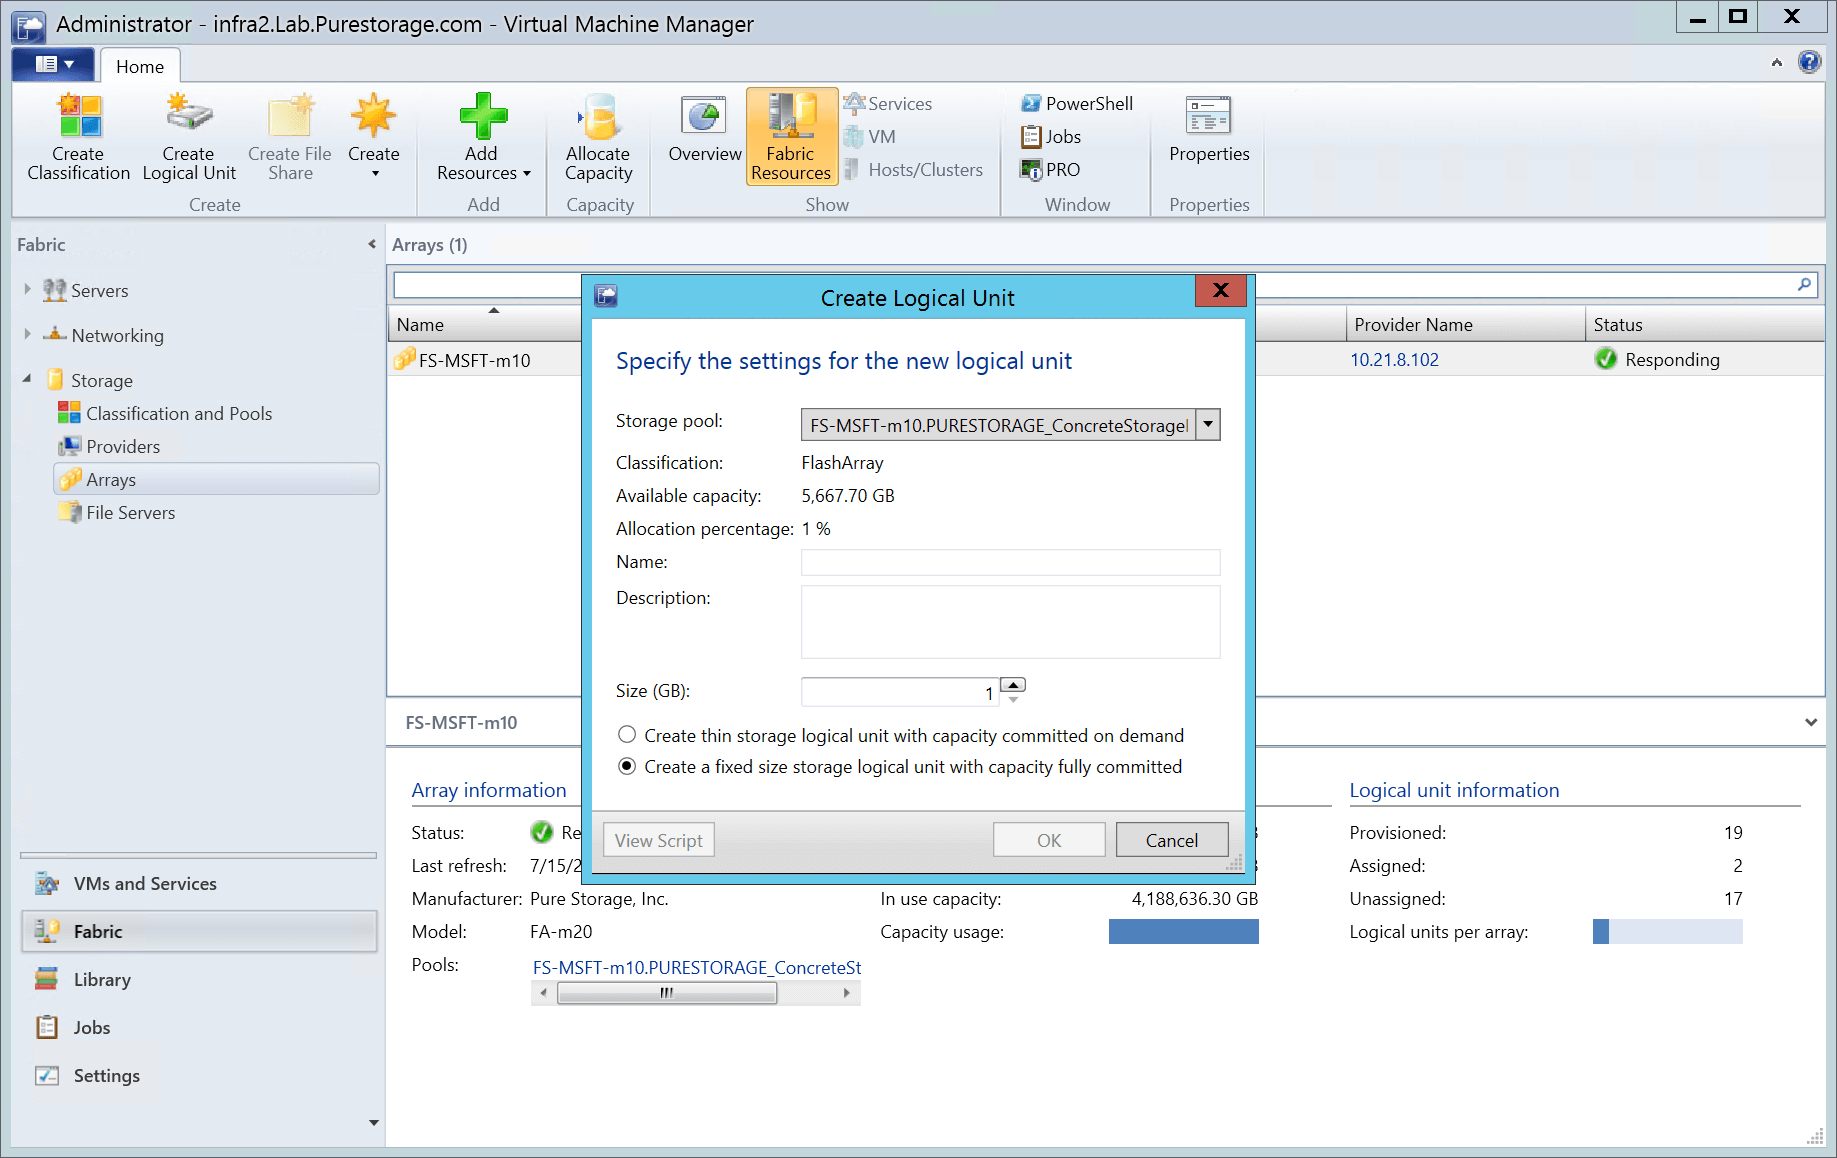
For my example I create a LUN named DEMO-LUN assign it a simple description and a Size of 750GB. Finally I select the Create thin storage logical unit with capacity committed on demand. Click OK to create the new LUN.
Once the LUN has been created it will be displayed in the Classification and Pools node of the parent Storage node.
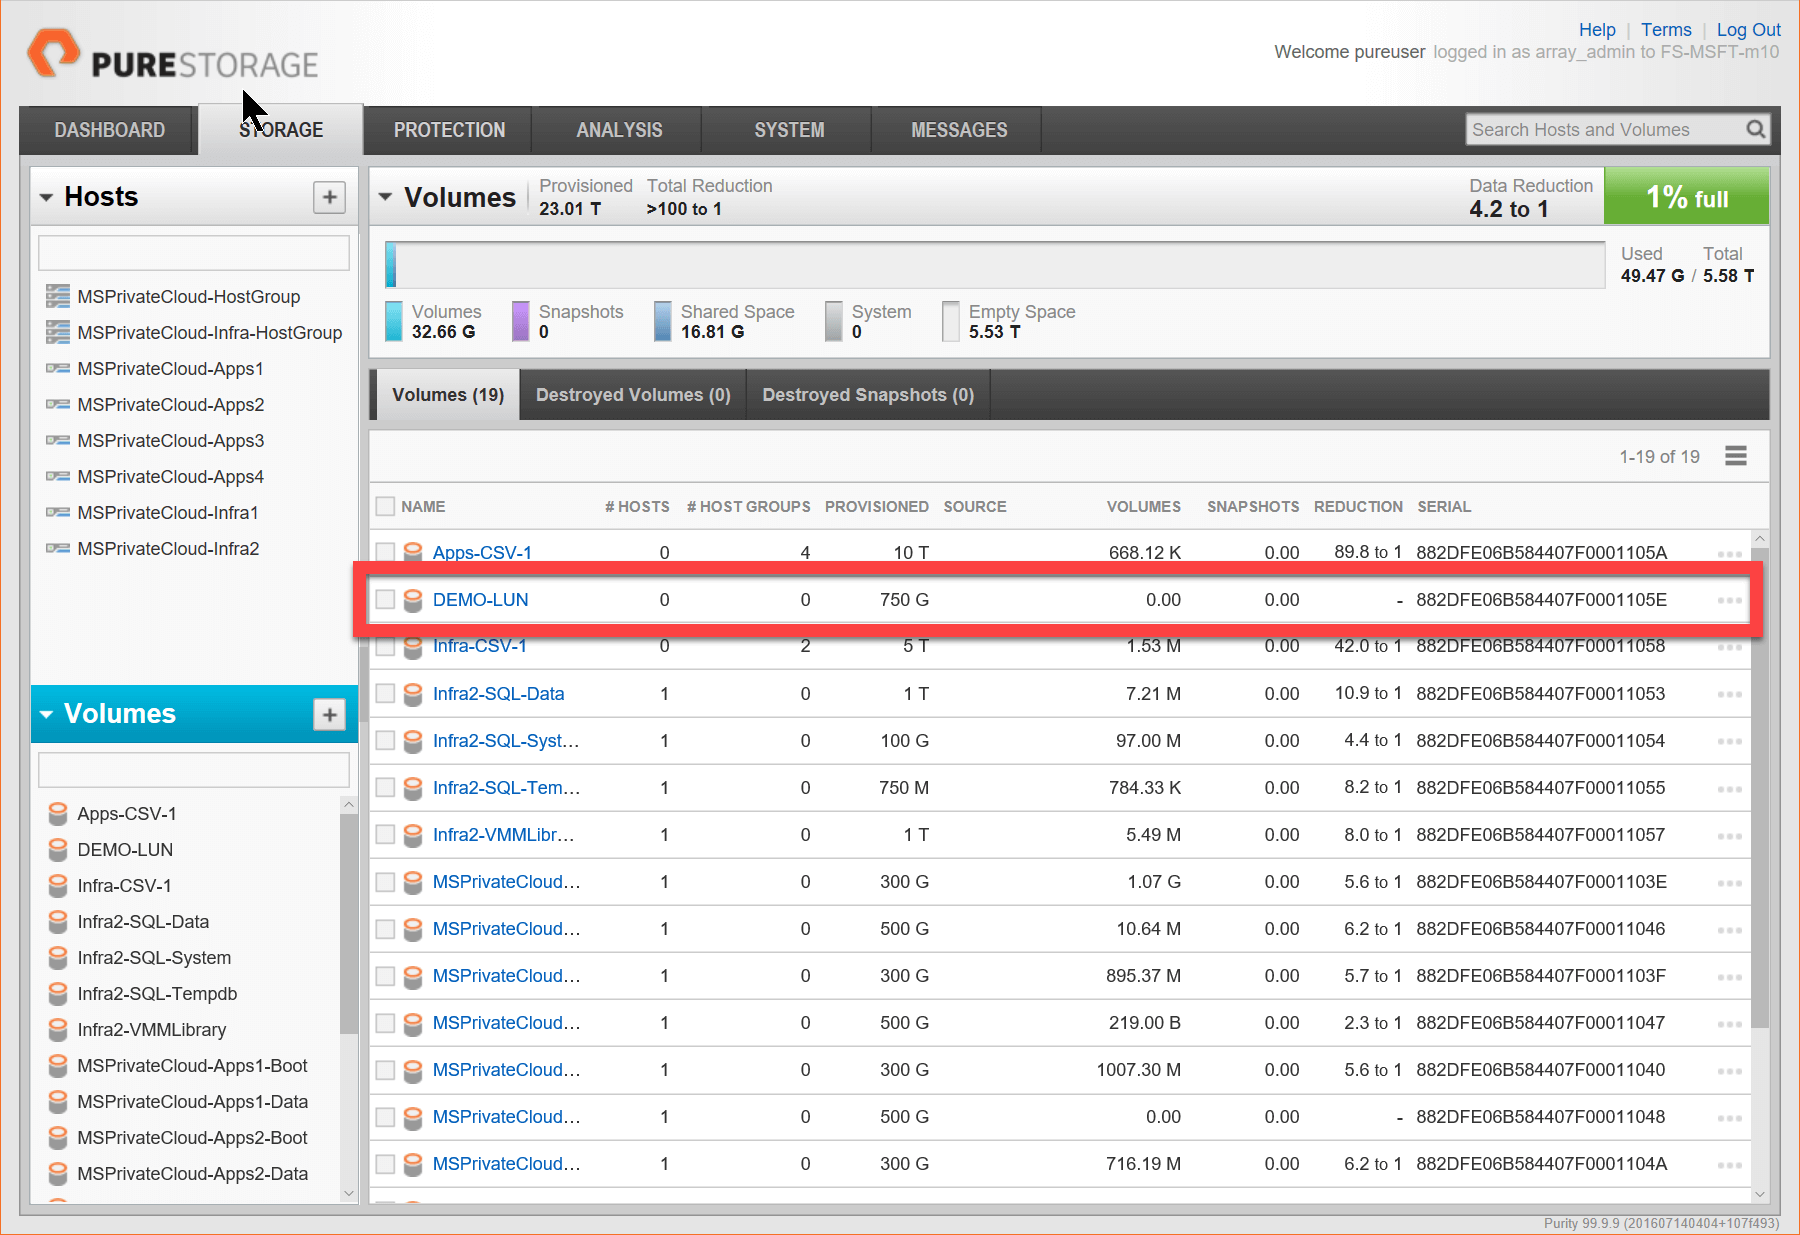
Checking the FlashArray Web management interface the DEMO-LUN can be seen using the all Volumes view.
Now we have a FlashArray//m10 connected to Microsoft System Center Virtual Machines Manager 2012 R2 and can provisioning new logical units.
I will be covering more details about the integration between SCVMM and Pure Storage in future posts. I will discuss creating a multi-node Hyper-V cluster and Allocating Capacity.