

A successful deployment is like a wedding…
Kubernetes is probably the hottest IT trend in 2019, as the popularity of conferences such as KubeCon indicates. K8s (as commonly stylized) not only realizes the elusive DevOps dream goal of reliably and quickly deploying applications from development to production thanks to the lightweight, immutable infrastructure properties of containers. It also allows process isolation at scale which in turn provides much-needed cost optimizations to ever growing applications, both in terms of storage and compute needs. Last, the portability of containers and Kubernetes across on-premises and cloud environments makes them an ideal choice for organizations that want to achieve true independence from infrastructure providers and spin up development, test or production environments wherever they see fit.
Another reason for the popularity of Kubernetes among DevOps engineers (at least from my own perspective) is the relative ease to spin up a brand new Kubernetes cluster. Installers such as Kubeadm or Kubespray have made the process a lot easier by abstracting away many of the complexities and required dependencies. However, a day-1 Kubernetes deployment, just like a marriage, isn’t the end goal. Rather, it’s the beginning of a new adventure, and some might say it’s actually when the real work begins.
…it’s the day after that really matters
Specifically, you may have to deploy a lot of other tools to make your Kubernetes environment actually usable by your developers and SRE engineers.
Tools such as Prometheus & Grafana for monitoring, Envoy & Istio for proxy and service mesh and enterprise storage orchestrators such as Pure Storage’s Pure Service Orchestrator are popular day-2 add-ons that developers and SREs expect in every out-of-the-box Kubernetes environment. And yet, the onus is on the DevOps teams to make sure these additional packages are properly deployed and configured after the initial Kubernetes installation. This further delays the availability of ready-to-use, on-demand Kubernetes platforms. Also, if there are even a few manual processes involved (as mundane as installing prerequisites and/or running specific scripts), the installation of a reliable Kubernetes cluster easily becomes daunting, complex and fraught with potential errors.
Take the case of setting up a storage orchestrator with Helm, for instance. You will need to:
- Install the upstream version of Kubernetes
- Install the Helm client
- Deploy Tiller on the Kubernetes cluster
- Add the Helm chart repository url to your cluster
- Set up the storage orchestrator configuration file
- Deploy the storage orchestrator’s Helm chart to your cluster
Be prepared to repeat at least steps #4 and #6 for any additional Helm package you must deploy and you may soon realize setting up a fully configured Kubernetes is not for the faint-hearted. It might still work for you if you only have one such cluster to set up but what if you have to deploy many Kubernetes clusters for developers and testers, all initially set up with the exact same configurations?
All you need is love one command line
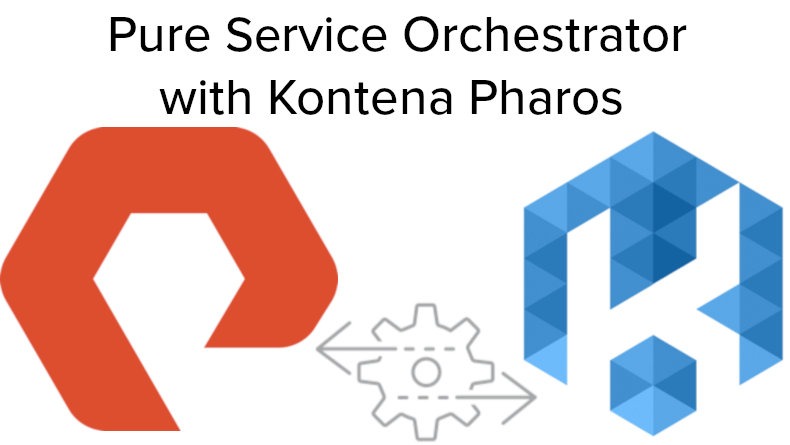
This is where the Pharos distribution comes to the rescue. The Kontena team has done a superb job at packaging the upstream distribution of Kubernetes with tons of useful add-ons such as an NGINX Ingress controller, a network load balancer (based on MetalLB), cert-manager and Kontena Lens, a dashboard masterpiece that radically simplifies the management of Kubernetes clusters through a powerful graphical user interface. You can virtually run any kubectl command in Kontena Lens, something you would be hard-pressed to achieve with the stock Kubernetes dashboard. Here is the main page you see once you sign in into Kontena Lens:

Kontena Lens includes many useful capabilities such as live inspection of log files inside each container in a pod, pod filtering by wildcard search on name and namespace, ability to execute shell commands inside pods, as well as the ability to visually view and edit every single Kubernetes component such as pods, deployments, jobs, services, ingresses, storage classes, PVs, PVCs and more. For instance, the following screenshot provides the full view of a GitLab gitaly pod, with a highlight on the gitaly container itself (there are 2 other containers in that pod, which are not shown below).

But how do I deploy the Kontena Pharos Kubernetes distribution in the first place? The Kontena team has done a really nice job at packaging the cluster deployment process in one single YAML file, an example of which is available here. I won’t go into the details of what this configuration file contains since the Pharos site is very well documented and provides a must-read Getting Started page.
Suffice it to say that the initial deployment of a Pharos cluster with all the add-ons you require can be achieved in one single command line (after you have pulled your Pharos distribution using the chpharos tool):
|
1 |
pharos up -c cluster-dev.yaml |
You would run the exact same command whenever you need to customize your K8s cluster or want to upgrade it (provided you have downloaded a more recent version of Pharos using the chpharos tool).
One of the useful integrations available in Kontena Lens is the ability to add custom Helm chart repositories. The following screenshot shows v2.5.0 of the Pure Service Orchestrator available in a 2.3.8 Pharos cluster (in the Apps tab):

Enabling custom Helm charts in Kontena Pharos is as simple as adding a charts element in the Kontena Lens portion of Kontena Pharos’ YAML definition file. For instance, the configuration below makes all the official Helm charts as well as the Pure Storage Helm charts (including the Pure Service Orchestrator helm chart) available by default in Kontena Lens:
|
1 2 3 4 5 6 7 |
charts: enabled: true repositories: - name: stable url: https://kubernetes-charts.storage.googleapis.com/ - name: purestorage url: https://purestorage.github.io/helm-charts |
However, this Helm Charts repo integration only takes care of steps #3 and #4 above (deploying Tiller and adding custom Helm charts to a K8s cluster) and you would still have to manually deploy your Helm chart using your custom Helm values file, which is a must for Pure Service Orchestrator, since it requires environment-specific values. This can be achieved directly from the Lens UI by pressing the Install button for the selected Helm chart. You would then have to customize the default chart config file inside Kontena Lens and deploy your manually configured Pure Service Orchestrator instance in your cluster. The screenshot below highlights the manual process you would have to go through:

Let’s take this opportunity to succinctly describe the required customizations of the Pure Service Orchestrator configuration file.
The Pure Service Orchestrator configuration file
If you’re not familiar with Helm, you might want to know that pretty much all Helm Charts expect a customized configuration file (in YAML format), the structure of which is 100% determined by the needs of the underlying chart. You would usually pass that custom config file as a -f parameter of an helm install command, such as:
|
1 |
helm install --name pure-storage-driver pure/pure-k8s-plugin --namespace <namespace> -f <your_own_dir>/yourvalues.yaml --dry-run --debug |
I won’t go into the details of each parameter of the PSO config file, as they are well documented in the official documentation. The Kubernetes, Persistent Volumes, and Pure Storage whitepaper also does a great job at pointing out and explaining the most common parameters you may want to customize. I will thus limit my discussion to the arrays section, as available in the pure-cluster-dev.yml file:
|
1 2 3 4 5 6 7 8 9 10 11 12 13 14 15 16 17 18 19 |
arrays: FlashArrays: - MgmtEndPoint: "10.21.6.28" APIToken: "abcdef01-abcd-1234-5678-0123456789ab" - MgmtEndPoint: "10.21.6.29" APIToken: "abcdef01-abcd-1234-5678-0123456789cd" FlashBlades: - MgmtEndPoint: "10.21.241.17" APIToken: "T-abcdef01-abcd-1234-5678-0123456789ab" NFSEndPoint: "10.21.236.209" - MgmtEndPoint: "10.21.241.17" APIToken: "T-abcdef01-abcd-1234-5678-0123456789ab" NFSEndPoint: "10.21.236.210" - MgmtEndPoint: "10.21.241.17" APIToken: "T-abcdef01-abcd-1234-5678-0123456789ab" NFSEndPoint: "10.21.236.211" - MgmtEndPoint: "10.21.241.17" APIToken: "T-abcdef01-abcd-1234-5678-0123456789ab" NFSEndPoint: "10.21.236.212" |
This section is critical as it is the one you will always have to customize to your environment.
The FlashArrays sub-section allows you specify the FlashArray appliances you would like to expose as part of your Kubernetes block storage array fleet. For FlashArrays, you only need an API Token along with the FlashArray’s URL or management IP Address (to be entered in the MgmtEndPoint property). Since there may be multiple management IP addresses for a single FlashArray, make sure that you pick an IP that is reachable from your Kubernetes nodes. If you prefer to configure an FQDN, make sure it is accessible and resolvable from your Kubernetes nodes as well. Don’t forget to install ISCI initiator and multipath packages on your Kubernetes Linux nodes first (such as multipath-tools and open-isci on Ubuntu or multipath-device-mapper and iscsi-initiator-utils on RHEL/CentOS, for instance). If you don’t do so, PSO will be unable to mount FlashArray volumes.
You can generate the FlashArray API token in the Settings → Users section of your FlashArray management UI:

To abide by least-privilege best practices, we recommend that you use or create a user with the Storage Admin role only and use that user’s API token.
As of PSO v2.5.0, you must configure 3 parameters for each of your FlashBlades:
- An API token
- The management IP Address or URL (accessible from your K8s hosts)
- An NFS endpoint IP address (accessible from your K8s hosts)
To generate the API token, you will need to SSH into your FlashBlade and uses the pureadmin create --api-token command (or the pureadmin list --api-token one) to create (or retrieve) the API token for the pureuser user.
Additionally, you must configure a Kubernetes-accessible IP address configured as a data NFS address in the Settings → Network section of your FlashBlade management UI. Add one whole entry for each available (and accessible) NFS endpoint. It is recommended to configure multiple NFS endpoints in case one of them becomes inaccessible.
Note also that we are configuring the pure storage class (equivalent to the pure-block class) as the default storage class for our Pharos cluster:
|
1 2 |
storageclass: isPureDefault: true |
This is the recommended setting if Kontena Lens is configured with persistence enabled, as we will see in the next section.
Pharos cluster with PSO one-click deployment
While the Helm Charts repo integration available in Kontena Lens alleviates the need to add custom charts to a Kubernetes cluster deployed with Pharos, it is most appropriate for charts that must be manually deployed by developers or application owners, potentially long after the initial Kubernetes installation.
For system-level charts that set up core functionality such as persistent storage or metrics, Pharos provides another Helm add-on, available since the Pharos 2.3 release. The Helm add-on (not dependent on Kontena Lens and available in the OSS version of Pharos) allows the deployment of Helm charts, pre-configured with a customized values file. This can prove useful if you need to provision multiple Kubernetes clusters that will all use the exact same set of Pure Storage appliances. For instance, if you have a valid and properly configured pure-values-dev.yml file available, you can drop it in the same folder as your Pharos cluster-dev.yml definition file and add the helm add-on in the cluster-dev.yml file, as follows:
|
1 2 3 4 5 6 7 |
helm: enabled: true charts: - name: purestorage/pure-k8s-plugin namespace: purestorage repo: https://purestorage.github.io/helm-charts values: ./pure-values-dev.yml |
Kontena Lens can be configured with persistence enabled to maintain user session state. If enabled, Kontena Lens provisions a Redis database, which is persisted through a Redis persistent volume claim (backed by the cluster’s default storage class). In that situation, it is critical to set the isPureDefault parameter to true in the PSO config file, as noted above and currently in place in my pure-values-dev.yml sample file.
Note also that the helm add-on should be configured before the kontena-lens add-on in the Pharos cluster definition file, as is the case in my sample cluster-dev.yml file. This allows PSO to be installed before Kontena Lens and can therefore properly provision the Redis PVC with a pure storage class, as shown in the screenshot below:

Conclusion
I hope this blog post will prompt you to try out the Kontena Pharos distribution with the Pure Service Orchestrator and enjoy the benefits of hassle-free one-click deployments.
If you have any questions, issues or feedback about this integration, we’d love to hear from you in the PSO channel of the Pure/Code() Slack community (request an invite first if you’re not yet a member). We hope to see you there soon!
Useful resources
- Sample Kontena Pharos configuration with Pure Service Orchestrator GitHub repo
- Kontena Pharos documentation
- Pure Service Orchestrator page on purestorage.com
- Pure Service Orchestrator Helm Chart GitHub repository
- Kubernetes, Persistent Volumes, and Pure Storage white paper