In part 2 of this four-part series, we’ll explore using ActiveDR™ for managing Oracle disaster recovery.
Part 1 : Configure ActiveDR and protect your DB volumes (why and how)
Part 2 : Accessing the DB volumes at the DR site and opening the database
Part 3 : Non-disruptive DR drills with some simple scripting
Part 4 : Controlled and emergency failovers/failbacks
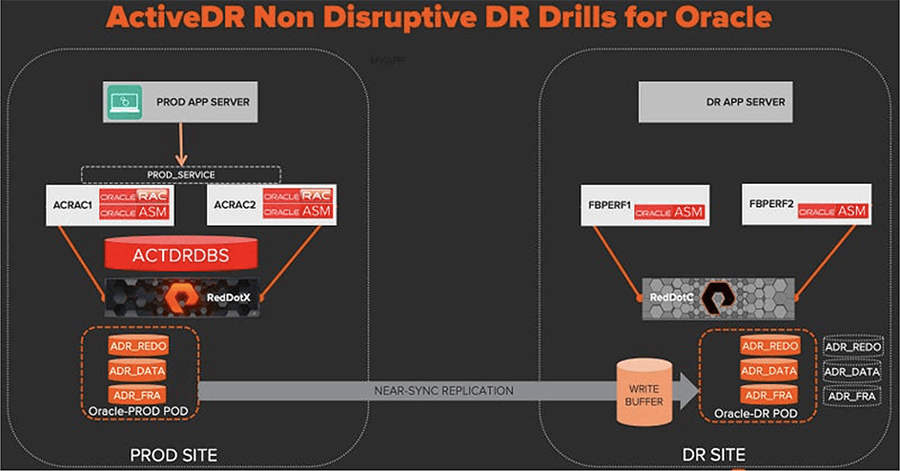
In part 1, we configured ActiveDR and protected the database volumes with a pod that was replicated to the DR site.
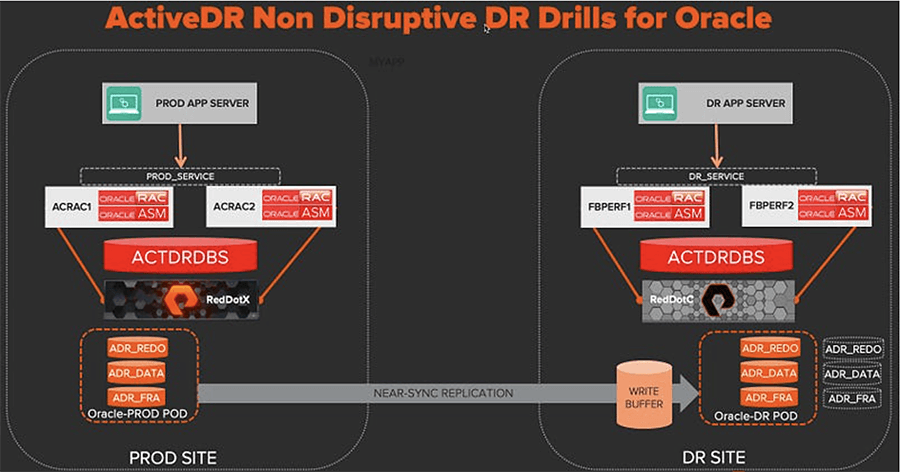
The raw database volumes are now protected so in the event of a disaster, we have the peace of mind knowing that our data is safe at another site. But let’s not pat ourselves on the back just yet because we can’t access this data without configuring an Oracle database that can read it. So here in part 2, we’ll do just that. Note that this is a one-time process for the initial DR database config.
The DR hosts (fbperf1/2) are already connected to the DR array and a host group with both of the aforementioned hosts has been created, so our first step is to connect the new replicated volumes to this host group on the DR array.
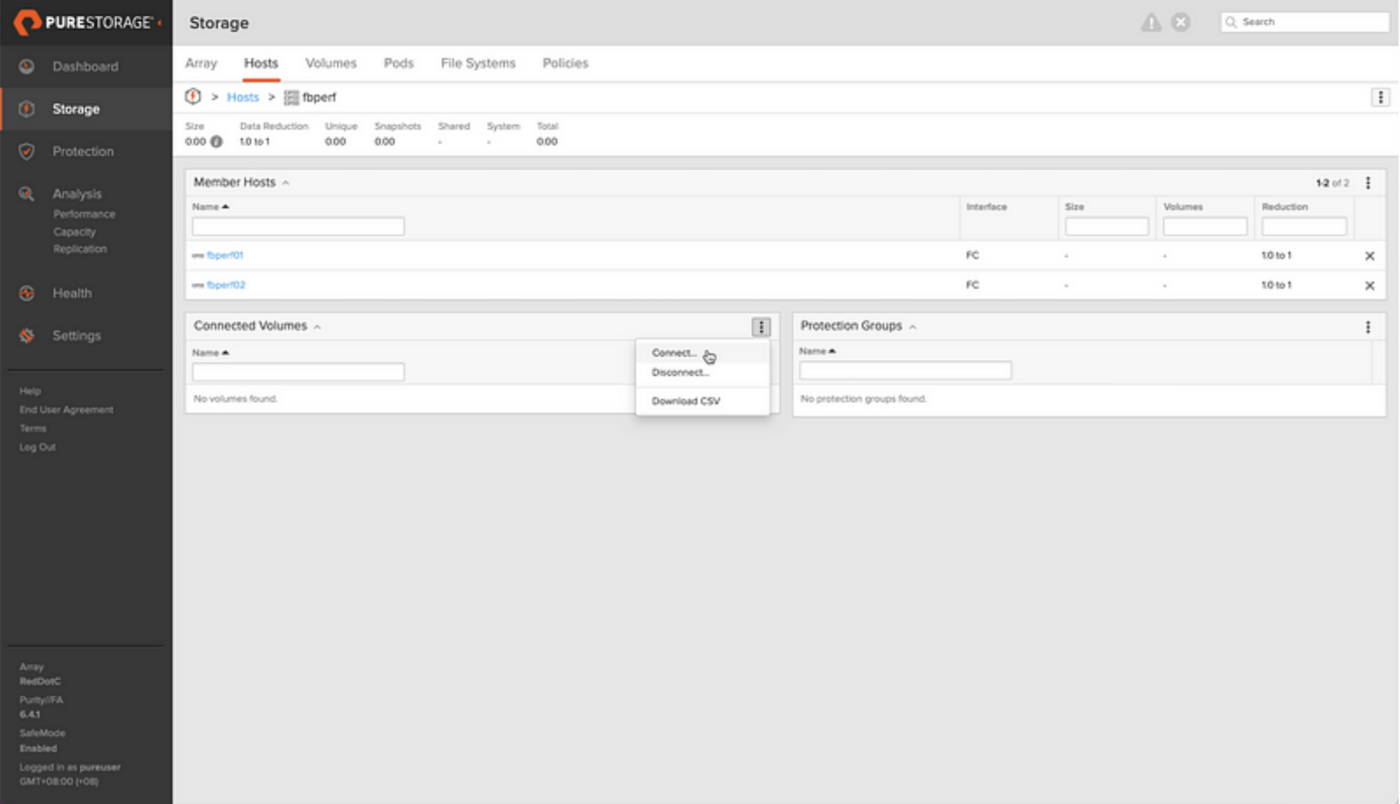
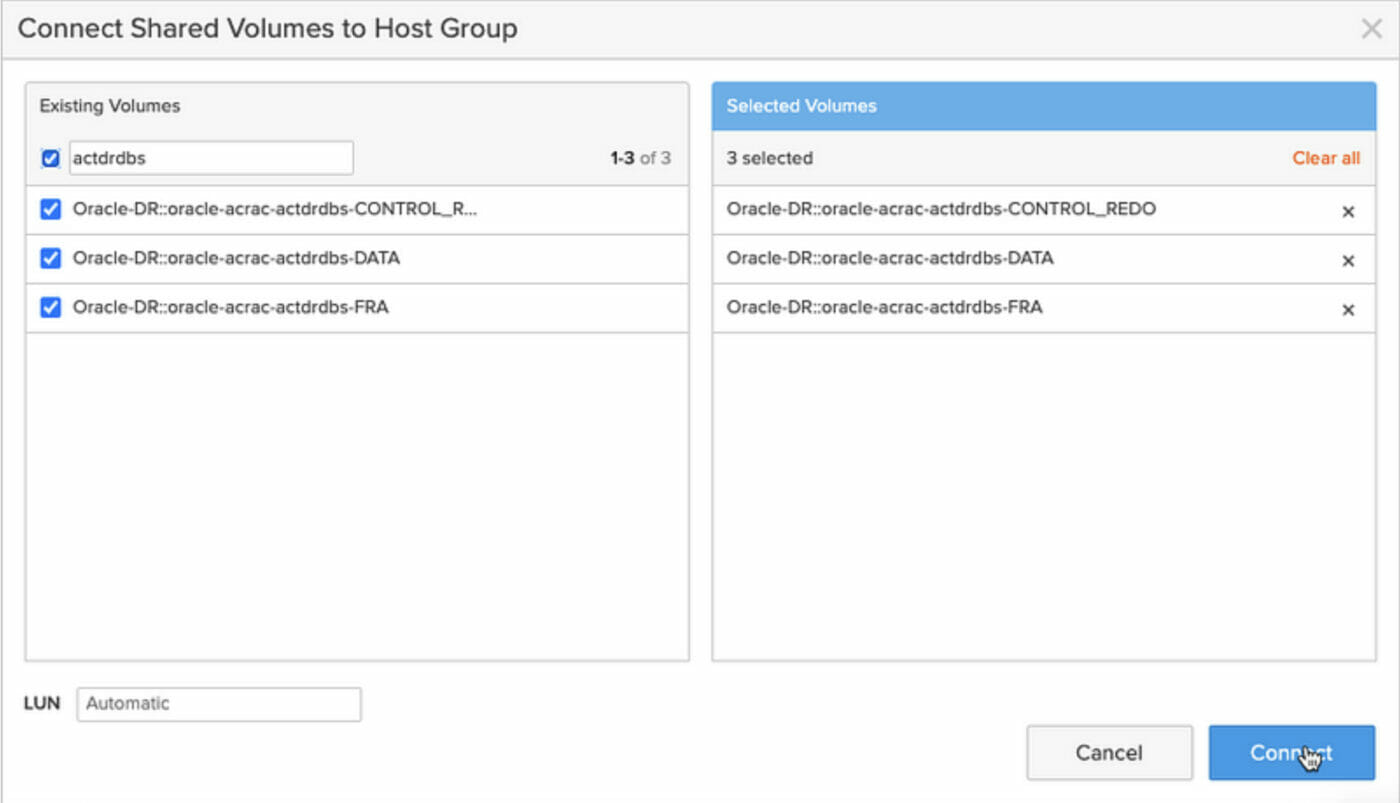
purehgroup connect –vol Oracle-DR::oracle-acrac-actdrdbs-CONTROL_REDO fbperf
purehgroup connect –vol Oracle-DR::oracle-acrac-actdrdbs-DATA fbperf
purehgroup connect –vol Oracle-DR::oracle-acrac-actdrdbs-FRA fbperf
The newly attached volumes showed up instantly on the hosts in /dev/mapper for me although on some environments it may be necessary to rescan the host bus adaptors:
for f in ls /sys/class/scsi_host/host?/scan
do
echo “scanning $f” ; echo “- – -” > $f
done
For each volume, find the serial number with ls -l /dev/mapper and match this with the volume serial number shown by the array to add meaningful device names into /etc/multipath.conf on all RAC nodes.
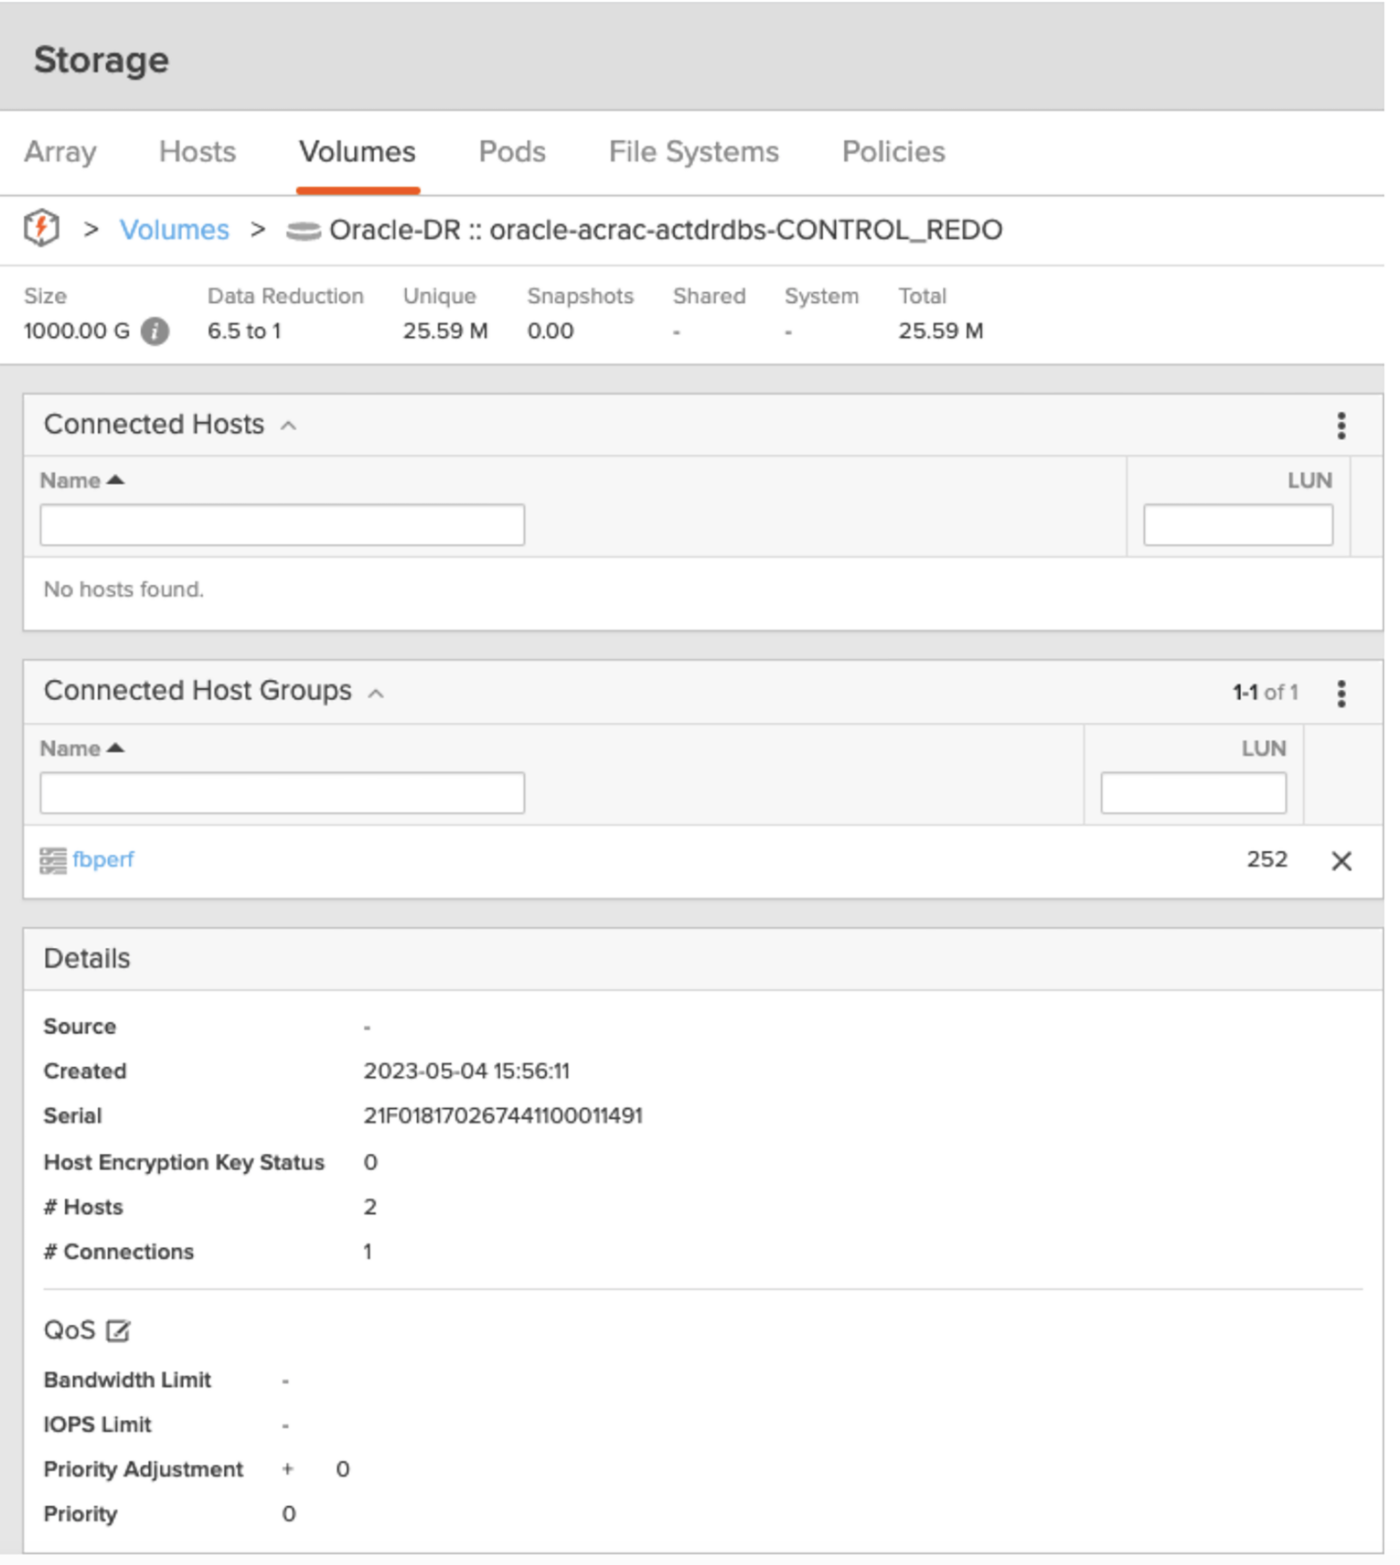
We’re looking for the Serial 21f018170267441100011491 in the example above to create the following entries into the /etc/multipath.conf:
multipath {
wwid 3624a937021f018170267441100011491
alias dg_acrac_actdrdbs_control_redo
}
multipath {
wwid 3624a937021f01817026744110001148f
alias dg_acrac_actdrdbs_data
}
multipath {
wwid 3624a937021f018170267441100011490
alias dg_acrac_actdrdbs_fra
}
Reload the multipath devices as root using multipath -r and the friendly names that we’ll use for the ASM configuration are now visible in /dev/mapper:
ls -l /dev/mapper | grep actdrdbs
lrwxrwxrwx 1 root root 8 May 5 17:30 dg_acrac_actdrdbs_control_redo -> ../dm-45
lrwxrwxrwx 1 root root 8 May 5 17:30 dg_acrac_actdrdbs_data -> ../dm-46
lrwxrwxrwx 1 root root 8 May 5 17:29 dg_acrac_actdrdbs_fra -> ../dm-44
I’m using the ASM Filter Driver (as opposed to ASMLib), which is the recommended way of preparing devices for ASM these days so I’ll add this path string into the ASM Filter Driver config file so the devices can be discovered by ASMFD on all nodes.
$ORACLE_HOME/bin/asmcmd dsset ‘AFD:*’,’/dev/mapper/dg*’
$ORACLE_HOME/bin/asmcmd afd_scan
$ORACLE_HOME/bin/asmcmd afd_lsdsk
——————————————————————————–
Label Filtering Path
================================================================================
ADR_CONTROL_REDO ENABLED /dev/mapper/dg_acrac_actdrdbs_control_redo
ADR_DATA ENABLED /dev/mapper/dg_acrac_actdrdbs_data
ADR_FRA ENABLED /dev/mapper/dg_acrac_actdrdbs_fra
Note that once we’ve scanned for new disks with asmcmd afd_scan when we list them, the disk labels are already present as these were written into the header of the device on the PROD site and have been replicated across to DR.
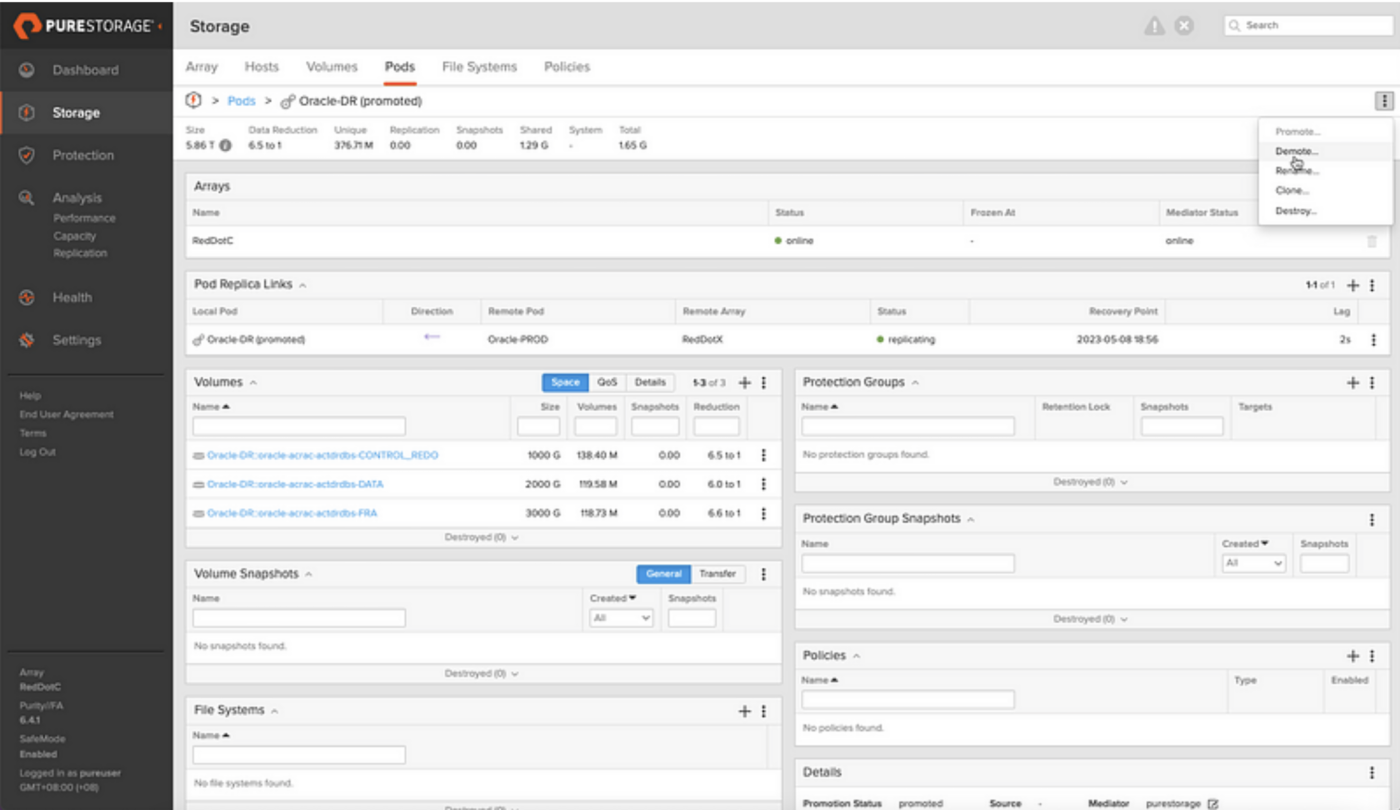
To mount the diskgroups so that we can register the new database instance in Oracle Clusterware, we’re going to temporarily need the Oracle-DR pod in read/write mode which means promoting the pod. Any writes hitting the PROD database will be queued up and not applied to the DR database until the pod is demoted again after we’ve finished configuring the database at the DR site.
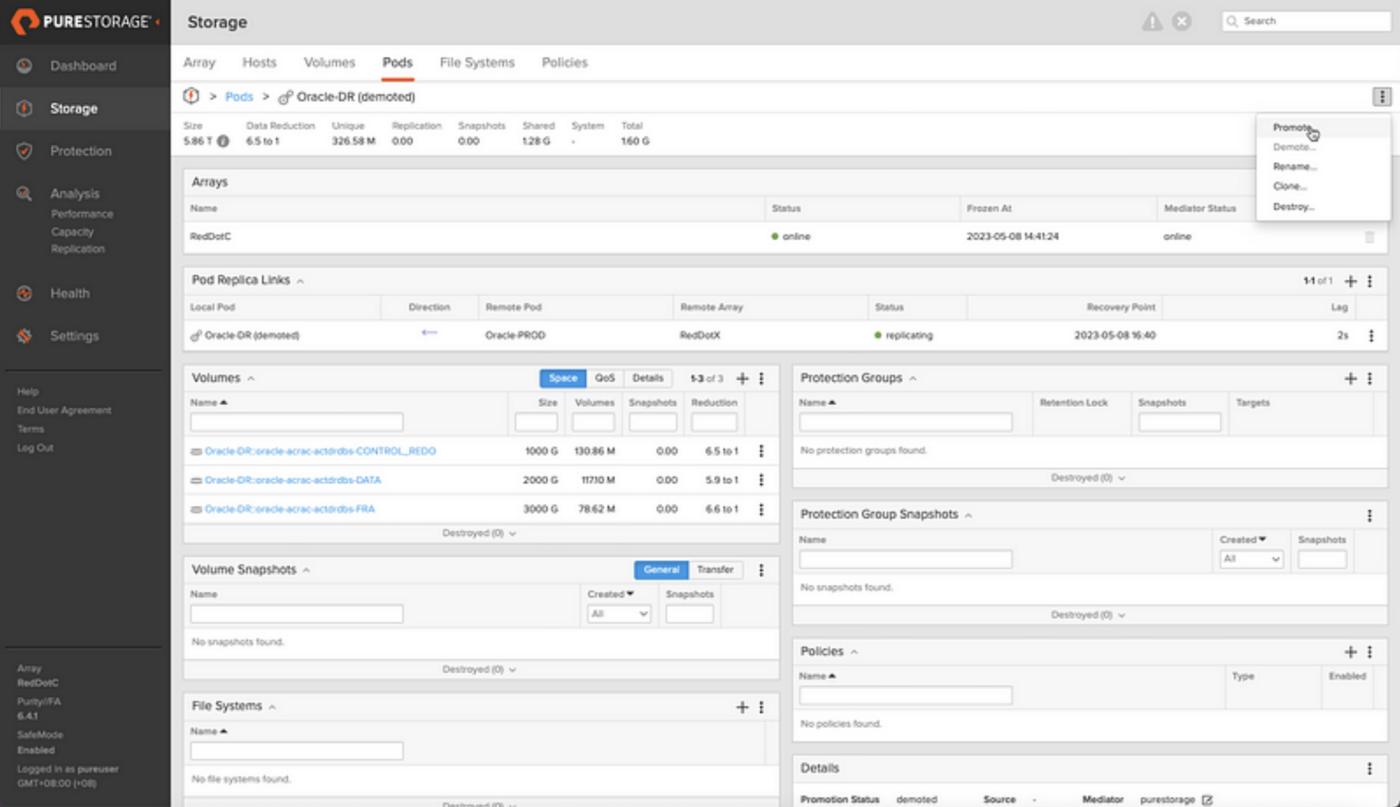
Promote the Oracle-DR Pod
As the grid user, mount the diskgroups on all RAC nodes:
echo “alter diskgroup ADR_CONTROL_REDO mount force;” | sqlplus -s / as sysasm
echo “alter diskgroup ADR_DATA mount force;” | sqlplus -s / as sysasm
echo “alter diskgroup ADR_FRA mount force;” | sqlplus -s / as sysasm
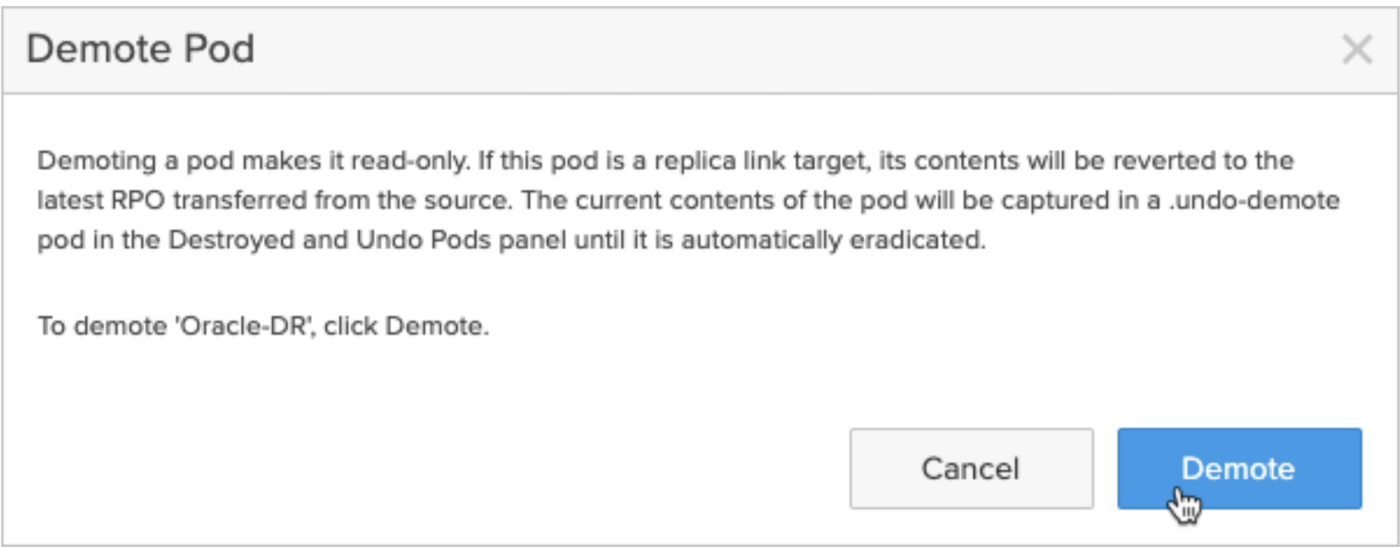
When promoting the Oracle-DR pod, the replicated writes are queued instead of being applied. A background snapshot of the DR volumes is automatically taken so the original state can be rolled back when the pod is demoted again before the queued writes are applied. It’s this mechanism that allows us to open the DR database read/write and ultimately run our DR drills without taking down the production database.
We’ll need to recreate the directory structure from the production hosts at the DR site before we can add it to the Clusterware configuration. As the Oracle user, create the relevant directories on all RAC nodes at the DR site:
mkdir -p /u01/app/oracle/local/admin/ACTDRDBS/adump
mkdir -p /u01/app/oracle/local/diag/rdbms/actdrdbs/ACTDRDBS1/cdump
Now find some of the important Clusterware configuration details on the production site database using srvctl config database -d <DBNAME>:
srvctl config database -d ACTDRDBS
Database unique name: ACTDRDBS
Database name: ACTDRDBS
Oracle home: /u01/app/oracle/product/db/12cR2
Oracle user: oracle
Spfile: +ADR_CONTROL_REDO/ACTDRDBS/PARAMETERFILE/spfile.270.1136027663
Password file: +ADR_CONTROL_REDO/ACTDRDBS/PASSWORD/pwdactdrdbs.256.1136027291
Domain: puresg.com
Start options: open
Stop options: immediate
Database role: PRIMARY
Management policy: AUTOMATIC
Server pools:
Disk Groups: ADR_FRA,ADR_CONTROL_REDO,ADR_DATA
Mount point paths:
Services:
Type: RAC
Start concurrency:
Stop concurrency:
OSDBA group: dba
OSOPER group: oper
Database instances: ACTDRDBS1,ACTDRDBS2
Configured nodes: acrac1,acrac2
CSS critical: no
CPU count: 0
Memory target: 0
Maximum memory: 0
Default network number for database services:
Database is administrator managed
We’ll use some of these details to configure the RAC settings on the DR site. The DR site has a slightly different path for the ORACLE_HOME, which is reflected below. Also, note that we’re using role PRIMARY as this database is not being managed by Data Guard and we’re using the policy MANUAL as we want to control when the database is started rather than having RAC attempt to start it automatically because we can only start it when the volumes are read/write by way of the Oracle-DR pod being promoted:
srvctl add database \
-db ACTDRDBS \
-dbname ACTDRDBS \
-oraclehome /u01/app/oracle/product/db/12.2.0 \
-spfile +ADR_CONTROL_REDO/ACTDRDBS/PARAMETERFILE/spfile.270.1136027663 \
-pwfile +ADR_CONTROL_REDO/ACTDRDBS/PASSWORD/pwdactdrdbs.256.1136027291 \
-startoption OPEN \
-stopoption IMMEDIATE \
-role PRIMARY \
-policy MANUAL \
-diskgroup ADR_FRA,ADR_CONTROL_REDO,ADR_DATA \
-dbtype RAC
Add the database to the /etc/oratab file on both nodes, for example:
vi /etc/oratab
ACTDRDBS1:/u01/app/oracle/product/db/12.2.0:N
+ASM1:/u01/app/grid/product/18.0.0:N
We can now attempt to start the database on the DR site:
srvctl start database -d ACTRDBS
The database is ready on the DR site so the final step is to create a RAC service for client sessions to connect to it:
srvctl add service -db ACTDRDBS -service ACTDRDBS_DR -preferred "ACTDRDBS1,ACTDRDBS2"
srvctl start service -db ACTDRDBS -service ACTDRDBS_DR
An example TNS connect string to connect to the database via this service would be:
(DESCRIPTION= (TRANSPORT_CONNECT_TIMEOUT=5) (RETRY_COUNT=6) (FAILOVER=ON) (ADDRESS = (PROTOCOL = TCP) (HOST = fbperf-scan) (PORT = 1521) ) (CONNECT_DATA= (SERVER = DEDICATED) (SERVICE_NAME = ACTDRDBS_DR.puresg.com) ) )
We can now shut the database down and unmount the ASM diskgroups before demoting the Oracle-DR pod to allow the replication flow to catch up and continue streaming writes made on the production database over to our DR pod:
srvctl stop database -d ACTDRDBS -o immediate
As the grid user:
echo "alter diskgroup ADR_CONTROL_REDO dismount force;" | sqlplus -s / as sysasm
echo "alter diskgroup ADR_DATA dismount force;" | sqlplus -s / as sysasm
echo "alter diskgroup ADR_FRA dismount force;" | sqlplus -s / as sysasm
So there we have it. Our production database is being replicated and we’ve completed all the necessary configuration at the DR site to open this database on demand (without interfering with production) in a few simple steps. In part 3, we’ll put together some very simple scripts to allow for on-demand non-disruptive DR drills.
![]() The FlashArray Family just got a little bigger! Watch the deep dive to learn more!
The FlashArray Family just got a little bigger! Watch the deep dive to learn more!