Most customers with current VMware Horizon View Linked Clone deployment have a dilemma in migrating their existing desktop on to new storage . The standard trick of doing storage vMotion do not work due to the way Linked Clone VMs are deployed (the Linked Clone VM is a copy of a virtual machine that shares virtual disks with the parent virtual machine).
Now the question arise how do you deploy the existing desktops on to a new storage? Or in other words, how do I migrate my existing desktops to a new storage?
VMware Horizon View Composer has an option called “Rebalance”, this option can be used to migrate desktops to new storage or balances across many datastores. This short blog describes the process of rebalancing and migrating the desktops to new storage.
The following simple steps illustrates the desktop migration. In our example, we move from one Pure Storage FlashArray to another Pure Storage FlashArray, but the same can be applied from moving from one vendor storage to another.
Step 1:
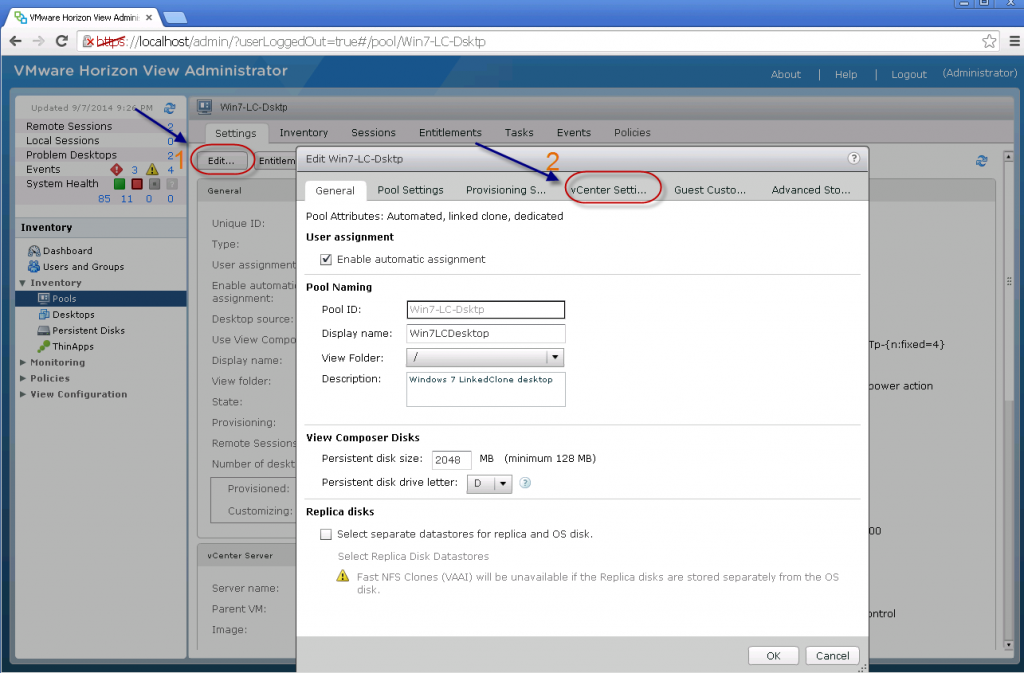
Select the desktop pool in VMware Horizon View and click on “Edit”, then select the vCenter settings tab.
Step 2:
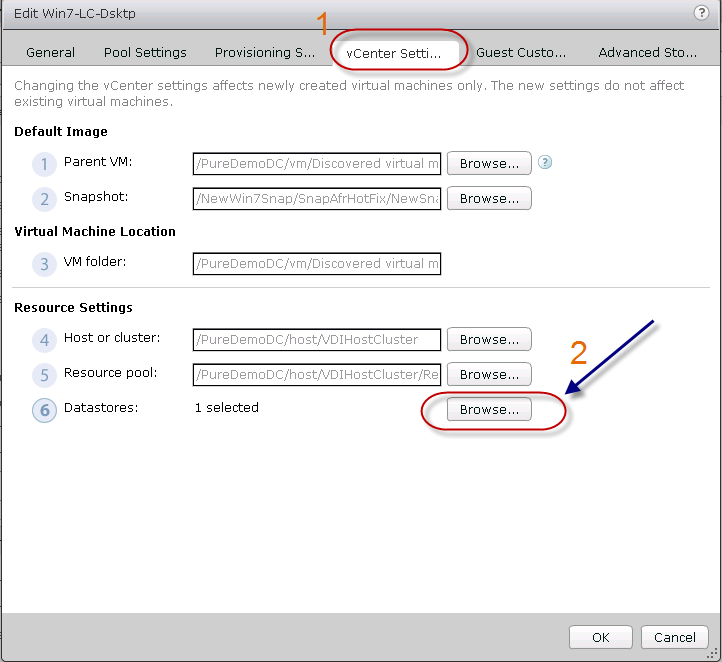
Once in the vCenter settings tab, select the datastore configuration button
Step 3:
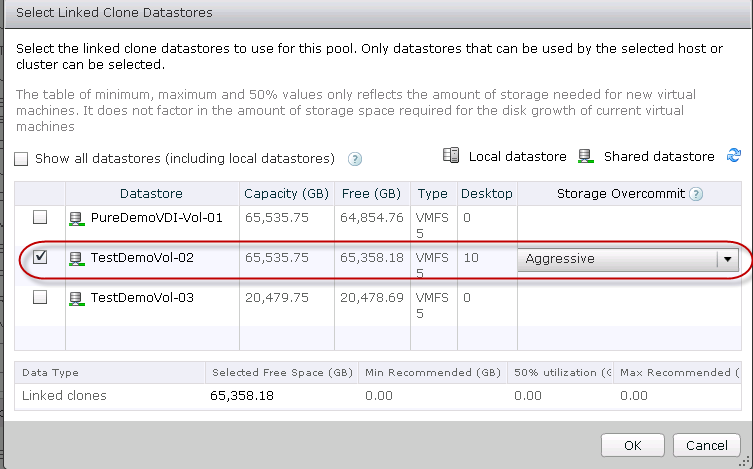
Unselect the old datastore and select the new destination datastore. The assumption is that the new datastore is already been created and shared across the cluster (in our case we are migrating from PureDemoVDI-Vol-01 to TestDemoVol-02). Click on OK and exit.
Check Out FlashBlade
Step 4:
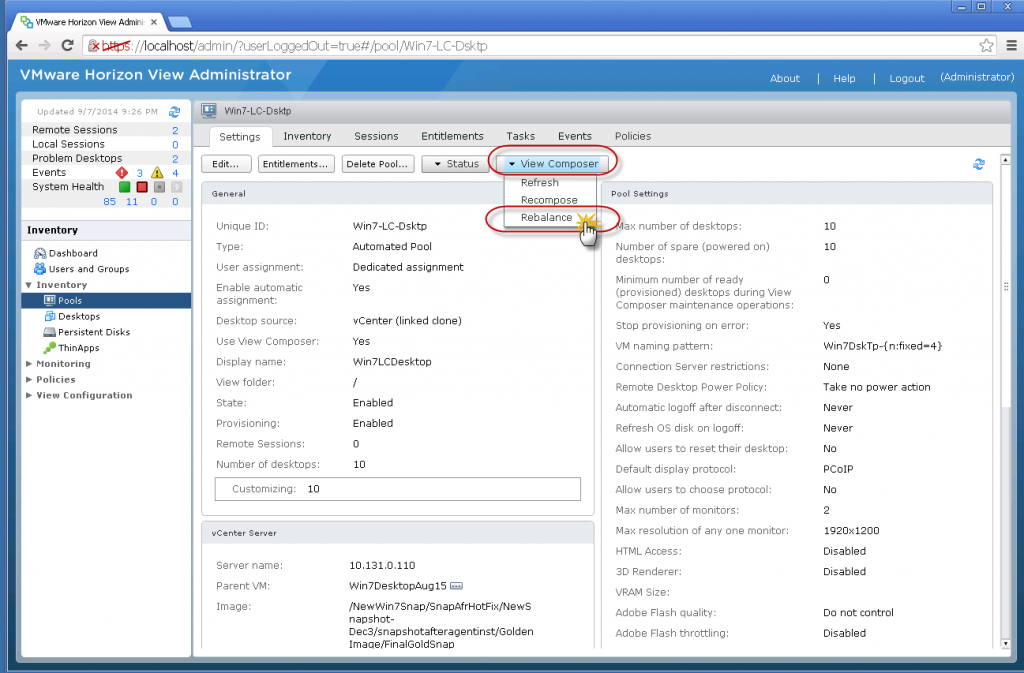
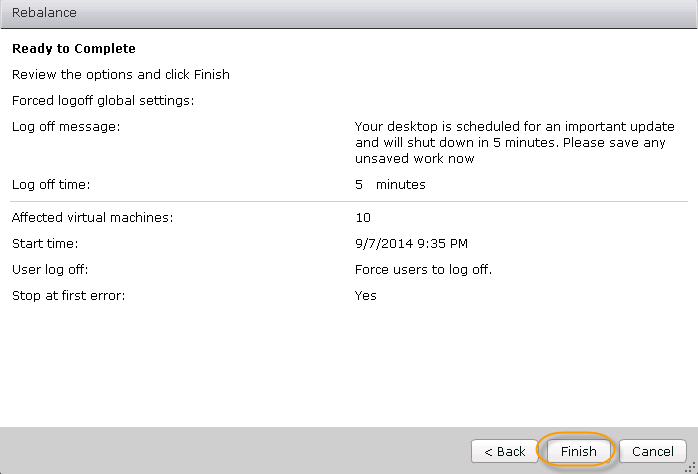
Now select the View Composer option “Rebalance” as shown below.
Step 5:
Follow the steps but keep in mind that this operation will refresh the desktop (refresh the OS to their base image, resetting the OS disk to its initial image) automatically, so any changes that are made to the user data will be lost unless you have a persistent disk setup as part of the Linked Clone selection.
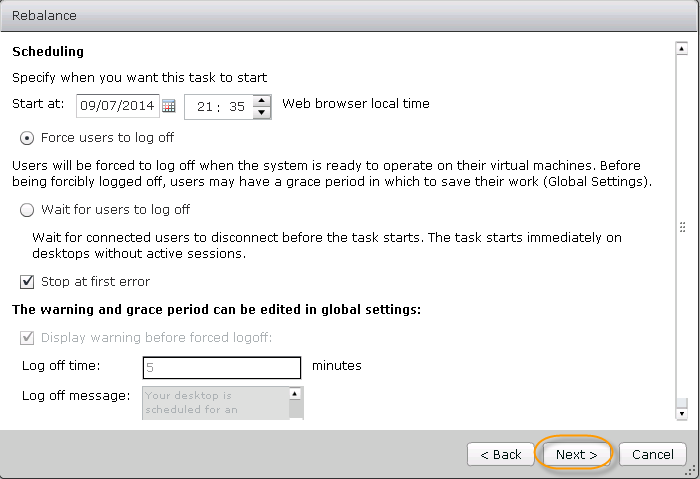
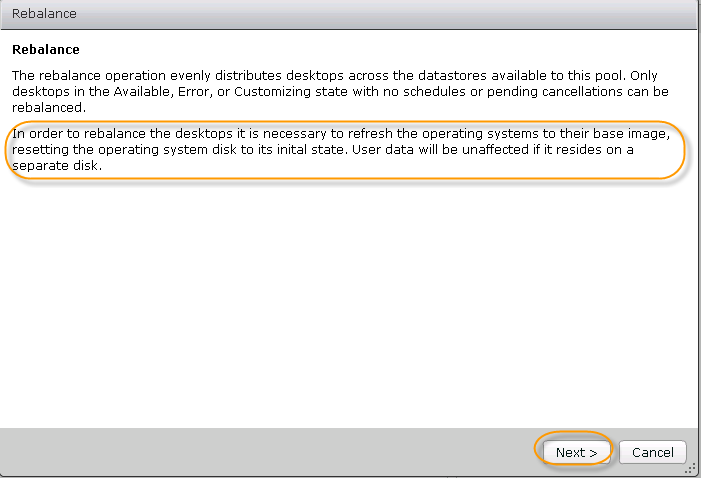
Once the reconfiguration process finish, the desktops make their way to the new datastore. That’s it, you are done! Viola!

BUYER’S GUIDE, 14 PAGES
A Buyer’s Guide to Modern Virtualization
Written By:
