First I will demonstrate how to copy Cassandra cluster data on VMFS datastore and in another blog, I will copy Cassandra cluster with data on VVols. It is interesting to see how easy it is to do this Apache Cassandra cluster copy process using vVols compared to VMFS deployment of Cassandra cluster with Pure Storage Snapshots.
Apache Cassandra is an open-source, distributed, wide column store, NoSQL database management system designed to handle large amounts of data across many servers, providing high availability with no single point of failure.
Pure Storage FlashArray snapshots are immutable point-in-time volume images. The process of taking a volume snapshot is nearly instantaneous and initially, the resulting snapshot does not consume any additional capacity. The entire cluster copy process is accelerated using Pure Storage FlashArray//X snapshots.
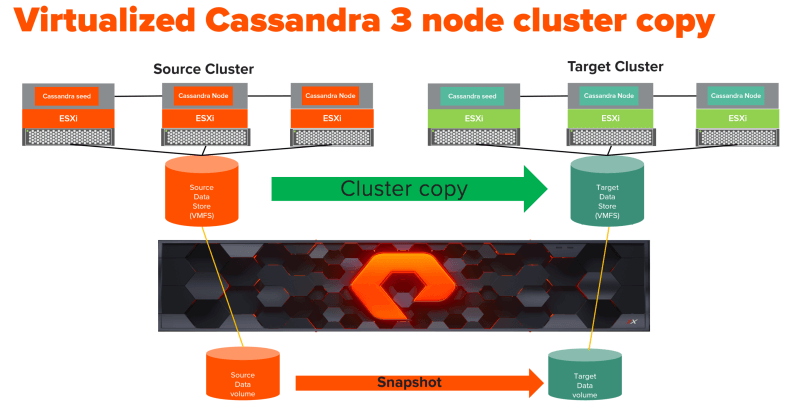
As you can see in the diagram above, I have built two three-node Apache Cassandra clusters and each cluster has one seed node.

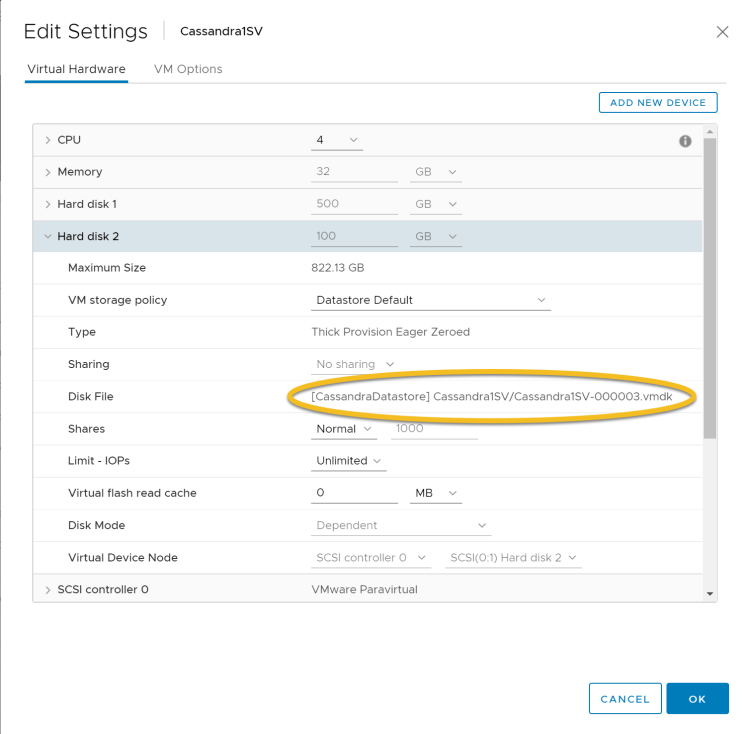
The Cassandra source and target nodes and their data volumes reside on VMFS datastore, This VMFS datastore is a single Pure storage FlashArray//X volume. The screenshot below shows the Cassandra data disk and corresponding vmdk file.
Now let us look into the cluster copy process in detail
- Execute nodetool flush simultaneously on all the Cassandra source nodes. The nodetool flush causes memtable data to flush to SSTables on disk and clears the logs.
→ nodetool flush
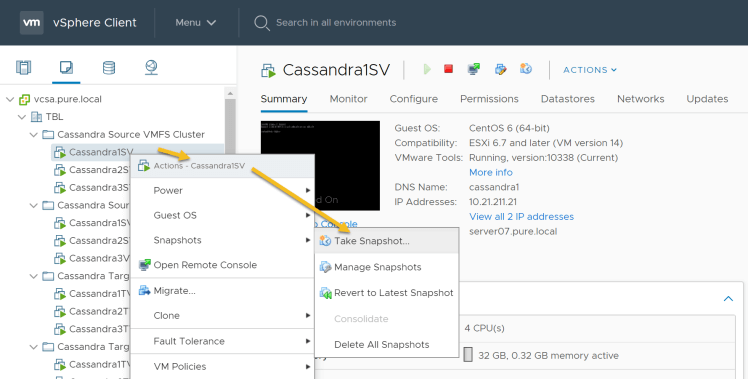
2. Take the virtual machine snapshot on each of the Cassandra nodes: Login to the vSphere client and select each of the nodes and open the context menu to take the snapshot.
“Node”->”Actions”->”Take Snapshot…”
3. Take the FlashArray snapshot of the Cassandra source datastore/volume: Login to the Pure Storage FlashArray//X GUI, select storage tab->Volumes->(select the volume of source data store)->Create snapshot->create as shown below.
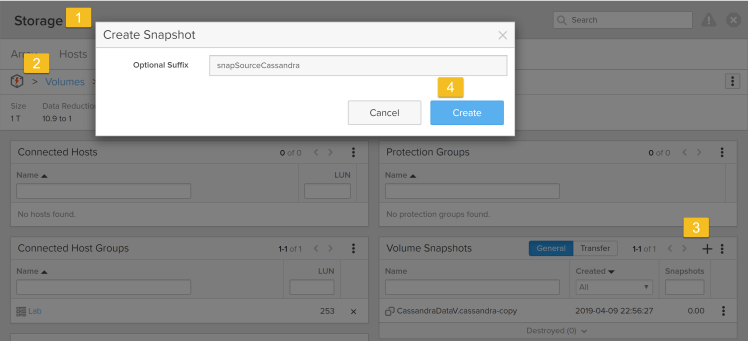
This creates the snapshot as shown below:
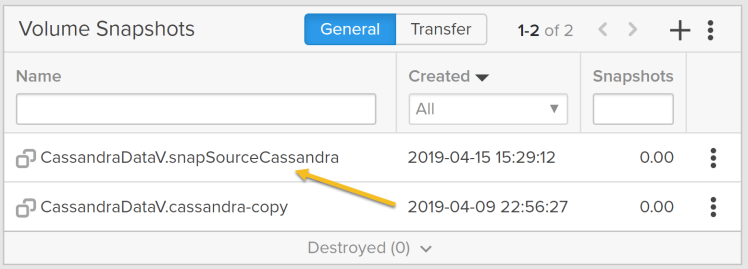
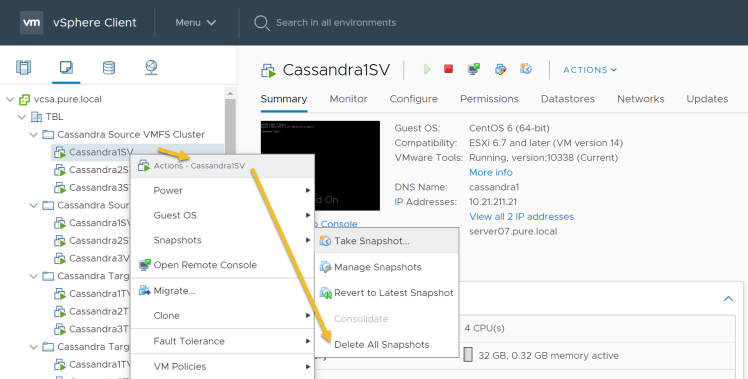
4. Delete the virtual machine snapshot on each of the Cassandra nodes: Login to the vSphere client and select each of the nodes and open the context menu to delete all the snapshots.
“Node”->” Actions”->” Delete All Snapshots…”
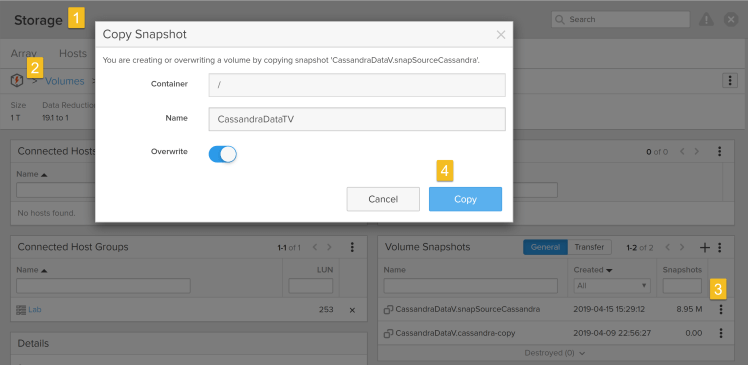
5. Copy the Pure Storage FlashArray//X snapshot to the target volume. The target volume is the VMFS datastore of our target cluster. Before that make sure target Cassandra cluster is stopped and the data disk(/var/lib/cassandra/data) of Cassandra is unmounted. Login to the Pure Storage FlashArray//X GUI
Goto Storage tab→ Go to Volumes→ Select the Source Data volume for which we took a snapshot in step 3 → Select the snapshot which we want to copy to the target data volume and click Copy as shown below. Ensure the Overwrite option is selected.
7. Create a new data store for the target systems: Login to the vSphere client and perform the following steps: Select Host->Actions->Rescan Storage as shown below
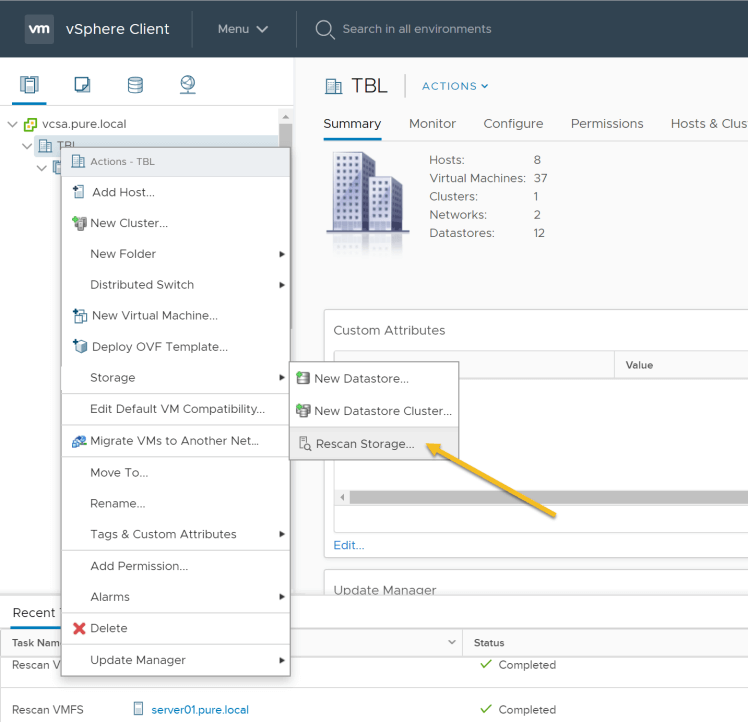
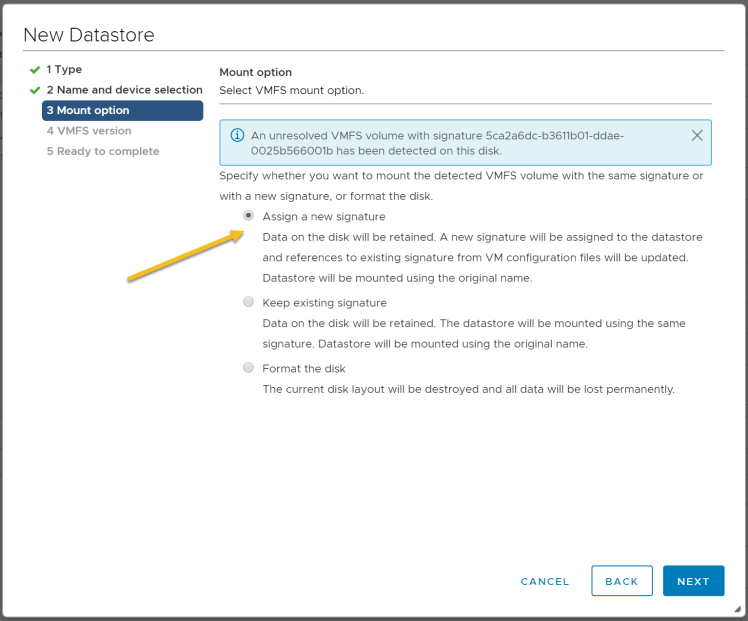
8. Create a new data store for the target cluster: In the vSphere client create a new data store as shown in the previous step context menu. In the New, Datastore window select VMFS data store, provide a name and select the target volume which was overwritten by the source snapshot. Choose “Assign a new signature” as shown below:
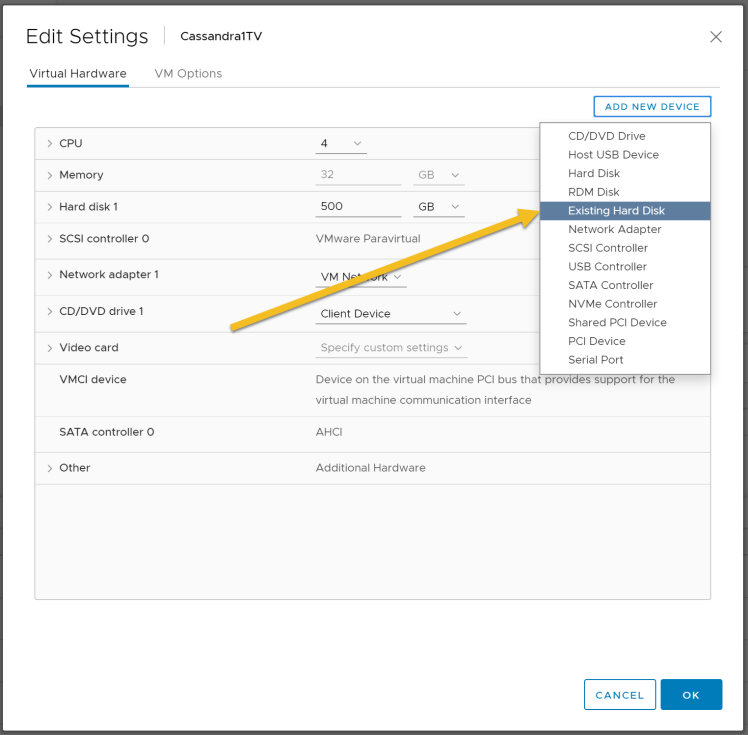
9. Mount the disks from the new data store created in the previous step. Select target Cassandra nodes in the vSphere client, Edit properties and add Existing Hard Disk as shown below:
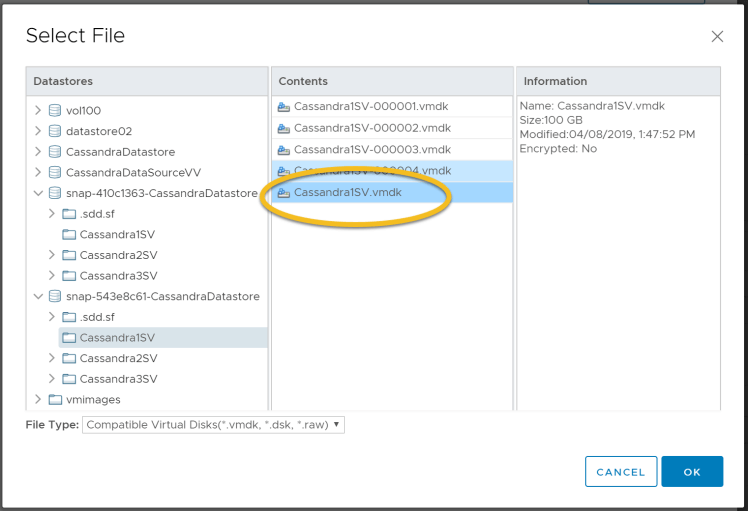
Select the datastore which was created in step 8, select the node name and select the vmdk disk which has the source data disk. Repeat this step for all the Cassandra nodes in the target cluster. See screenshot below.
- Mount the disk back on all the nodes as Cassandra data using the mount command.
mount /dev/sdb /var/lib/cassandra/data
11. Important prerequisites: Source and target token ranges will not match, because the token ranges cannot be exactly the same in the other cluster. You need to specify the tokens for the target cluster that were used in the source cluster.
a. From the source cluster, retrieve the list of tokens associated with each node’s IP:
nodetool ring | grep ip_address_of_node | awk ‘{print $NF “,”}’ | xargs
b. In the cassandra.yaml file for each node in the target cluster, add the list of tokens you obtained in the previous step to the initial_token parameter using the same num_tokens setting as in the source cluster.
c. Make any other necessary changes in the new cluster’s cassandra.yaml and property files so that the source nodes match the target cluster settings. Make sure the seed nodes are set for the target cluster.
d. Clear the system table data from each new node:
sudo rm -rf /var/lib/cassandra/data/system/*
This allows the new nodes to use the initial tokens defined in the cassandra.yaml when they restart.
e. Make sure the Cassandra commit logs are also cleared in the target nodes. Otherwise, it will cause inconsistencies.
sudo rm -f /var/lib/cassandra/commitlog/
- Restart Cassandra on all nodes, you should have the latest data from the source cluster.
This concludes the first part where we refreshed a target virtualized Cassandra cluster using source virtualized Cassandra cluster using Pure Storage FlashArray//X snapshots.

See SafeMode in Action
Take a closer look at how Pure protects your data
with built-in, immutable snapshots.
Accelerating Cluster Duplication with Modern Tools
Cloning and refreshing Apache Cassandra clusters remains a critical task in environments where staging, testing, and analytics need access to production-like data sets. Today, Pure Storage FlashArray and its automation ecosystem simplify this process even further—especially for virtualized Cassandra environments running on VMFS or in containerized form.
Key advancements include:
- REST API v2 and Ansible/Terraform integration, allowing the entire snapshot and copy workflow to be scripted as part of infrastructure-as-code.
- SafeMode™ Snapshots, delivering immutable protection for your Cassandra source volumes during the clone process.
- Improved data reduction with DirectCompress™, minimizing the footprint of cloned environments while maintaining performance.
- Support for Kubernetes-based Cassandra (via Portworx®), allowing snapshots to be used for refreshing container-native Cassandra stateful sets.
- Enhanced Pure1® observability, giving insight into snapshot frequency, clone efficiency, and capacity trends across development and production environments.
By combining automation, performance, and simplicity, Pure FlashArray enables faster, more reliable Cassandra cluster replication—ideal for test/dev, blue-green deployments, or migrating workloads across infrastructure.

Free Test Drive
Try FlashArray
Explore our unified block and file storage platform.
