
Summary
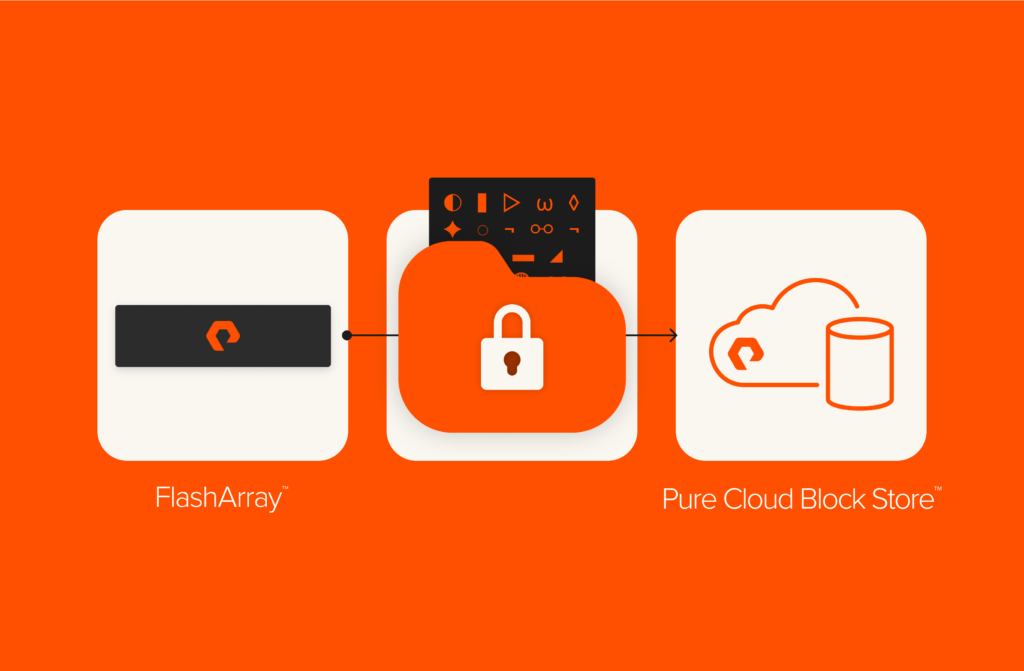
Using Cirrus Migrate Cloud and Pure Cloud Block Store, you can efficiently migrate data from on premises to the cloud.


In a previous post, we focused on the Cirrus Migrate Cloud tool and how to replace an Azure managed disk with a Pure Cloud Block Store™ volume within the same Azure VM, as well as how to migrate data from one Azure VM’s managed disk to another Azure VM with a Pure Cloud Block Store volume.
In the second post in this series, we’ll focus on how to migrate data from an on-premises VMware VM to an Azure-native VM with data stored on Pure Cloud Block Store.
Azure offers a wide range of storage options to meet different workloads, from high-performance computing to long-term data archiving. On the other hand, Pure Cloud Block Store offers several advantages over native Azure storage options. Some of them are:
Cost Savings with Data Reduction and Efficiency
- Built-in data reduction: Pure Cloud Block Store automatically compresses and deduplicates data, reducing overall storage costs. Azure does not provide inline deduplication across all storage types (only limited file deduplication in Azure files).
- Thin provisioning: Pure Cloud Block Store allocates storage dynamically, so you only pay for what’s actually used. Azure disks and files require pre-provisioning, leading to potential overpayment for unused space.
- Lower cloud egress costs: Pure Cloud Block Store efficient data replication reduces data movement costs between on premises and Azure. Azure charges for outbound data transfer, which can be costly over time.
Advanced Data Protection and Resilience
- Built-in disaster recovery (DR): Pure Cloud Block Store enables multi-cloud DR replication between Azure, AWS, and on-prem and includes advanced block-level storage replication.
- Immutable snapshots and ransomware protection: Instant recovery with immutable snapshots mitigates ransomware attacks. Azure Blob Storage has immutable snapshots, but Azure disks lack built-in ransomware protection.
- Zero downtime scaling: Pure Cloud Block Store scales storage without downtime. Azure disks need manual resizing and possible VM reboots.
Using Cirrus Migrate Cloud for Cloud Migrations
Cirrus Migrate Cloud (CMC) is a cloud migration tool designed to simplify and accelerate the movement of workloads between on-premises, cloud, and multicloud environments. It enables non-disruptive, live migration of data without requiring downtime.
Main Benefits of Cirrus Migrate Cloud
- Non-disruptive migration (zero downtime): Migrates data while applications remain online without the need for scheduled downtime, minimizing impact on business operations. Ideal for mission-critical applications like databases, VMs, and enterprise workloads.
- Continuous data synchronization: Uses real-time block-level replication, ensuring no data loss during migration. It enables failback and rollback in case of migration issues and allows gradual cutover with minimal risk.
- Seamless hybrid and multicloud support: Supports migration between on-prem, private cloud, Azure, AWS, Google Cloud, and other cloud platforms. Simplifies hybrid cloud adoption by keeping workloads available during the transition.
- Automated and easy to use: No complex scripting required—provides a simple UI and API-based automation. Auto-detects and optimizes storage configurations and supports an integration with Pure Cloud Block Store and other storage platforms.
To get more information about the Cirrus Cloud Data Migration platform, please visit their website. To get more information on Pure Cloud Block Store, please go to our website or documentation.
The rest of this blog will serve as a step-by-step guide for the above-mentioned use case.
On-premises Setup and Configuration
Within our on-premises environment, we have a VMware virtual machine running Windows Server with Microsoft SQL database installed. We have a test database named db_test_1, and as you can see in Figure 2, database files are stored on a separate 20GB large data disk (E:).

Figure 1: VMware virtual machine disk layout.

Figure 2: Database files placement.
The purpose of our test is to migrate a data disk with database files on it from this VMware virtual machine to Microsoft Azure running an Azure-native VM. We would like to use Pure Cloud Block Store as a target storage platform and also leverage Cirrus Data Cloud integration and automatic configuration with Pure Cloud Block Store.
Cloud Setup and Configuration
Within our Azure environment, we have an Azure-native VM named SQL-Cirrus-test running the Windows Server operating system. We also have Pure Cloud Block Store deployed in our subscription, but as you can see in Figure 4, our Azure VM isn’t configured and connected to Pure Cloud Block Store; it has only an OS disk attached to it.

Figure 3: Target Azure-native VM.

Figure 4: Azure VM disks configuration.
Between the on-premises and cloud environments, we have a site-to-site VPN connection so both VMs are able to see each other through this network connection.
Pre-migration Steps
For the migration process, we will leverage Cirrus Cloud Migration. The solution uses distributed migration agents that run on every host/VM. The agents allow direct host-to-host connections. Each host-to-host migration is independent, which makes the solution infinitely scalable.
Cirrus Migrate Cloud consists of multiple components:
- The cMotion feature of CMC does a storage-level cutover from a source to the target without downtime to the source host. cMotion is used to swing the workload over from the original source disk to the new destination. There are no central bottlenecks for the dataflow; the migration uses Cirrus cMotion technology to ensure there is no effect on production.
- The Web-based management portal is cloud-based management as a service. It allows users to manage migration and protect any block storage. The Web-based management portal provides interfaces for all CMC application configurations, management, and administrative tasks.
There are several steps that we need to follow for the migration to be successful. As a first step, we need to create our migration project.

Figure 5: Project dashboard overview.
Next, we have to register the source and destination hosts/VMs within the project and deploy migration agents into the operating systems of the source and destination hosts.
Cirrus Migrate Cloud (CMC) supports a wide range of Windows and Linux operating systems for seamless, live data migration. For each OS type, you will get a specific command line for installing or uninstalling the agent.

Figure 6: CMC agent deployment instructions.

Figure 7: CMC agent deployment successful.

Figure 8: Host with CMC agent is registered.
After the agent is installed, you will see the host in CMC under the “Registered Hosts” tab. You can click on each registered host to see the details, especially what storage devices are visible and connected to the host.

Figure 9: The details of the registered host.
The same steps need to be completed on the destination host as well. After you have agents installed on the source and destination hosts, you can continue with the next step—establishing host-to-host connections.
Host-to-host Connection
Before we start a migration session, we have to enable a host-to-host (H2H) connection. CMC uses a direct host-to-host data path to migrate data between source and destination systems without downtime.
H2H connection supports migrations between physical, virtual, and cloud-based environments. In our test case, we migrate from a source VMware VM to a native cloud VM in Azure.
The CMC agent needs to be installed on both source and target environments (see Pre-Migration Steps above). The agent operates in a user space, requiring no kernel modification. It intercepts I/O at the block level, ensuring real-time data replication.

Figure 10: New host-to-host connection.
The migration path does not depend on external storage or temporary volumes. Data is transferred via TCP/IP over standard network infrastructure (LAN, WAN, or VPN). Once the target system is up to date, a quick switchover occurs with minimal impact.
Pure Cloud Block Store Integration
The last step before we initiate data migration is to set up integration with Pure Cloud Block Store. Cirrus Migration Cloud offers a wide selection of integration points you can choose from.
Storage array integrations in Cirrus Migrate Cloud (CMC) enhance the efficiency, speed, and reliability of data migrations by leveraging advanced storage features. These integrations allow direct interaction with storage systems, reducing downtime and optimizing data transfer performance.
In our case, we will use the one for Pure Storage® FlashArray™/Pure Cloud Block Store. Select Integrations in the Management section of the left-hand side navigation menu, and then click the ADD INTEGRATION button.

Figure 11: CMC storage array integrations.

Figure 12: Add integration with Pure Cloud Block Store.
Pure Cloud Block Store will be used as our target storage array for the destination VM.
Data Migration
At this time, we are ready to start migration of our data. You can initiate a migration session from two places:
- The first option is to go to the Registered Hosts section, select a host (the one you want to migrate data from), and then click on the MIGRATE HOST VOLUMES button.
- The other option is to go to the Migration Sessions section. Here, you can review previous sessions, or create a new one by clicking on the NEW MIGRATION SESSION button. When using this approach, in the next step, you have to select the source host.
After that, both described approaches are the same and you land on the following page:

Figure 13: Data migration session.
Local migration allows you to migrate data within one host/VM, for example when you want to migrate from an Azure managed disk to a Pure Cloud Block Store volume within one Azure-native VM. In our test case, we are doing remote migration between two systems.

Figure 14: Select type and volume for data migration.
After we have selected the source system, migration type, and volumes we would like to migrate, we have to select the target system and configure target volumes.
For this operation, we can leverage the CMC integration we configured in the previous step. We are able to automatically allocate destination volumes on Pure Cloud Block Store if the integration is enabled and selected. This process includes automatic creation of host and volume entities within the target Pure Cloud Block Store and establishing iSCSI sessions between the destination host and the array.
Click on AUTO ALLOCATE DESTINATION VOLUMES, select the previously created integration to the Pure Cloud Block Store array when prompted, and click on Automatic Setup to begin with configuration.

Figure 15: Auto-allocate destination volumes.

Figure 16: Process of an automatic volume auto-allocation.
CMC will automatically, via the previously installed agent, prepare the destination host for Pure Cloud Block Store, creating a host entity on the array and establishing connection from the destination host side. By default, CMC will create two iSCSI sessions between the host and each of the two Pure Cloud Block Store controllers (four sessions in total). In production situations, we recommend conducting thorough testing to establish the best number of sessions for your specific workload.
Once the automatic setup is complete, you can review the results on the Pure Cloud Block Store array and destination host respectively:

Figure 17: Data volume and connection configured on Pure Cloud Block Store.

Figure 18: Connected (unallocated) data volume from Pure Cloud Block Store.
The final step includes naming the session and selecting several other options like automatic re-synchronization or migration priority. As we are doing a simple demo migration, we will leave everything in default.

Figure 19: Last step before starting the migration.
Finally, we can click the CREATE SESSION button at the bottom of the screen. This will start the process of data migration with initial data synchronization between the source and destination system. During the data migration, we can see information on the progress, including migration and transfer rates, synchronization progress, changes tracking, etc.

Figure 20: Process of data migration.
When data is added and/or changed on the source system after the initial synchronization, re-synchronization may be triggered manually, or it will happen automatically after the set amount of time (as we set during the migration session configuration). We will see the Tracking Changes percentage get lower first, and then get back to 100%.
Cutover
When the data is 100% synchronized, we can do the cutover. The cutover process is designed to ensure a seamless transition of data and workloads from source environments to the target. It can be triggered by clicking on START GUIDED CUTOVER PROCESS.

Figure 21: Start of the cutover process.
The guided cutover process in Cirrus Migrate Cloud leverages the cMotion technology. This uses patented mechanics to redirect I/O operations dynamically, ensuring that there is no “delta” during the final cutover phase. This means that applications can continue running with minimal impact until the final switch, which can be automated to occur in seconds if needed. cMotion allows for flexible back-and-forth switching between source and target.
Below are the key steps involved in the guided cutover phase. Since this process is fully guided, each step provides detailed insights into what is occurring, what will happen next, and any required actions outside the CMC console. Rather than a step-by-step guide, the following outlines the main concepts:
- Final synchronization: Before initiating the cutover, CMC performs a final sync to capture any changes made to the source data since the last update. This ensures the target environment is fully up to date and prepared for the transition.
- Initiating cMotion: CMC utilizes cMotion to seamlessly redirect I/O operations from the source storage to the destination storage without disrupting production. This step is triggered through the CMC portal, shifting the workload from the original source disk to the new destination.
- Redirecting I/O operations: At this stage, cMotion ensures that all I/O traffic is directed to the target environment. This process can be monitored using tools like iostat to confirm that read/write operations are now occurring on the destination disk.
- Final cutover: Once the workload has been successfully redirected, administrators can proceed with the final cutover. This step locks in the changes and disables the source disk, ensuring that all subsequent I/O operations take place exclusively on the target environment.
- Rescan and validation: A storage rescan is performed (e.g., using the Windows Storage Management tool), at which point the new disk should appear attached to the virtual machine. The next step is to validate that the application is functioning correctly in the target environment, ensuring data integrity and verifying that all services are operational.
There are two optional steps following the validation:
- Generate migration session report: A PDF report summarizing the migration session’s details and progress can be generated and shared.
- Cleanup: Any migration-related components (such as CMC agents) can be removed from both the source and target environments.

Figure 22: Cutover process steps.

Figure 23: Migration session successfully completed.
If the data was successfully migrated, we can see a new iSCSI volume connected, initialized, and with data inside within our destination virtual machine. Now, we can start MS SQL and mount this data volume into the instance.
The same process can be used for the reverse migration back from cloud to on premises or between clouds if needed.

Figure 24: Data is migrated and visible on destination VM.
Conclusion
This post outlines how to migrate data from an on-premises VMware virtual machine (VM) to an Azure-native VM using Cirrus Migrate Cloud and Pure Cloud Block Store and demonstrating efficiency, automation, and reliability in cloud data migration.
The main benefits of integration between Cirrus Migrate Cloud and Pure Cloud Block Store are:
- Zero downtime migration: Continuous data synchronization avoids service disruptions.
- Automated setup: No manual intervention needed for storage configurations.
- Cost efficiency: Pure Cloud Block Store reduces cloud costs with thin provisioning and deduplication.
- Multicloud support: Enables migrations between cloud platforms and on premises.
In the next post, I’ll show how easily we can do a data migration between hyperscalers. Stay tuned.

Modern Hybrid Cloud Solutions
Seamless Cloud Mobility
Unify cloud and on-premises infrastructure with a modern data platform.
Optimize Your Cloud Spend
Reduce your cloud storage costs by up to 50% with Pure Cloud Block Store.