The motto of the Pure Storage vSphere Plugin team has always been “Bring Pure Storage Simplicity to vSphere.” That’s what we’ve done with version 5.2.0 of the Pure Storage vSphere Plugin and the new Replication Manager feature. Operations that used to require complex PowerCLI commands or an SRM deployment can now be entirely managed from within the plugin. Let’s walk through a sample scenario to see how it works.
The Test Environment
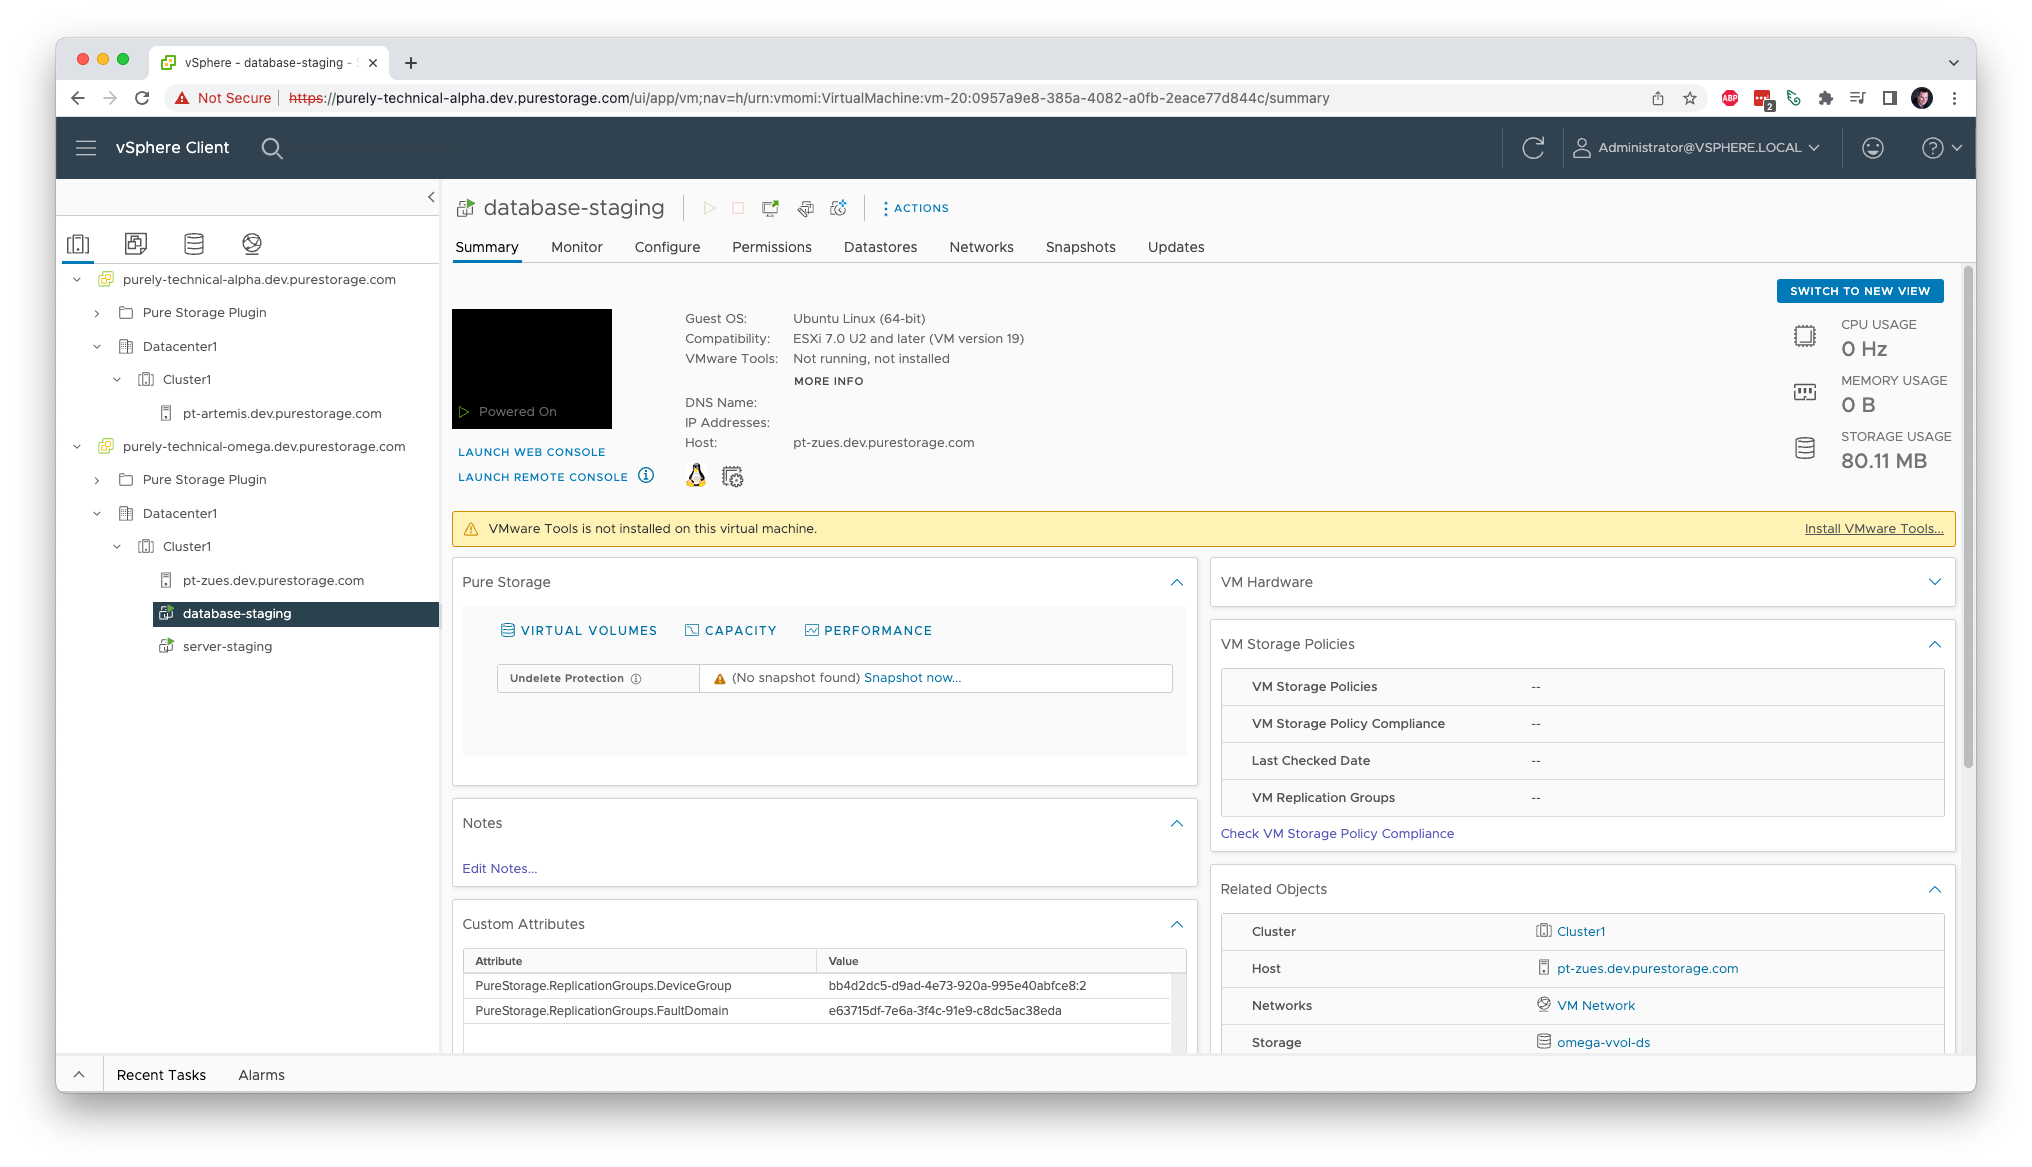
First, let’s look at the test environment. There are two vCenter instances, configured in linked mode. Each has a single host, and each has a FlashArray-backed vVols datastore configured. On our primary vCenter, we have two VMs running: a server and a database.
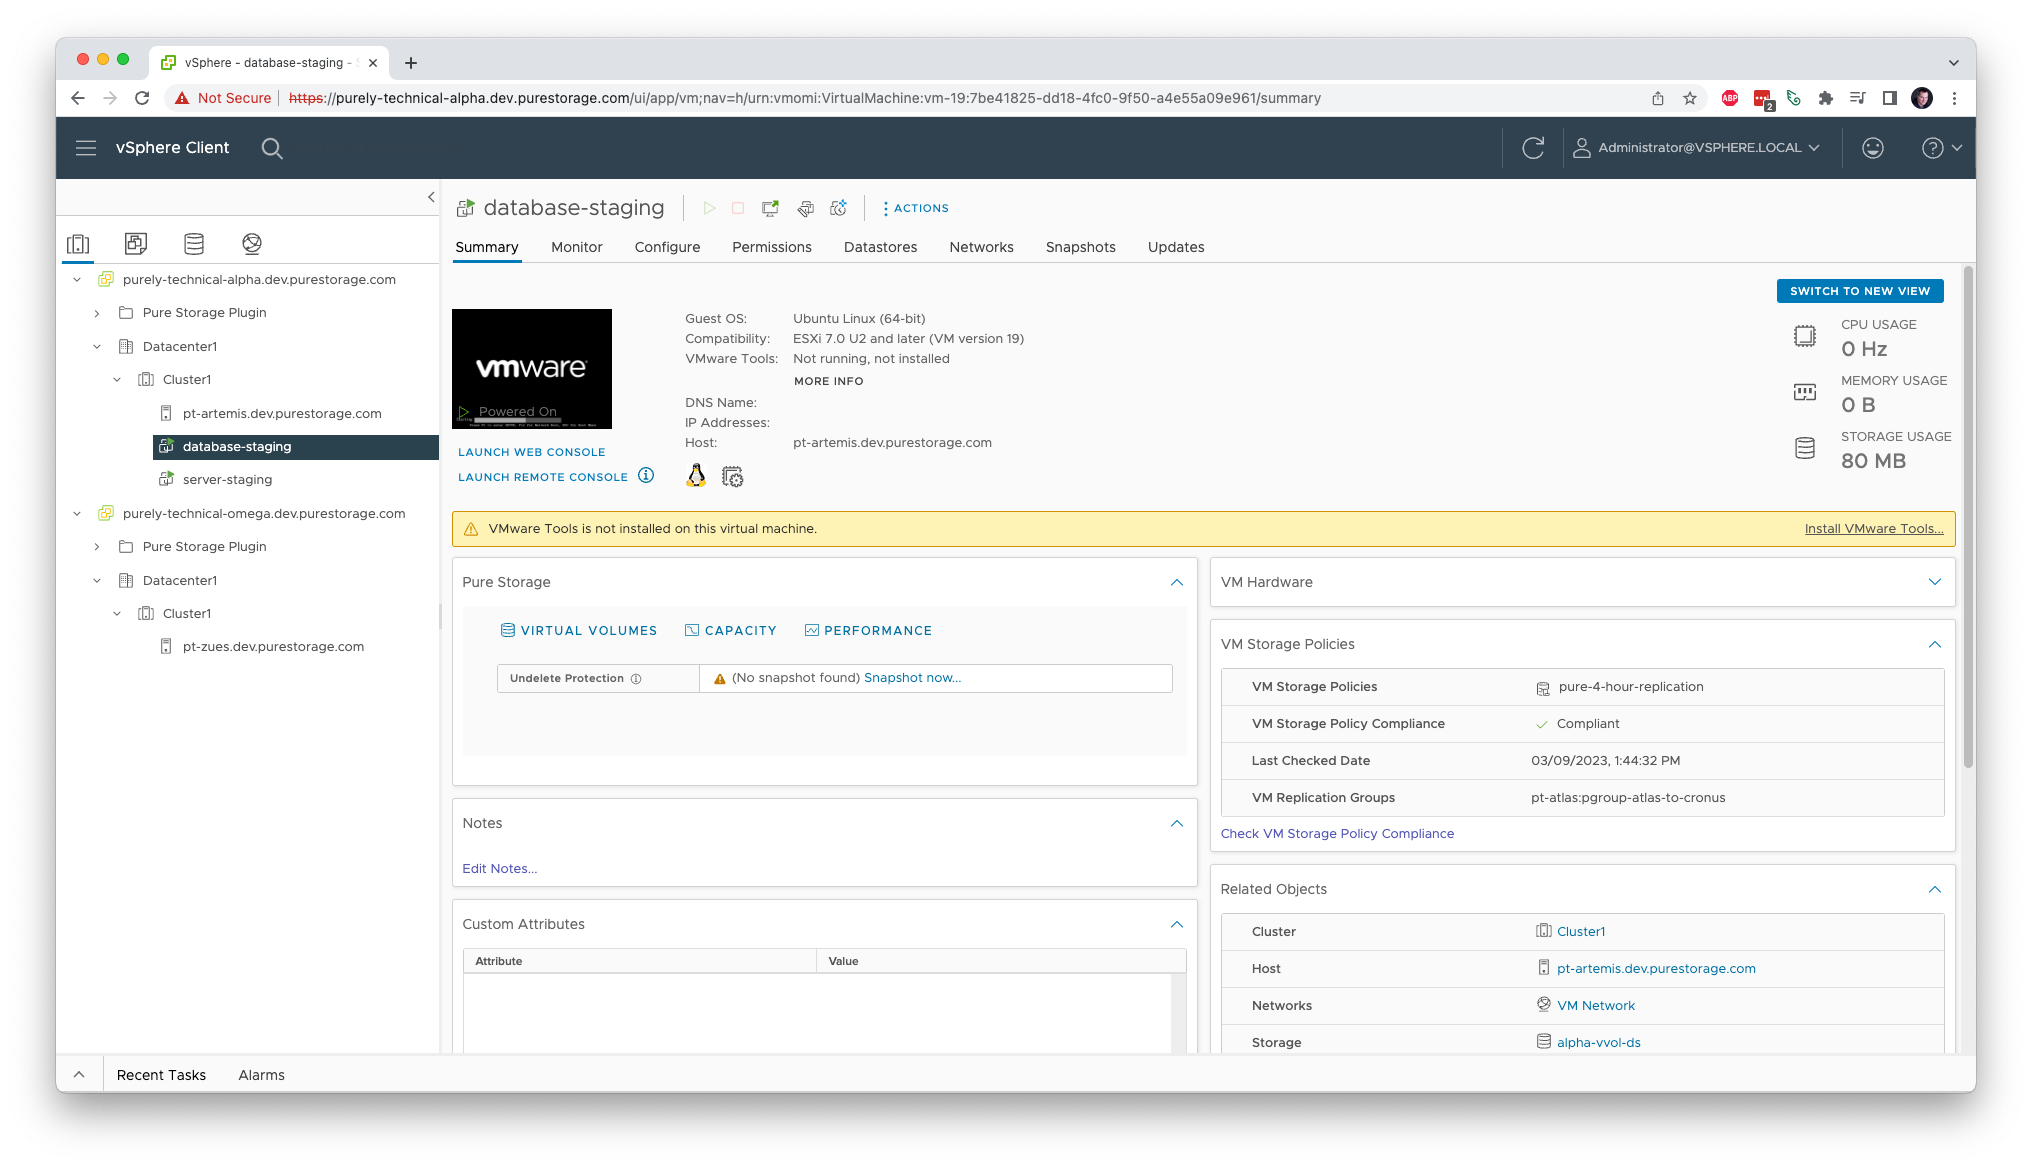
The Pure Storage vSphere Plugin is registered with both vCenter instances. It has two FlashArray™ storage arrays added to it, one for each vCenter.
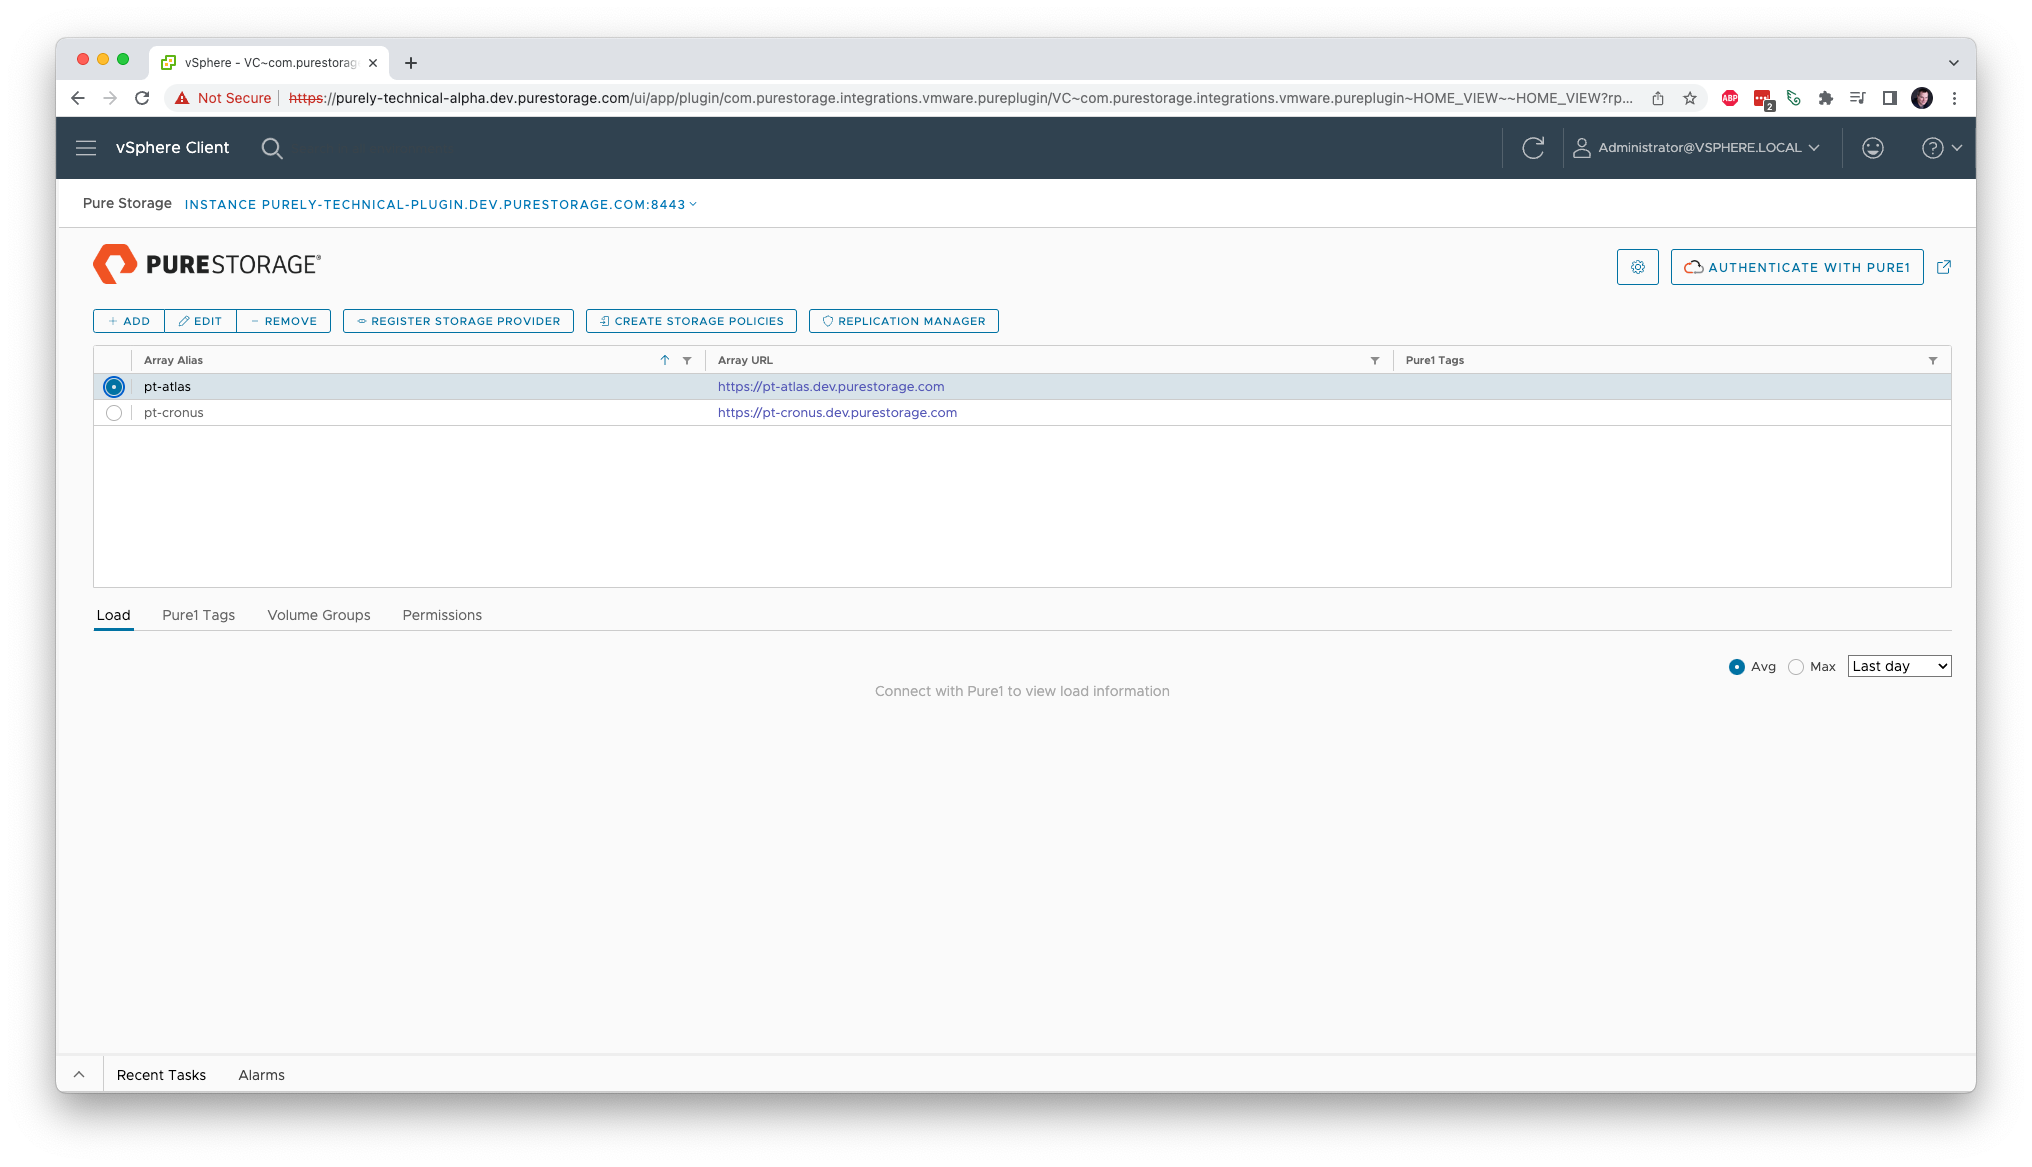
Finally, we’ve created a pgroup on the pt-atlas array with replication to the pt-cronus array configured at four-hour intervals. A compatible SPBM policy has been set up using the Create Storage Policies feature in the plugin, and that policy has been applied to both of our VMs.
With just this setup, we know that the data for our VMs will be backed up from pt-atlas to pt-cronus every four hours. If we need to do some planned maintenance, we can create VMs from that data on the target site, but setting up those VMs can be a bit of a pain. Next, let’s take a look at how the Replication Manager can help.
Creating a Point-in-time Snapshot
From the main Pure Storage vSphere Plugin view, a new Replication Manager action is available whenever a registered array is selected. Clicking on it will bring us to a view that shows all of the replication groups currently available on that array.
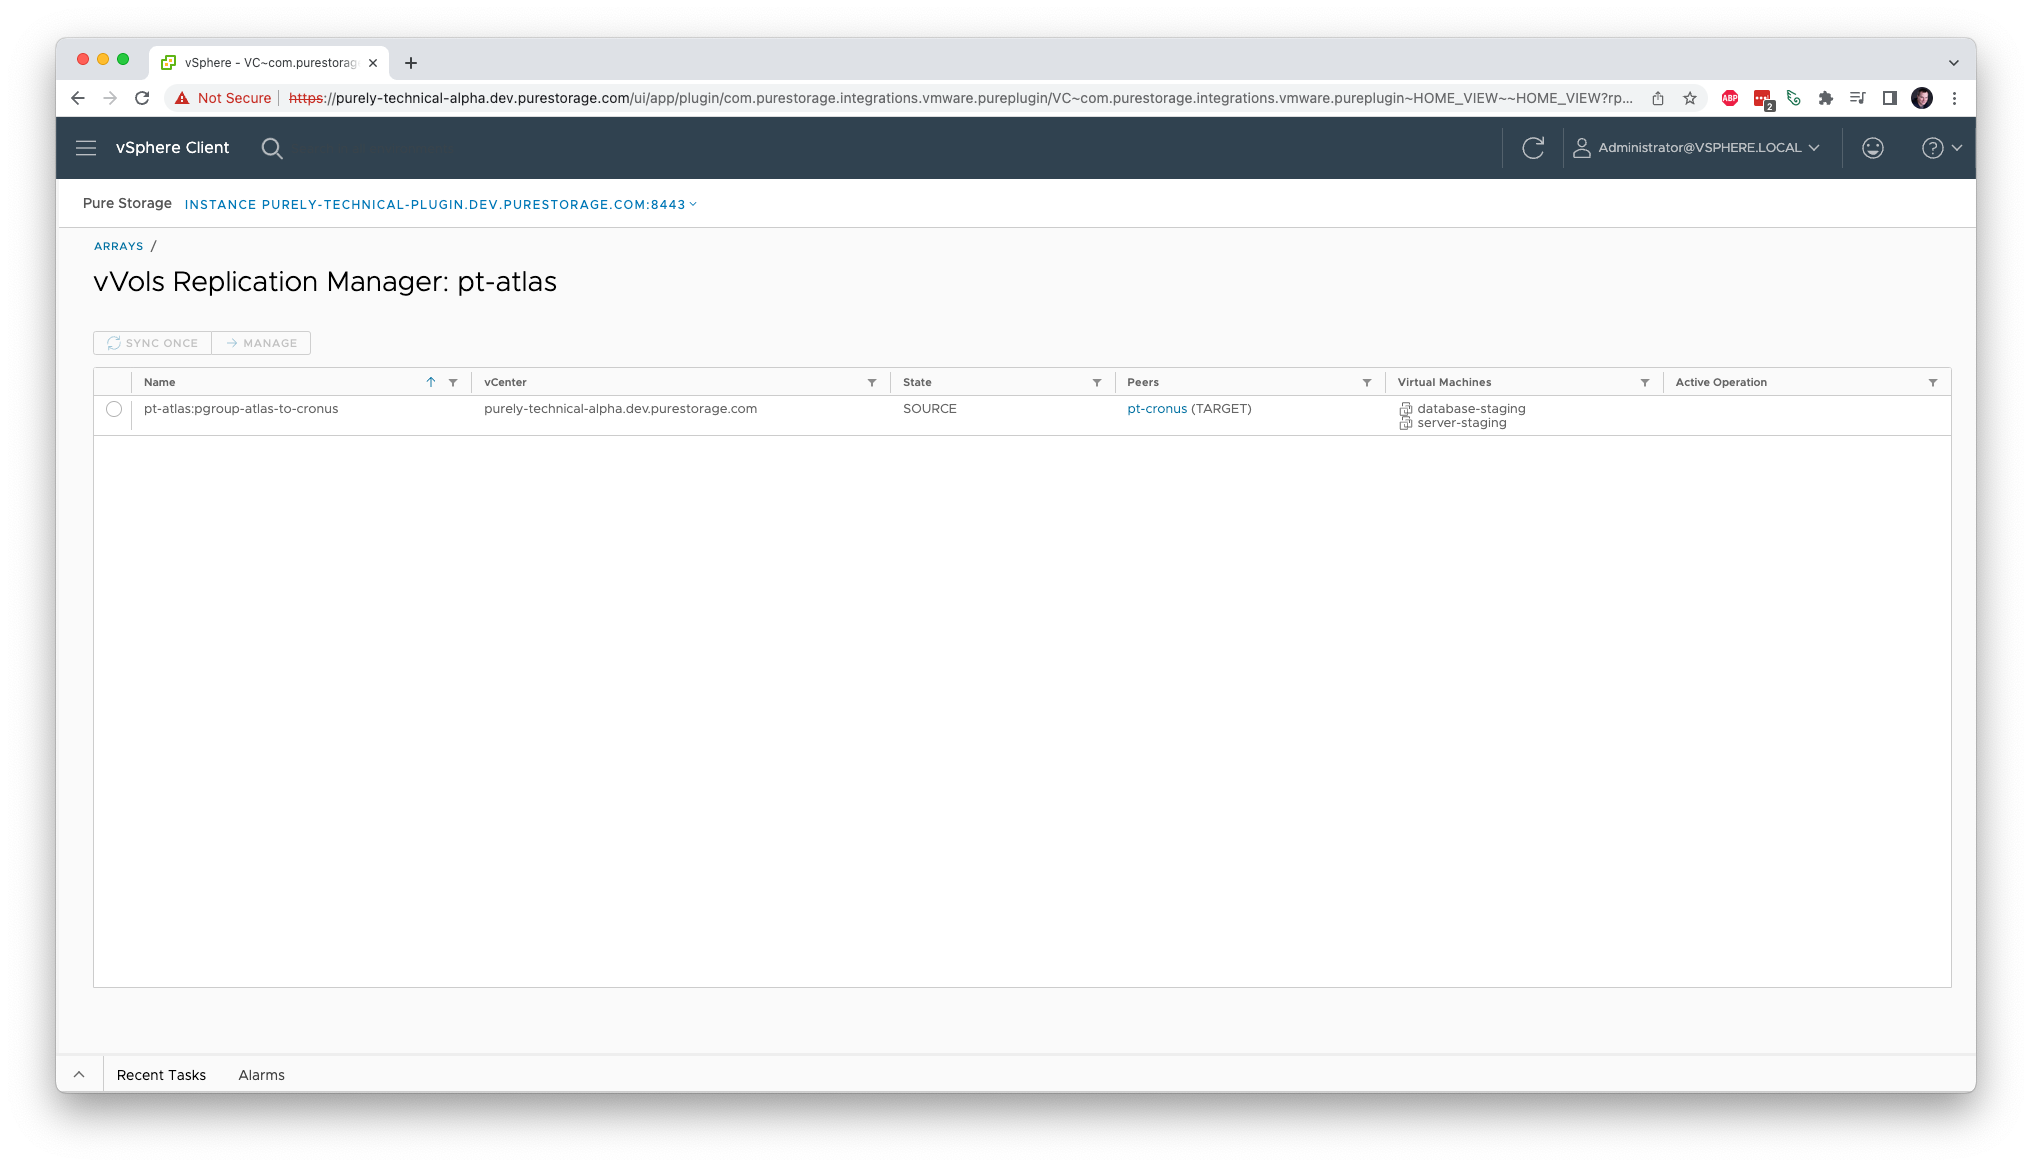
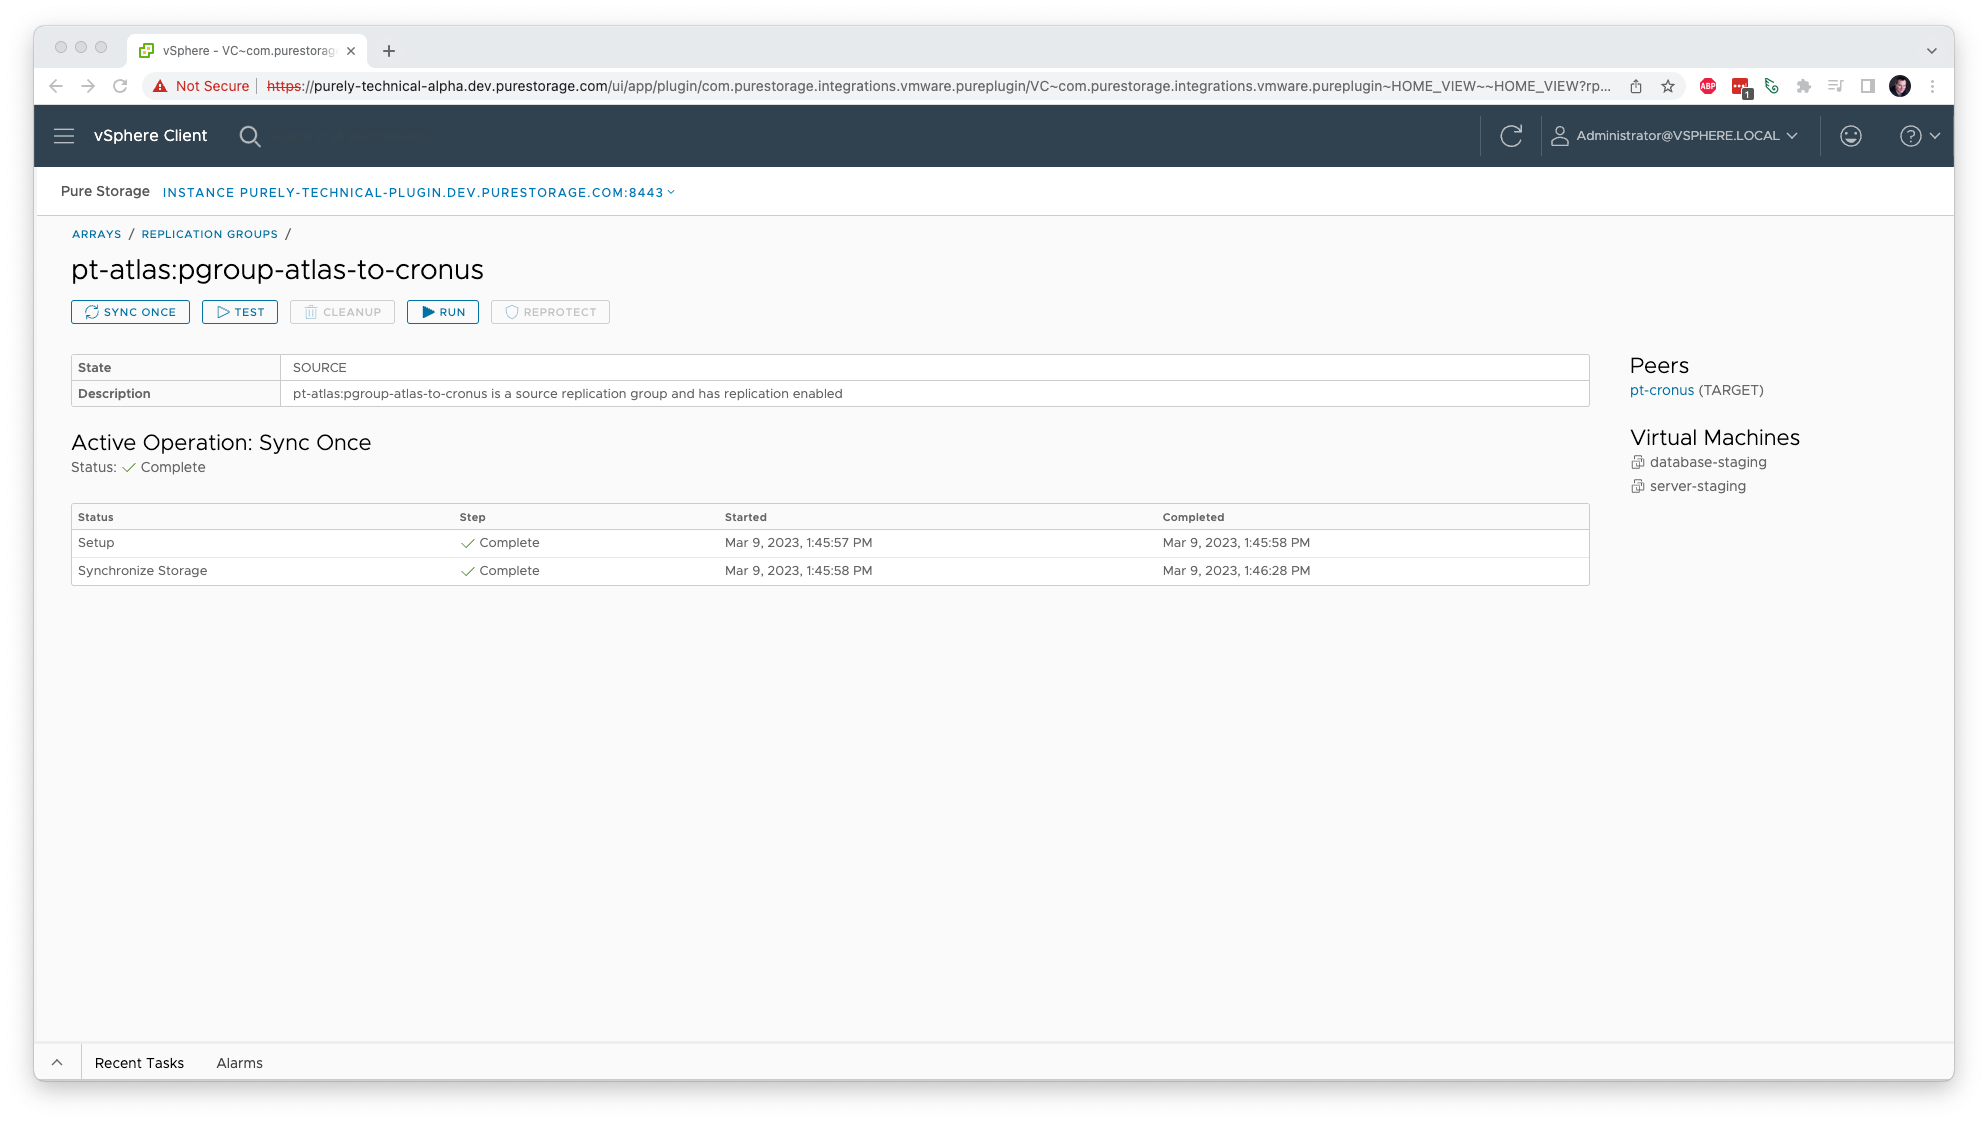
As you can see, the pt-atlas:pgroup-atlas-to-cronus group is the only one available. It currently contains our two VMs and is in an idle state. Selecting it and clicking Manage will give us some more info and options.
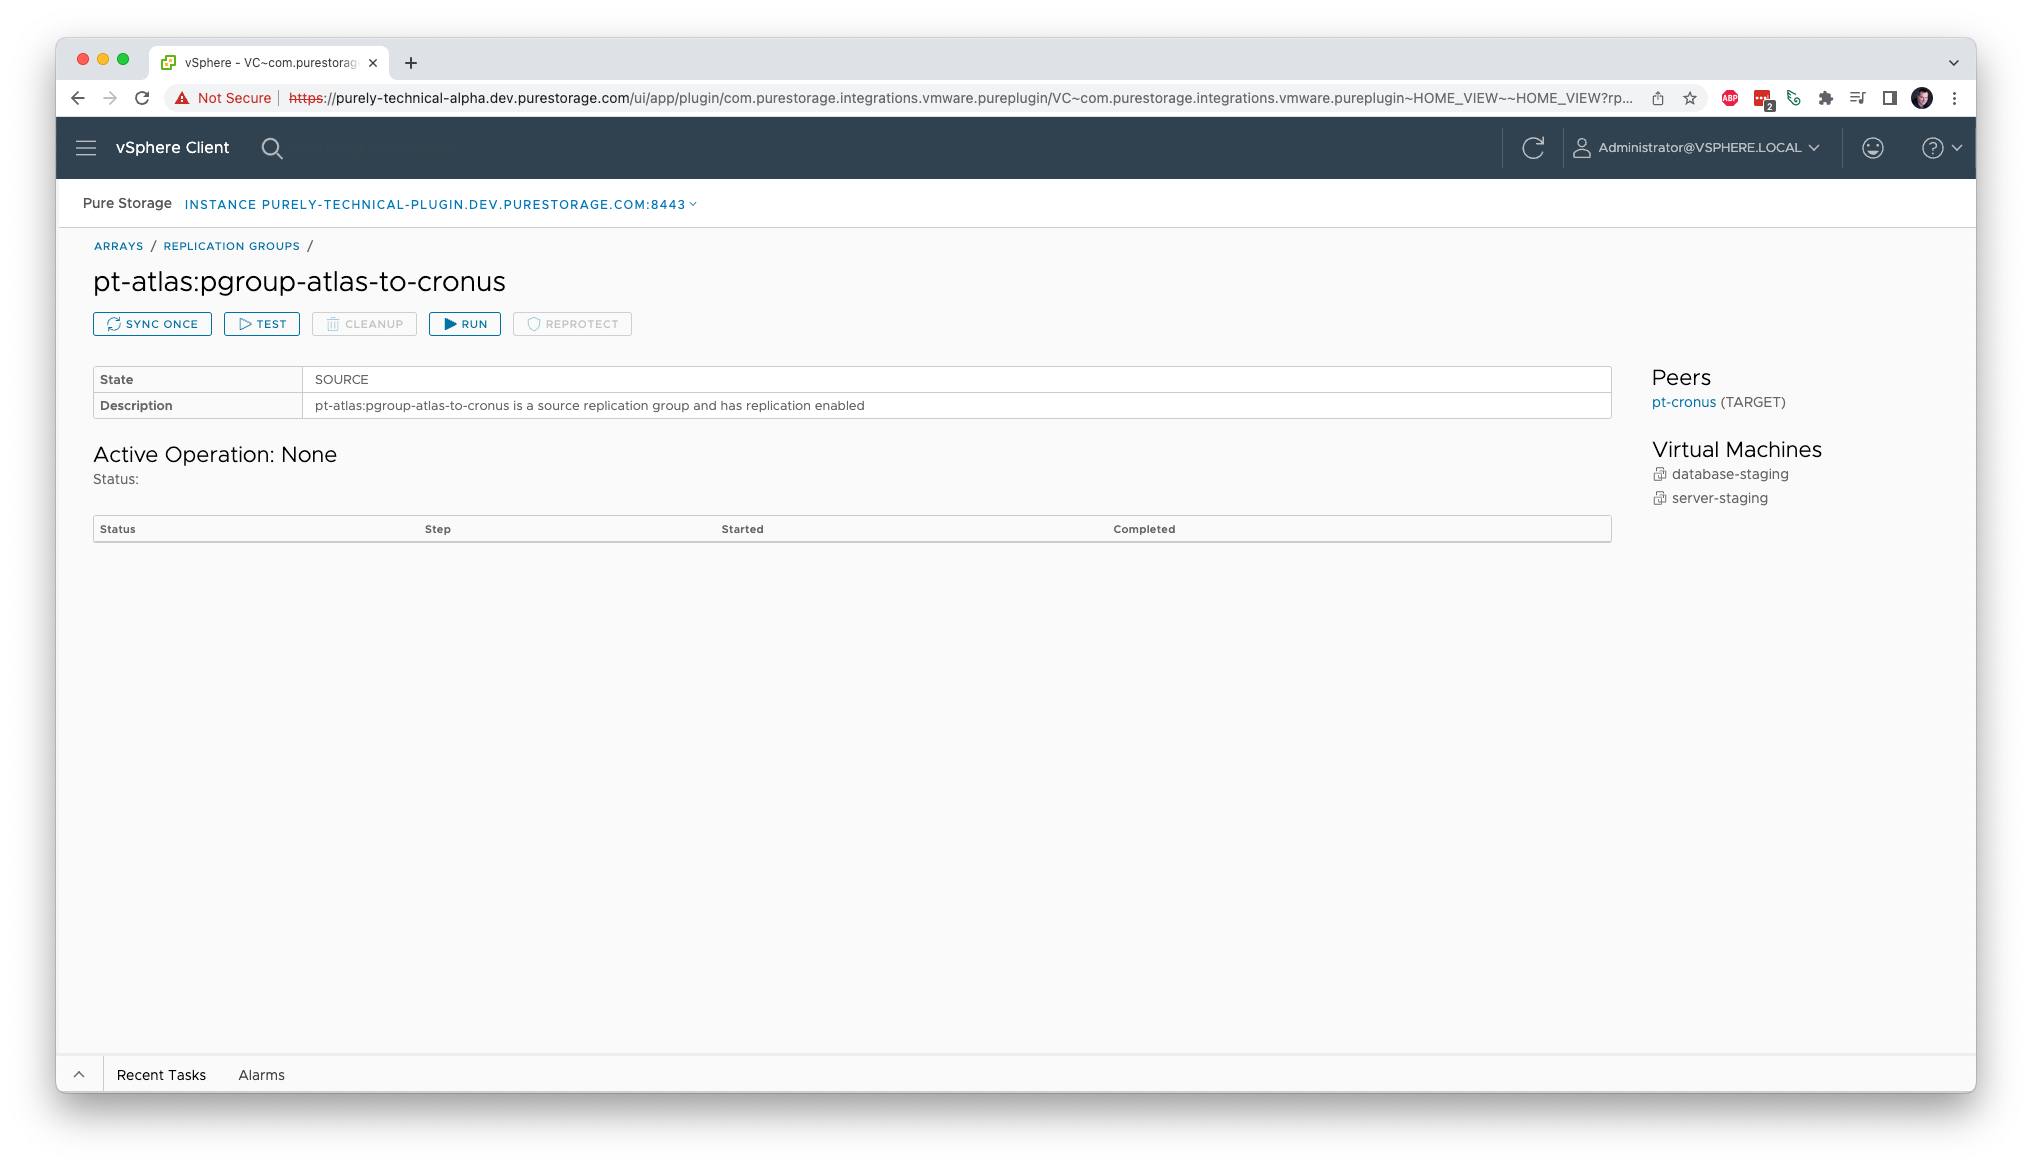
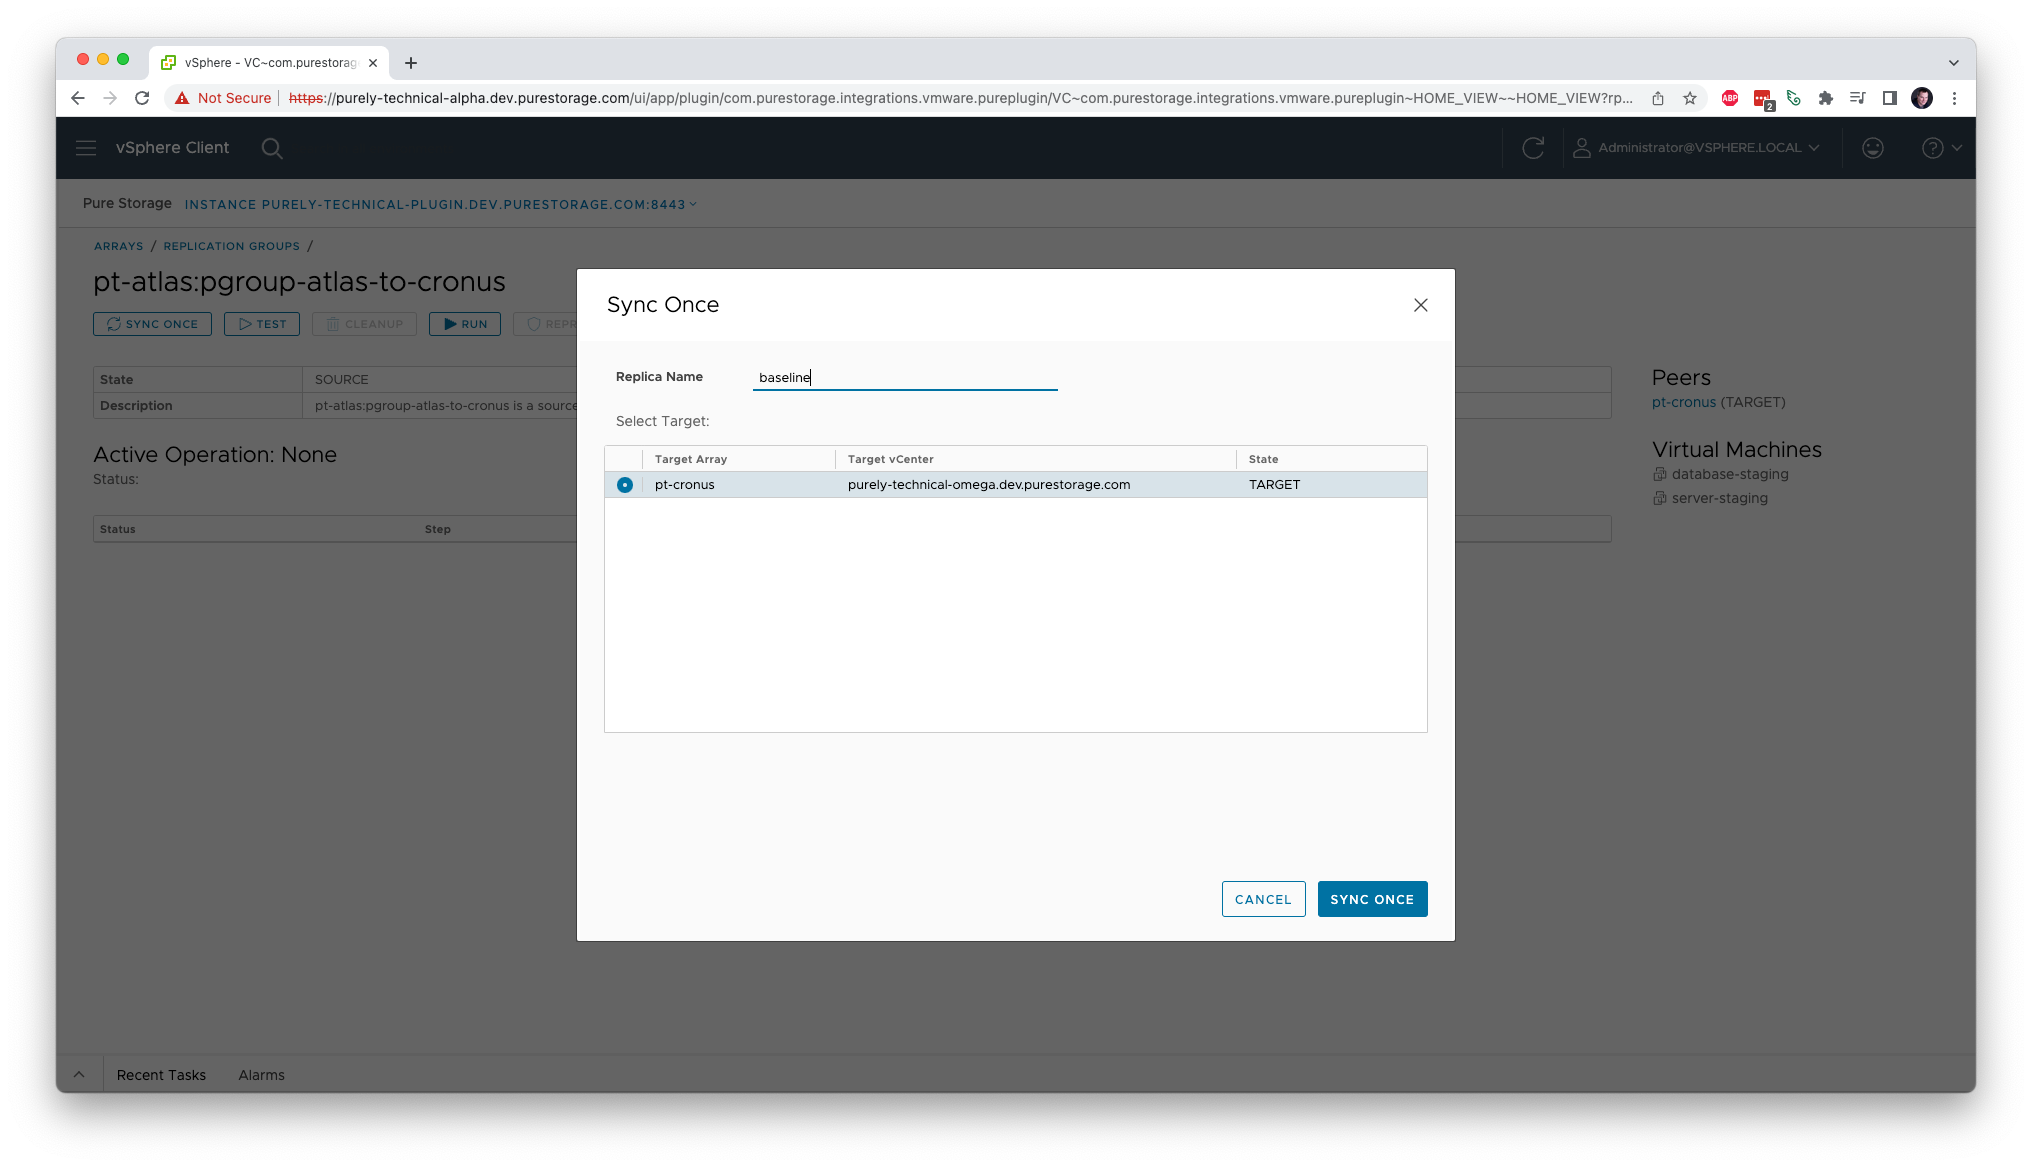
Here, we can see all of the actions available for a replication group. Let’s start with Sync Once. This action allows us to create point-in-time snapshots at important moments. Clicking Sync Once brings up a dialog where we can enter a unique name for the snapshot and begin the process of replicating it to the backup site.
Once the action is confirmed, the Replication Manager screen will display the progress of the action. This will happen for all operations performed in the Replication Manager, so you can always see the status of anything that’s in progress.
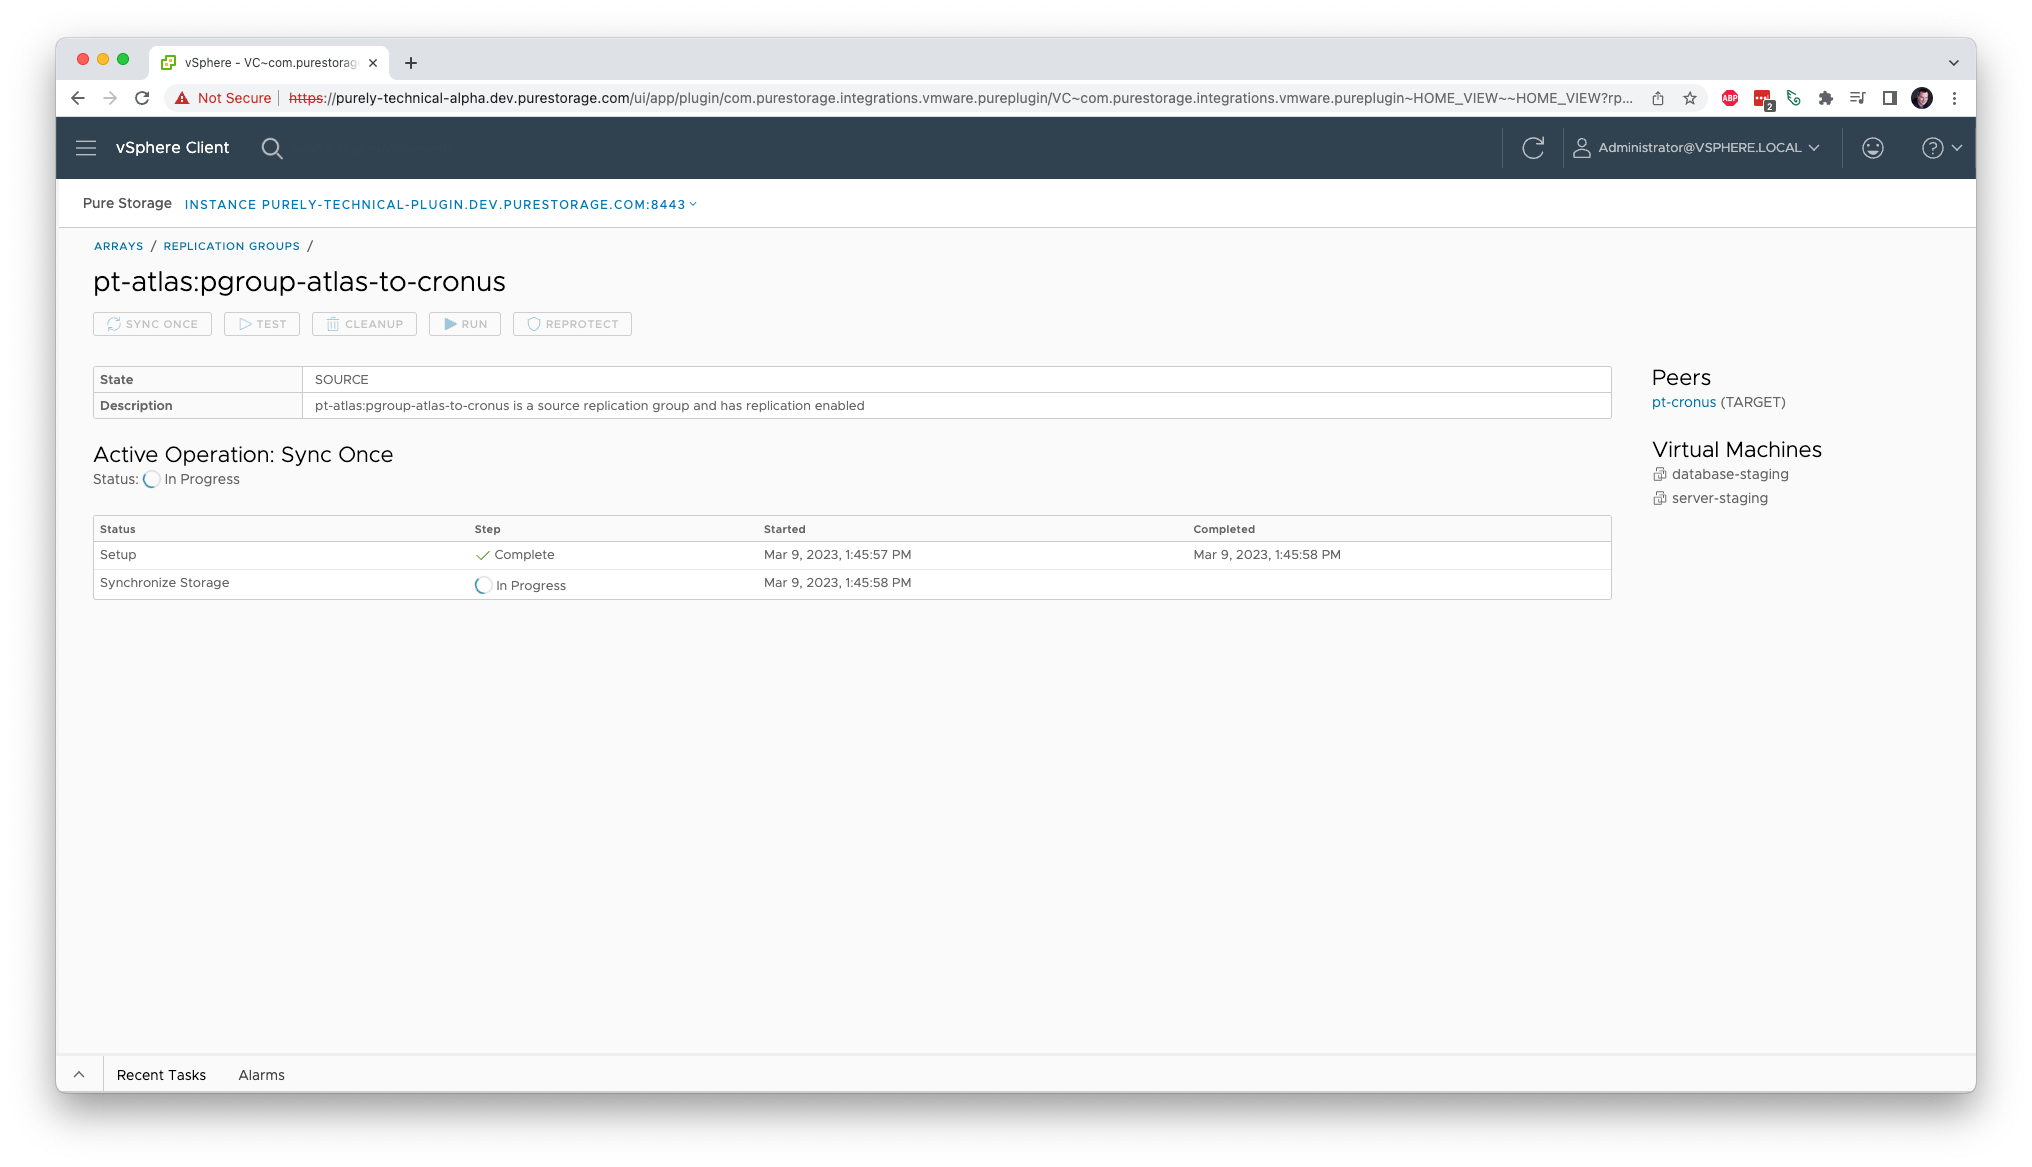
Once complete, we’ll see all steps resolved and the point-in-time replica has been sent to the backup site.
Are you registered for Accelerate? Check out what we have lined up!
Testing the VM Snapshot
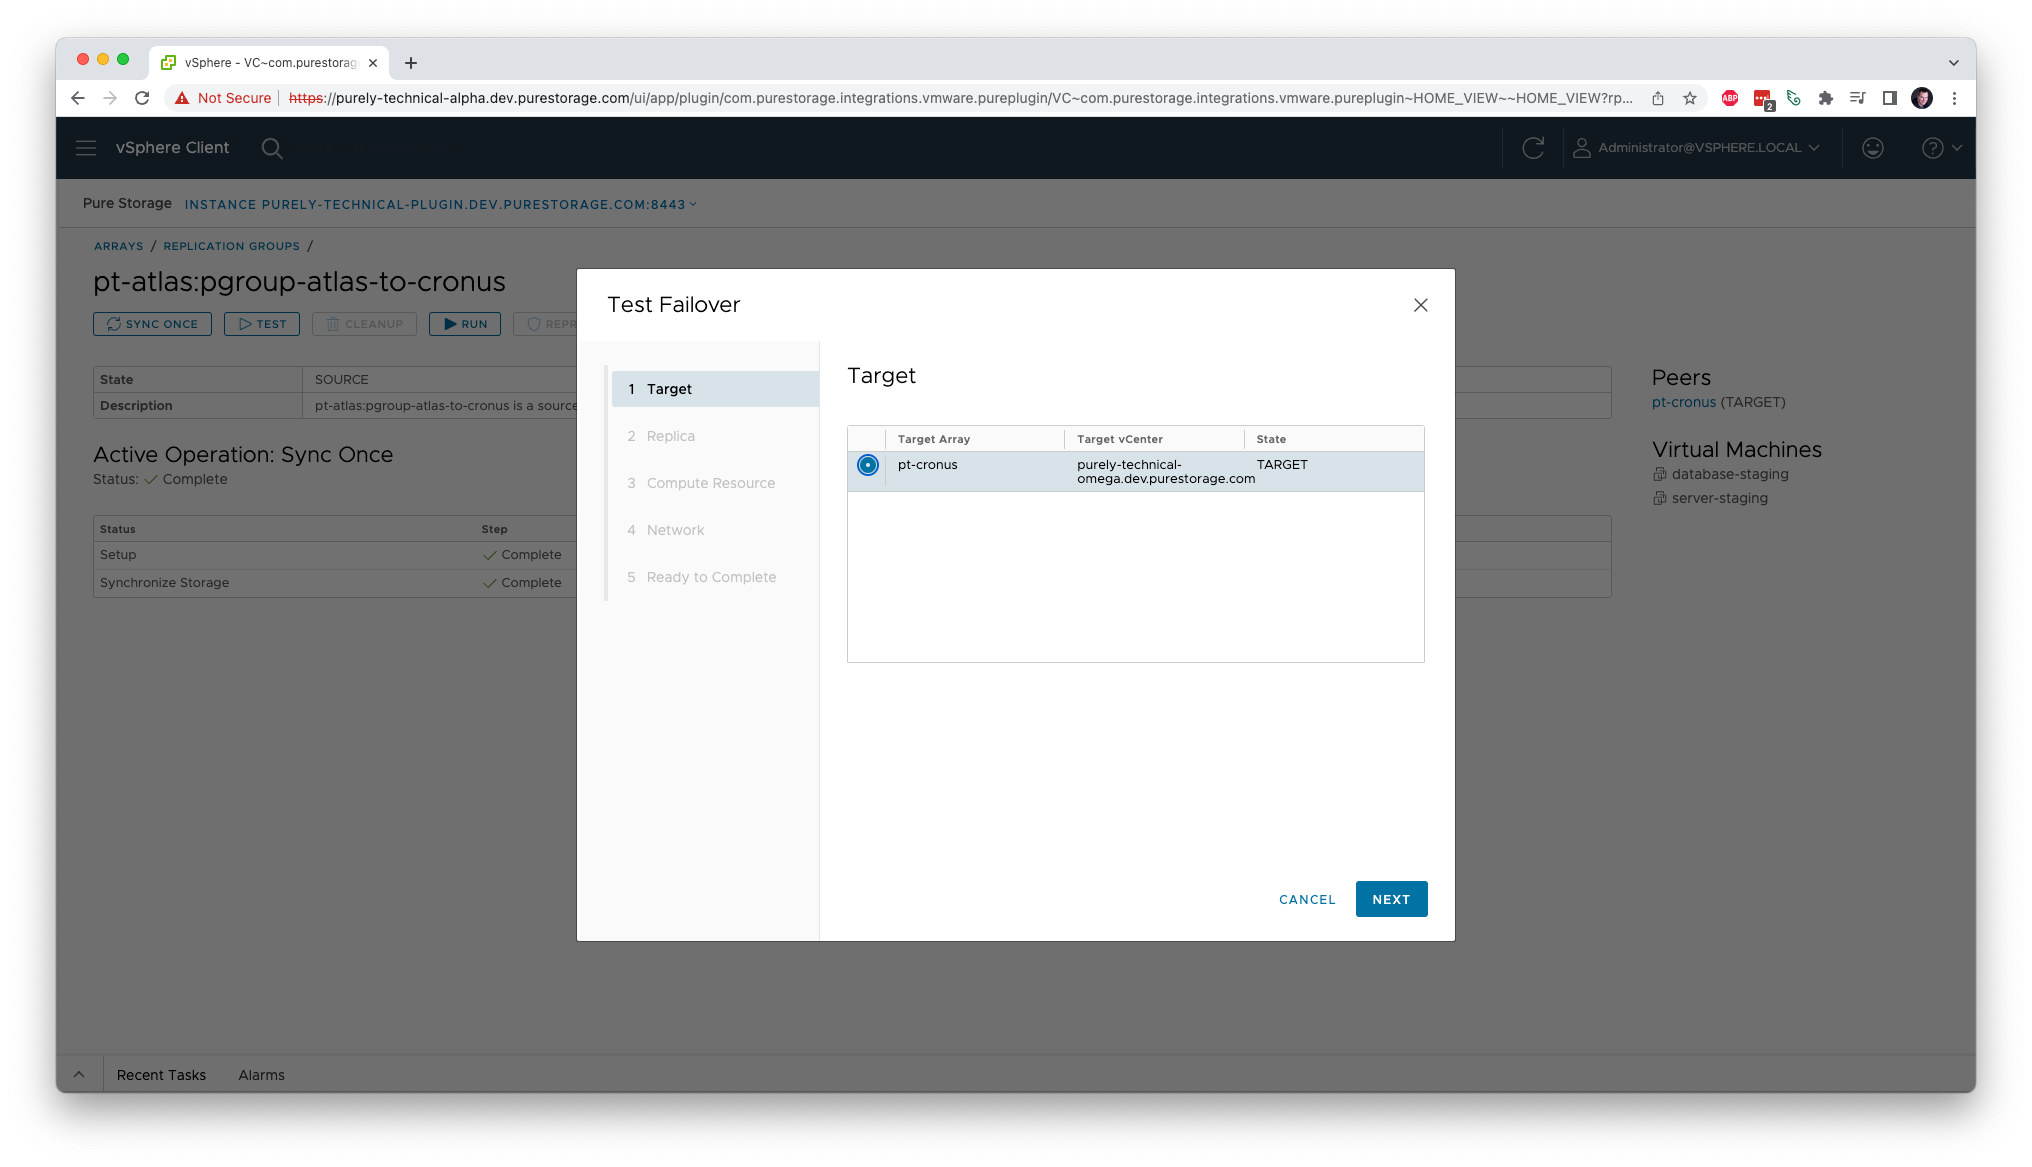
Having snapshots on the backup site is great, but it doesn’t do much good if we can’t turn those snapshots into VMs. The first way to accomplish this is with the Test feature. Running a test will create VMs on the target site without modifying the originals from the source site. This allows you to validate that the backups work as expected, long before any real migration needs to be done. To perform a test, simply click the Test button in the Replication Manager. A dialog box will guide you through the process.
The first step is to pick the target for this operation. In our example, there’s only one option, but it’s possible to configure pgroups and policies such that multiple targets are available to cover different use cases.
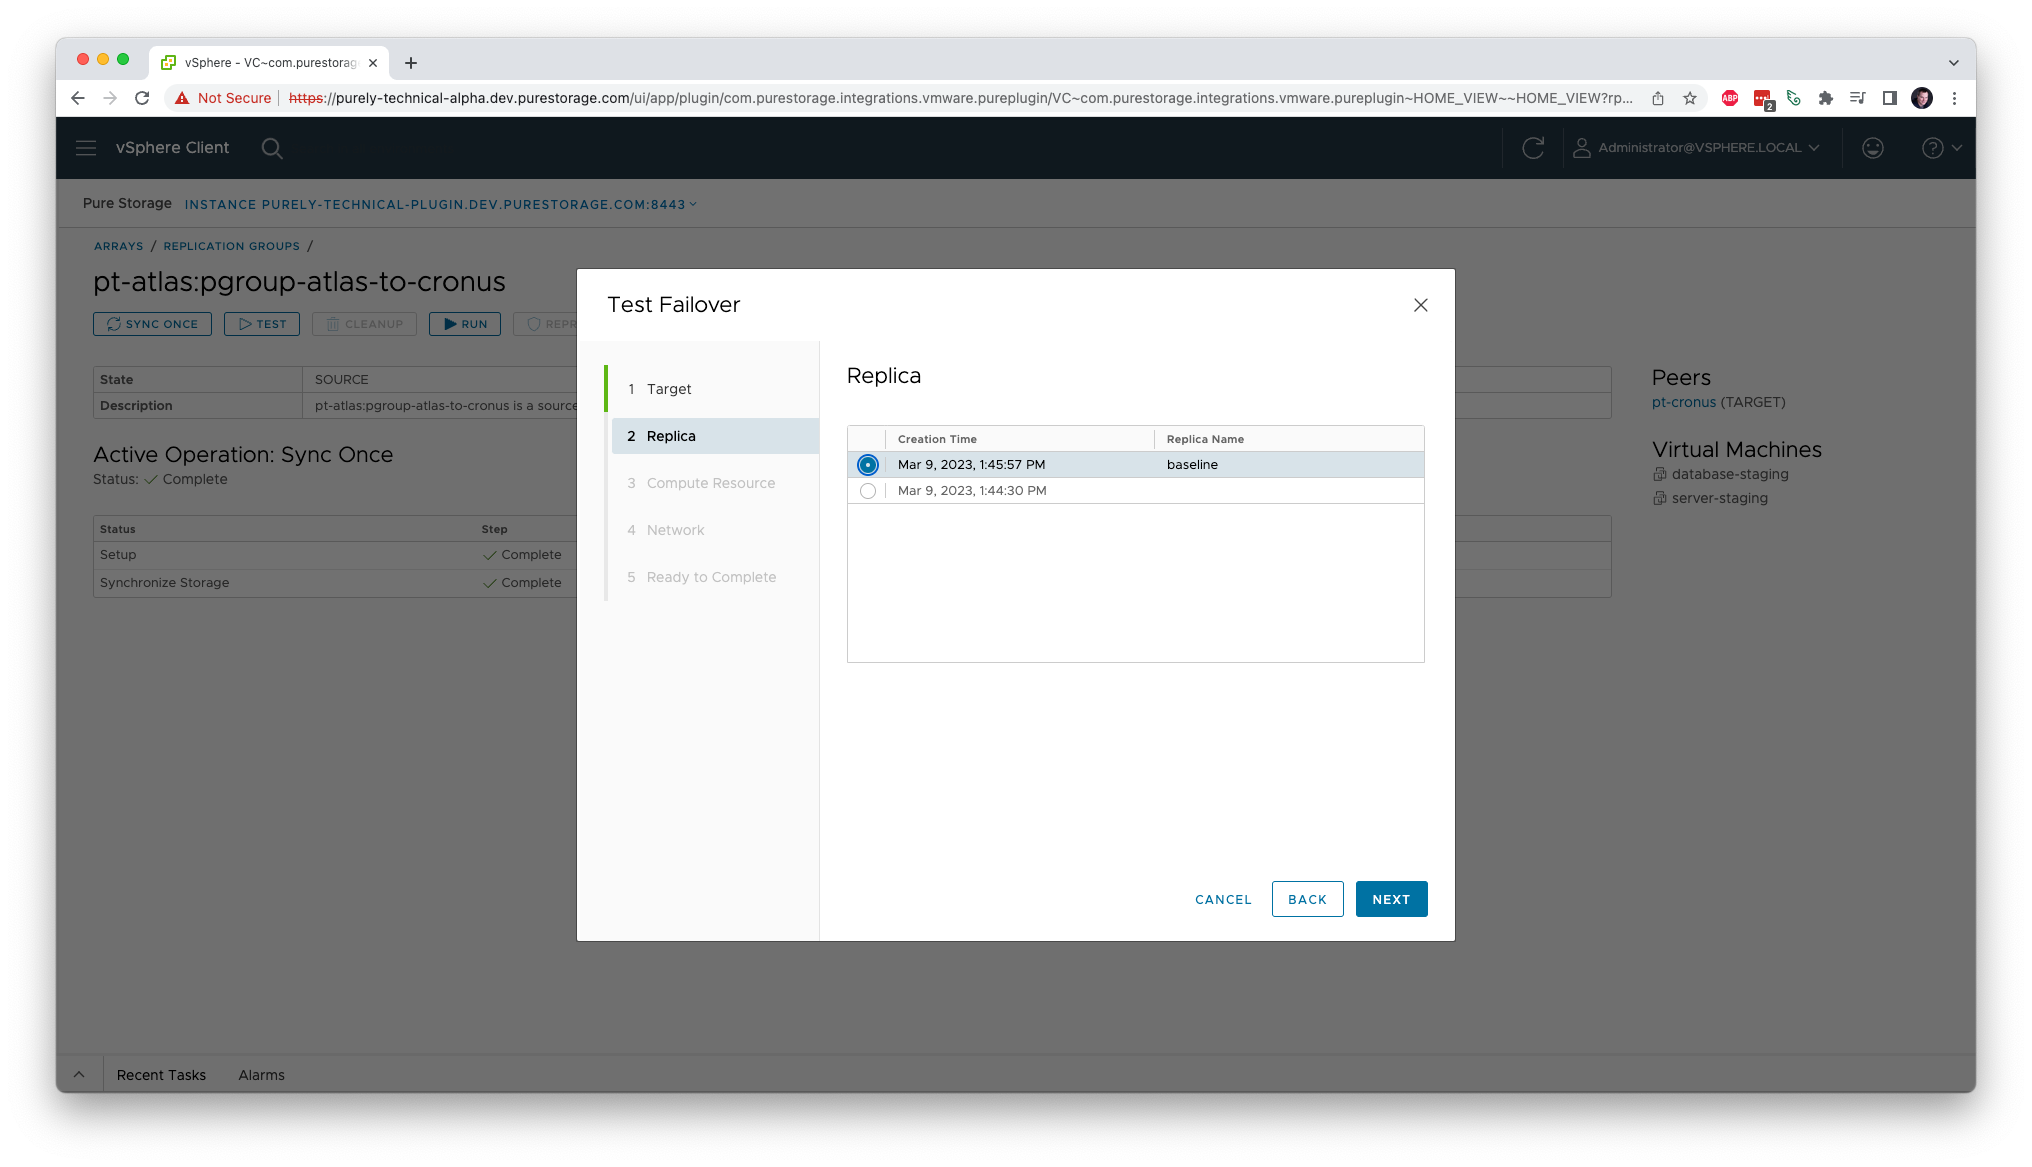
Once the target is selected, the next step is to choose the replica we want to restore. All replicas created by the pgroup are available to use, along with any replicas created manually with the Sync Once workflow.
Next, the target compute resource and networks are selected before a summary screen shows everything that’s about to happen.
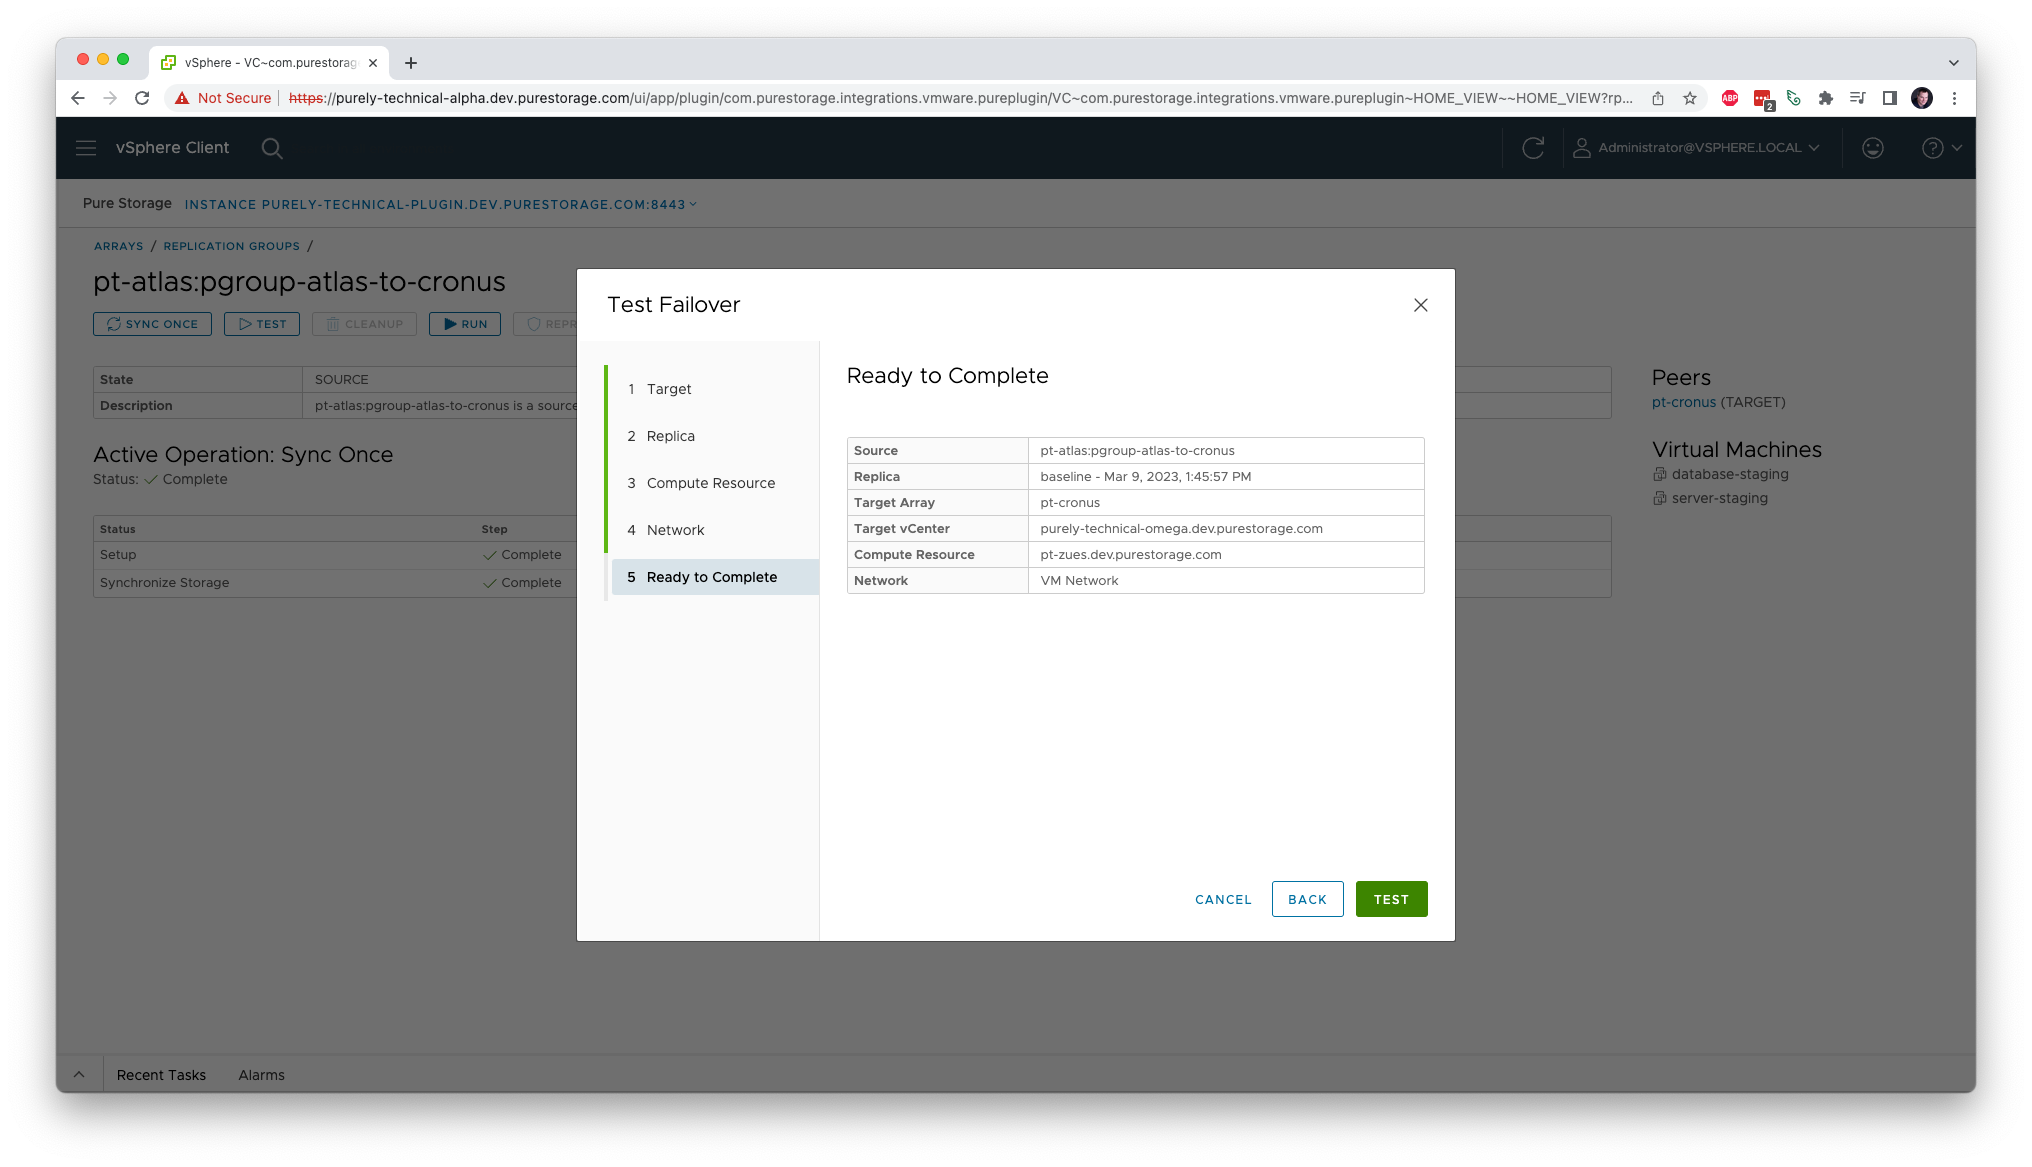
Clicking the Test button will begin the test. VMs will be created and configured on the target site. As always, the Replication Manager will show its progress through each of the steps. When everything is done, the test VMs will appear on the target site. You can run any validation you want on these VMs without worrying about the original source VMs being affected.
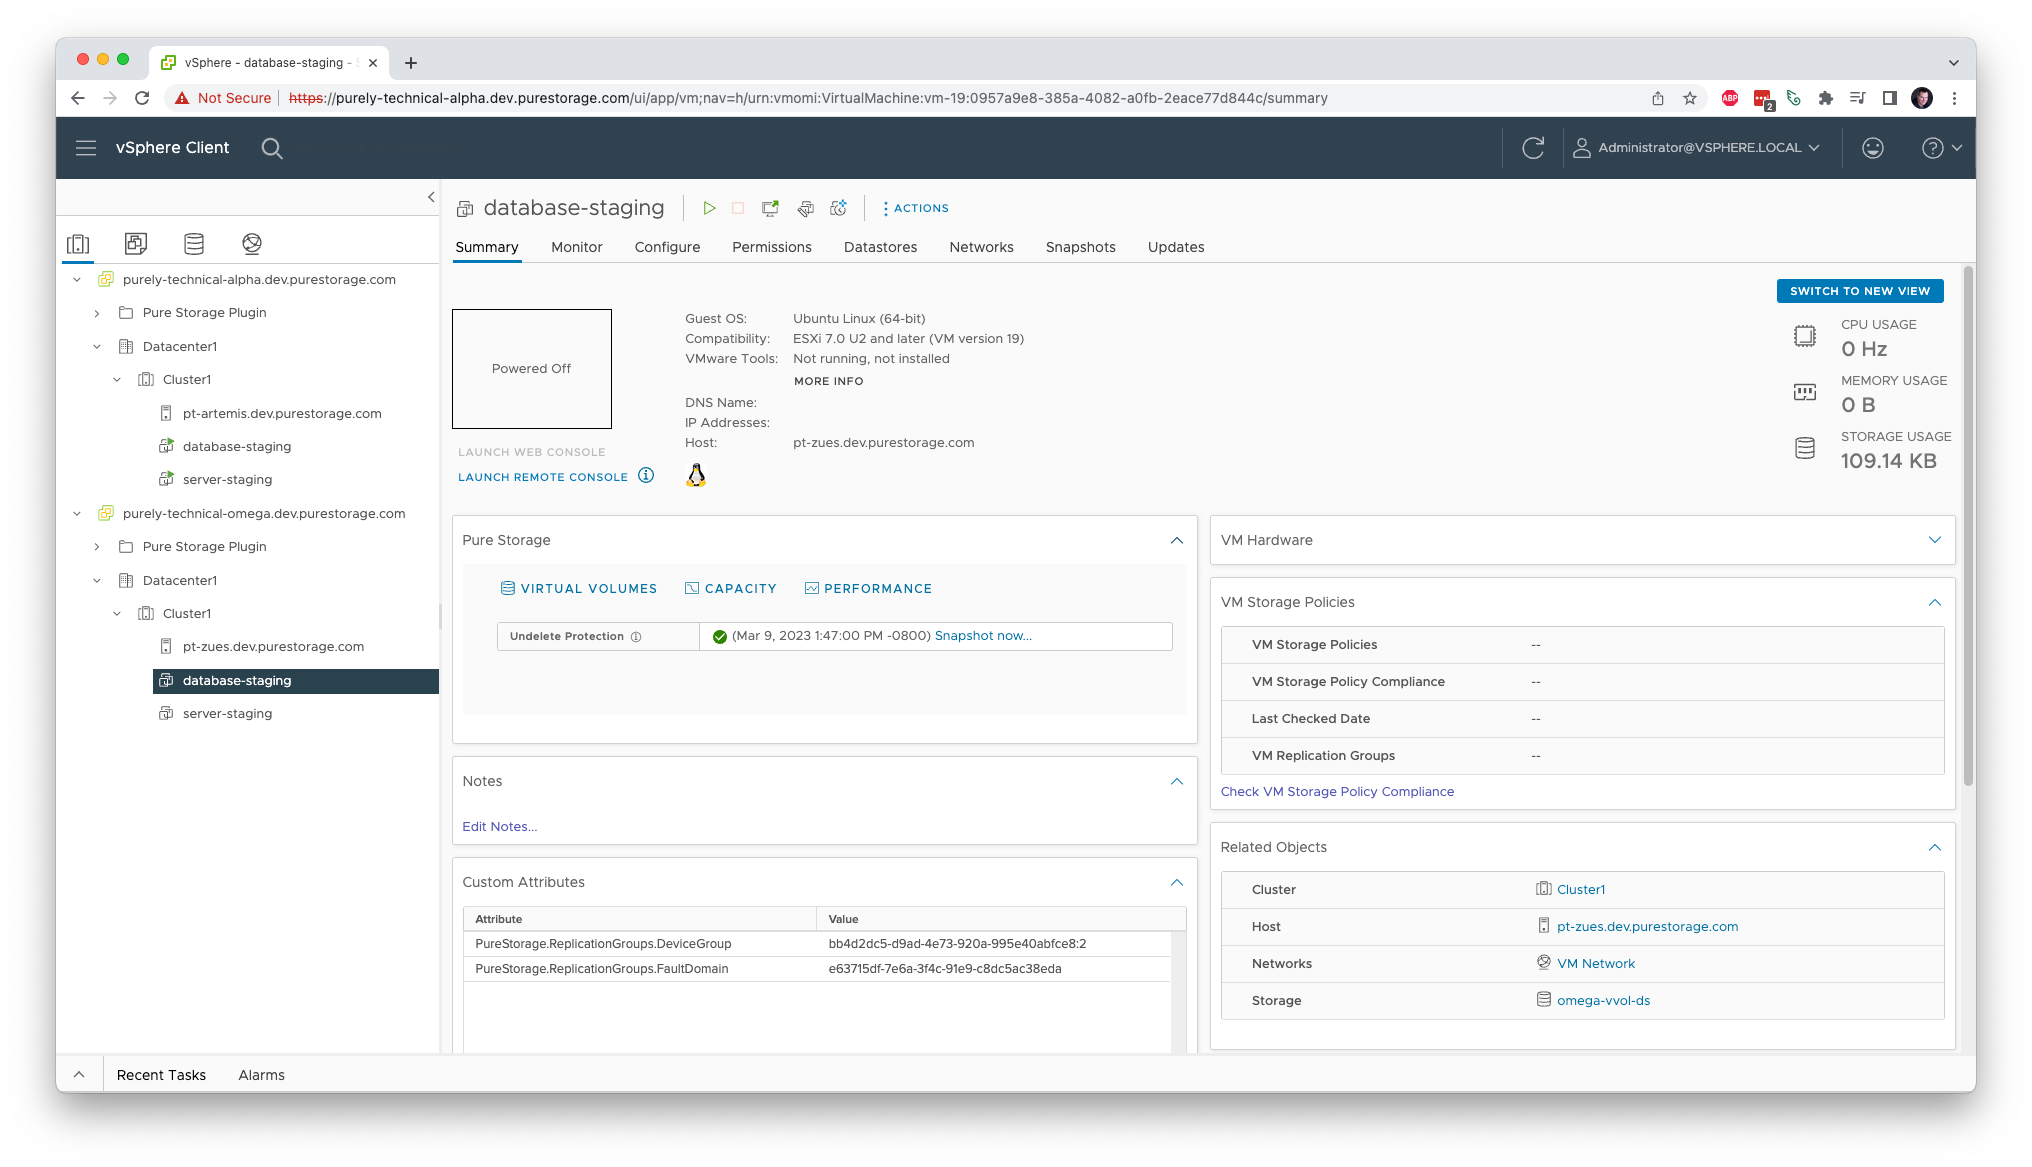
Once validation is complete, the Cleanup action will destroy these test VMs and free any resources they’re using. Tests and cleanups can be performed as many times as needed to ensure everything will work as expected when a full migration is performed.
Running a VM Migration
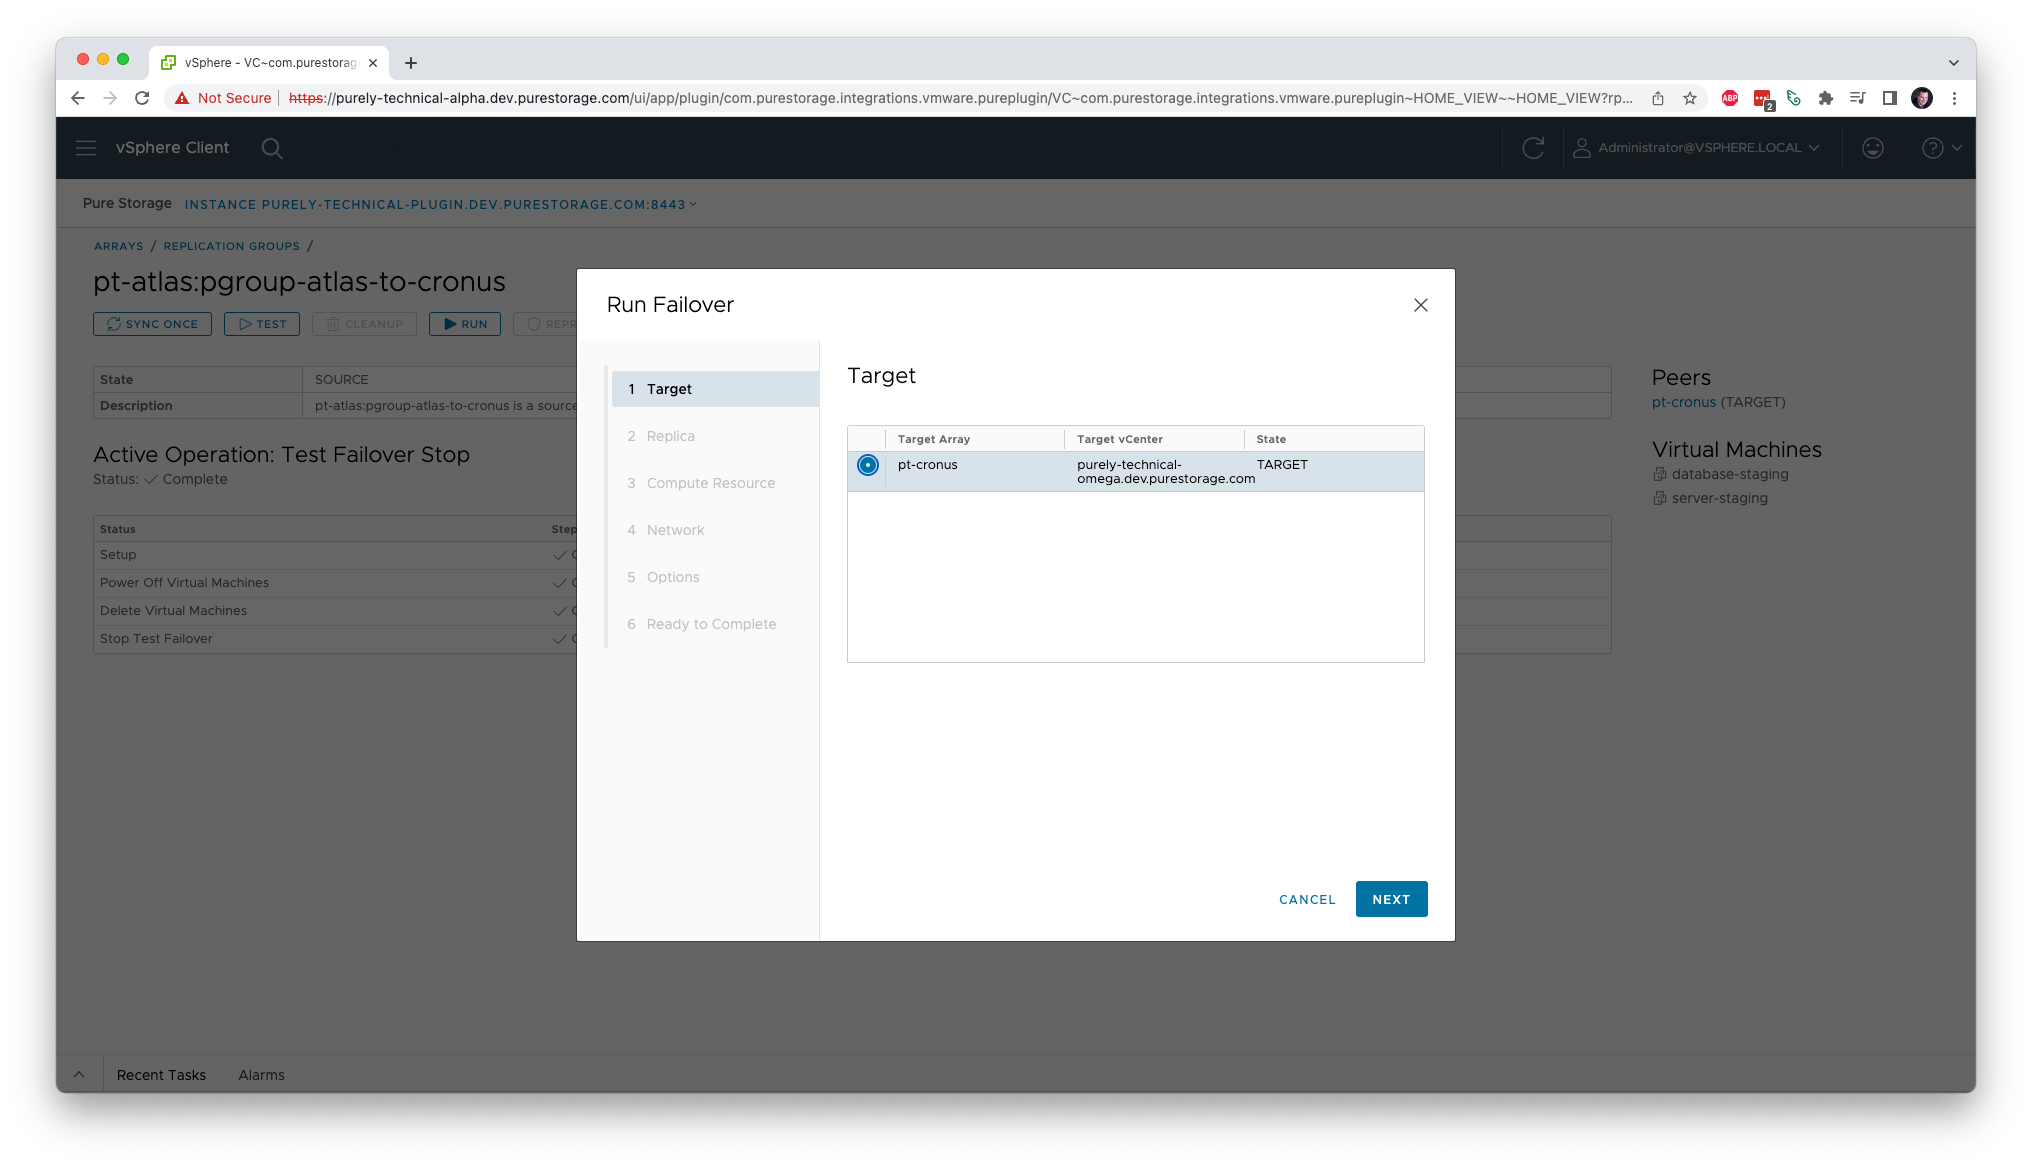
When the time comes to migrate the VMs in your replication group, the Run action is where you should look. This functions exactly like a test migration, but this time the VMs on the source site will be powered off and removed as part of the workflow. Once the Run is complete, all of your VMs will be up and running on the target site. The workflow is nearly identical to the Test workflow, starting with selecting the target.
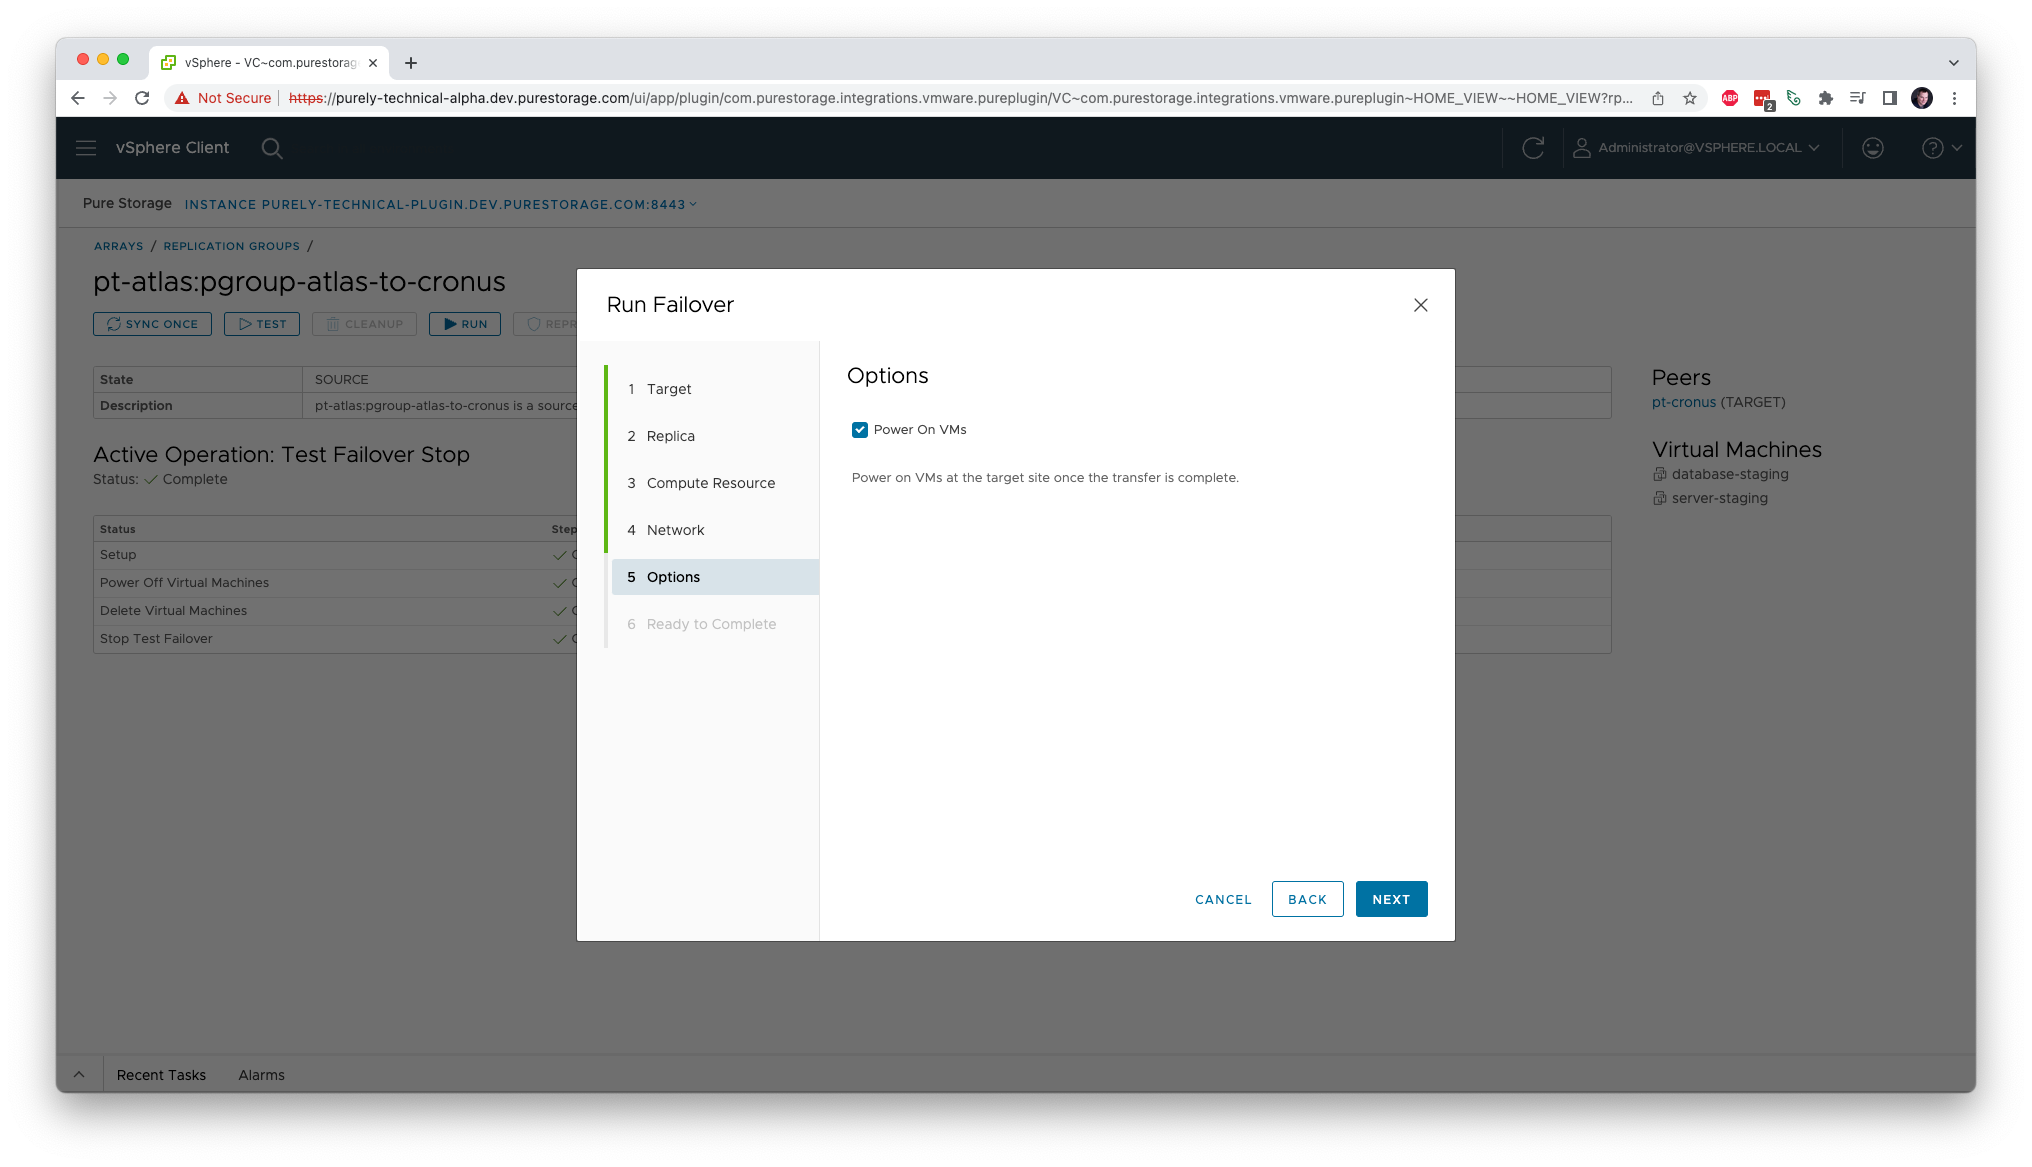
The main addition to the Run workflow is the option to power on VMs immediately. Choose this option if you’re confident that all VM configuration will be done once they’ve been created. If, on the other hand, some extra configuration is needed (for example, network remapping), you may uncheck this box and power on the VMs when you’re ready.
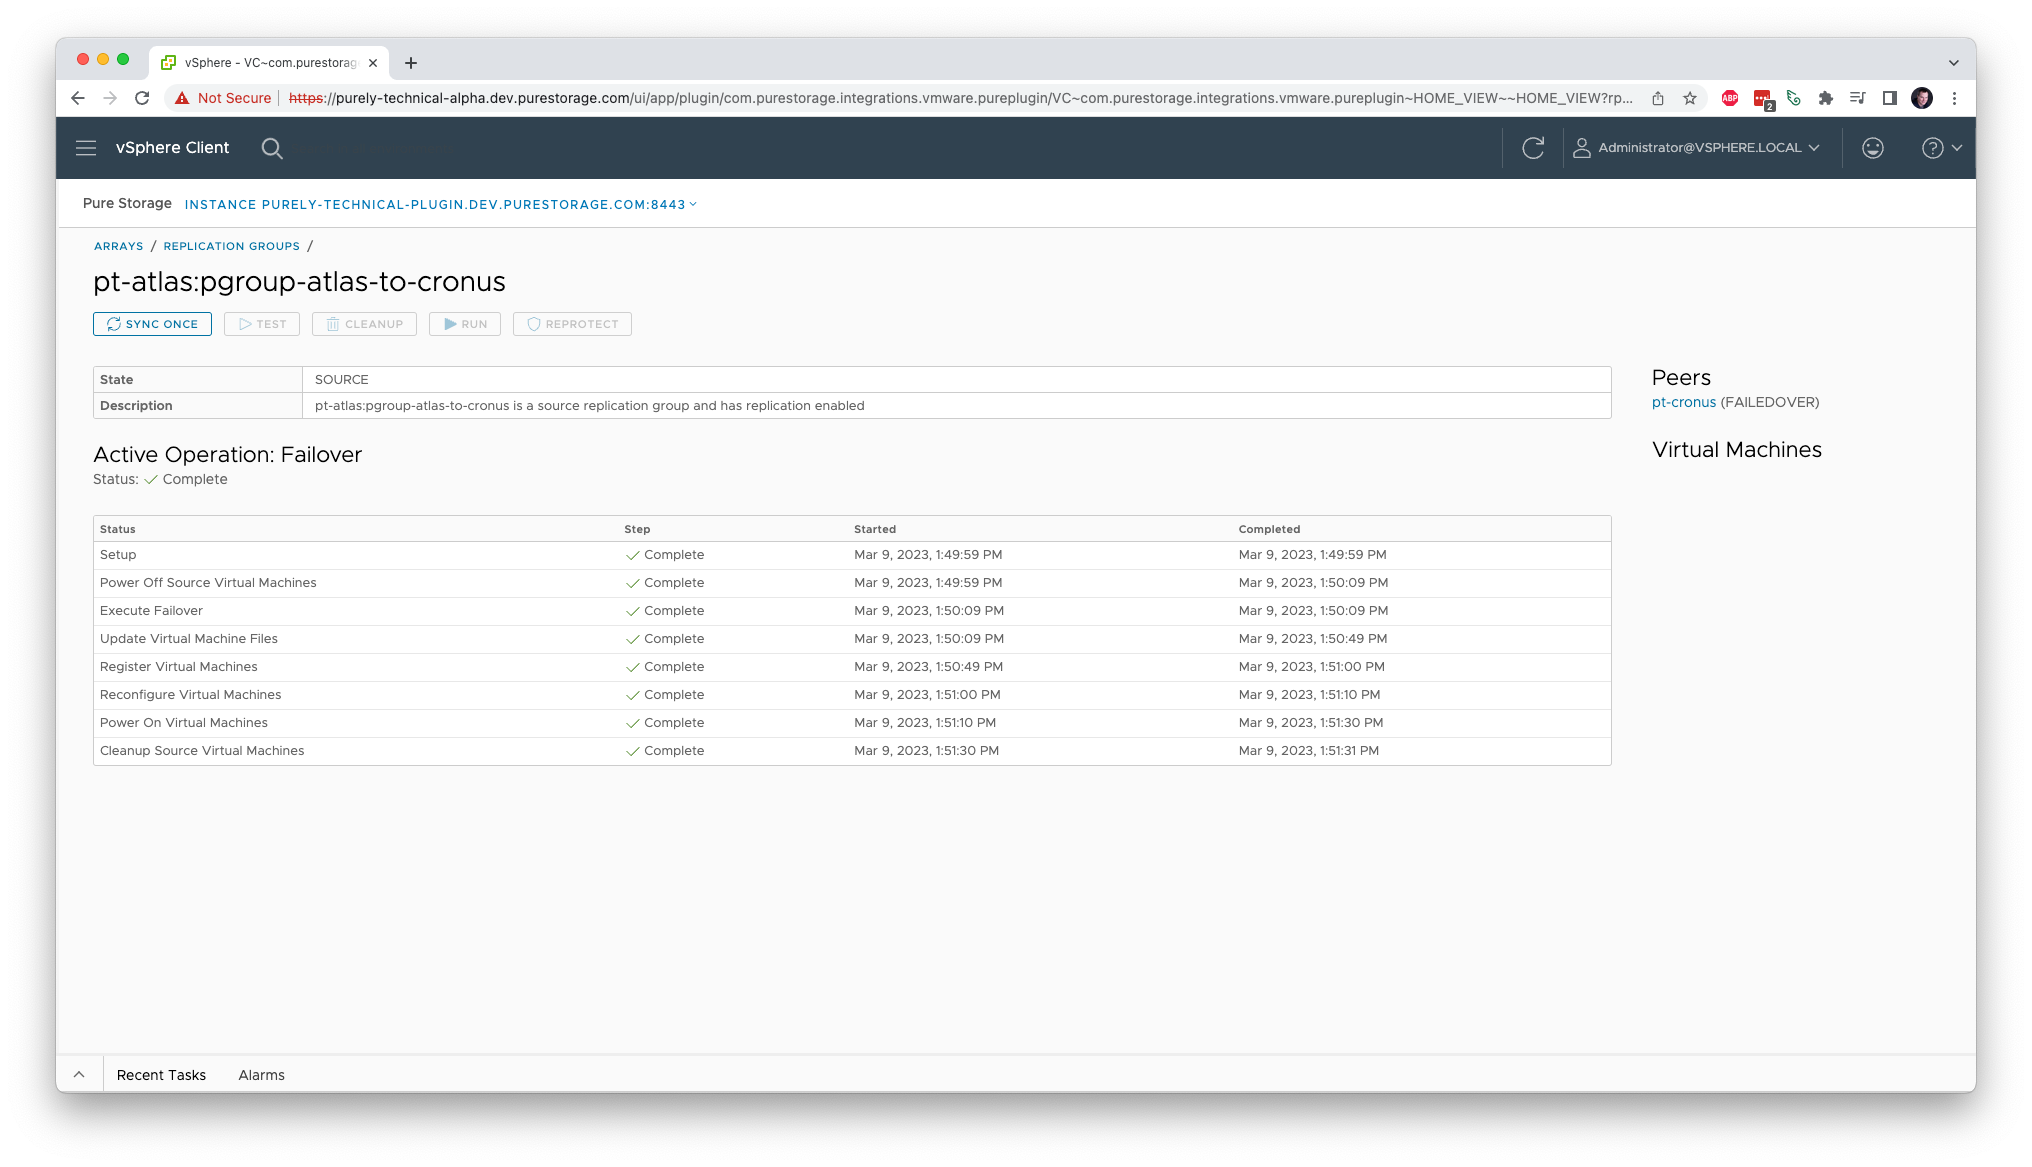
As always, the Replication Manager will show its progress through the workflow. When it’s complete, the VMs will be available on the target site.

Modern Hybrid Cloud Solutions
Seamless Cloud Mobility
Unify cloud and on-premises infrastructure with a modern data platform.
Finishing Up
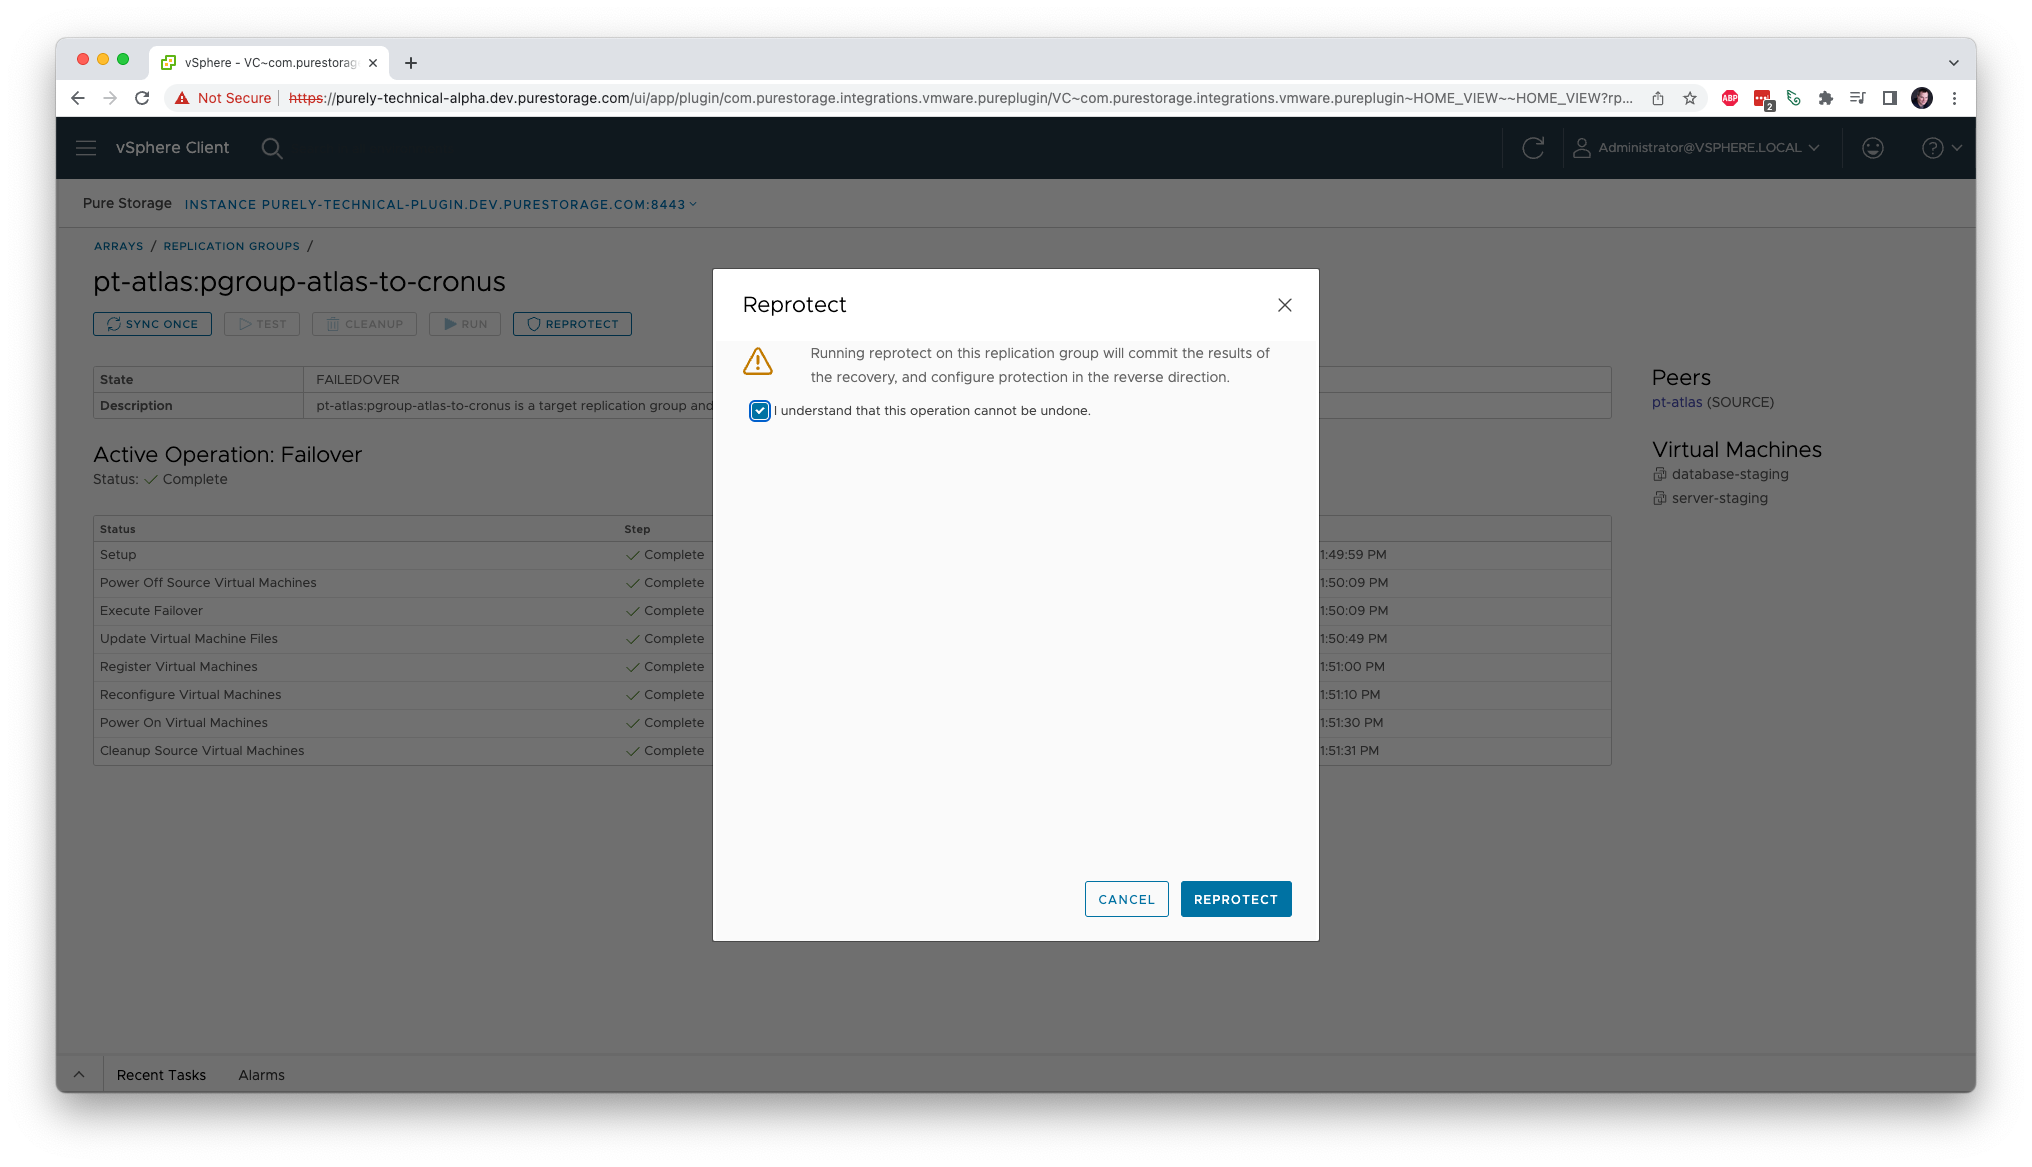
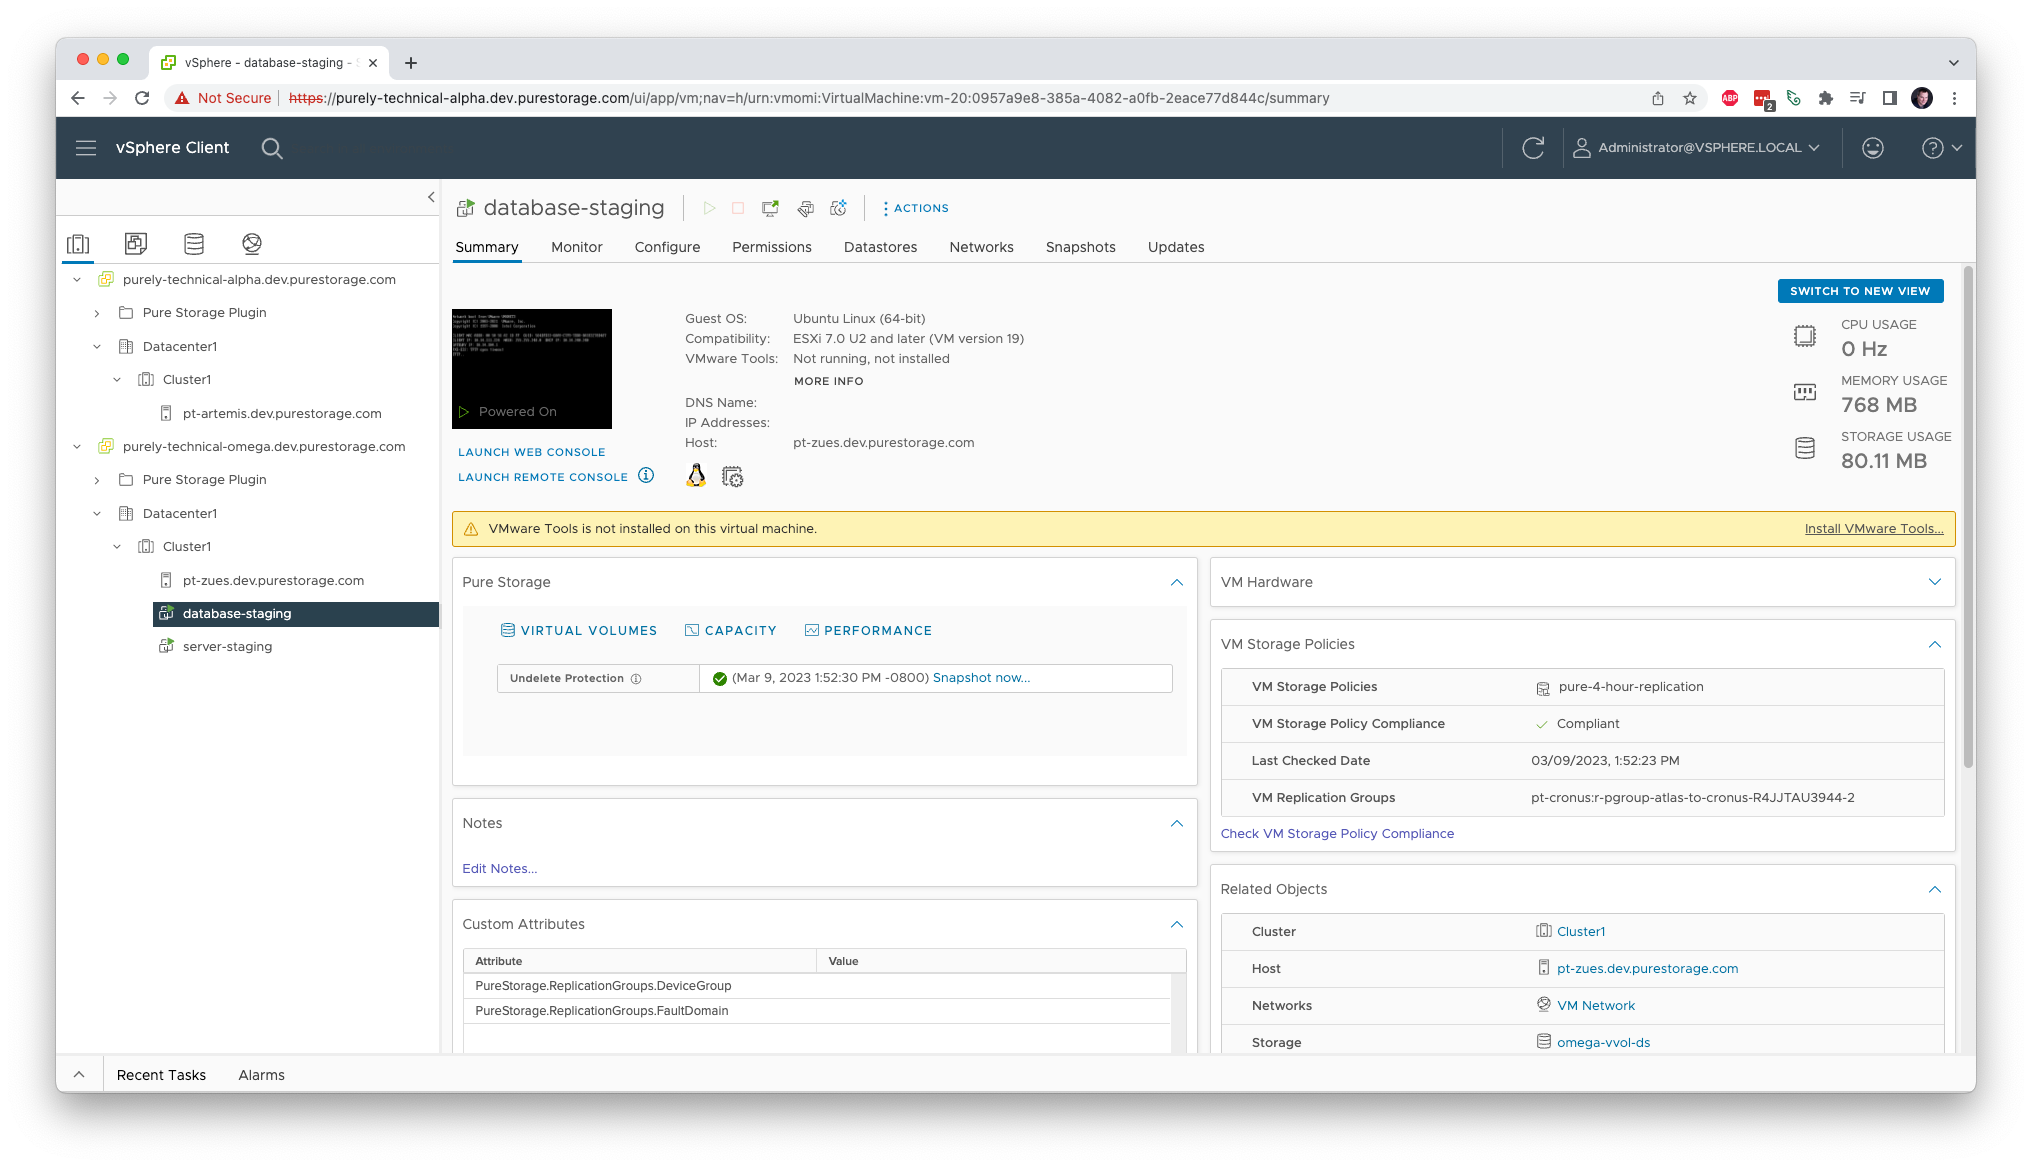
The final step in a migration is Reprotect, which will set the system up to migrate in the reverse direction. Simply click the Reprotect button and follow the steps in the dialog. Once complete, the VMs will be assigned an appropriate SPBM policy allowing any new data to be replicated back to the original source array.
Learn why FlashArray is the best storage for your vSphere environment
Closing Thoughts
I hope this example has shown how the new Replication Manager in the Pure Storage vSphere Plugin can help simplify backups and planned migrations. We’re very excited about the possibilities of this new feature and would love to hear your feedback on any additional workflows you’d like to see supported.

See SafeMode in Action
Take a closer look at how Pure protects your data
with built-in, immutable snapshots.


