Summary
Check out this a step-by-step guide to setting up SAN boot for an 8-node Windows Server 2012 R2 failover cluster using Pure Storage FlashArray, showcasing how to efficiently deploy a scalable, high-availability cluster with PowerShell integration.
Let’s say you want to work in the lab setting up a Windows Server 2012 R2 failover cluster (WSFC) using eight diskless servers. The goal is to configure SAN boot with a Pure Storage FlashArray. The result? A straightforward and efficient setup process that simplifies cluster deployment.
In this post, we’ll walk you through the steps to configure SAN boot for an 8-node cluster, highlighting how to leverage Pure Storage and PowerShell for seamless integration. This guide assumes that you have a basic understanding of SAN architecture and that your environment includes the necessary pre-requisites:
- A pre-installed and configured SAN fabric with Fibre Channel (FC) connectivity.
- Diskless servers equipped with Fibre Channel Host Bus Adapters (HBAs).
- A Pure Storage FlashArray configured and ready for use.
By the end of this guide, you’ll have a functional SAN-booted cluster, optimized for high availability and ready for further configuration. Let’s dive into the step-by-step process, starting with creating a bootable USB device for the operating system installation.
SAN Steps
1. Create bootable USB device with the operating system of your choosing. For this setup I am using Windows Server 2012 R2 Update. To create the bootable USB device I used Windows USB/DVD Download Tool.
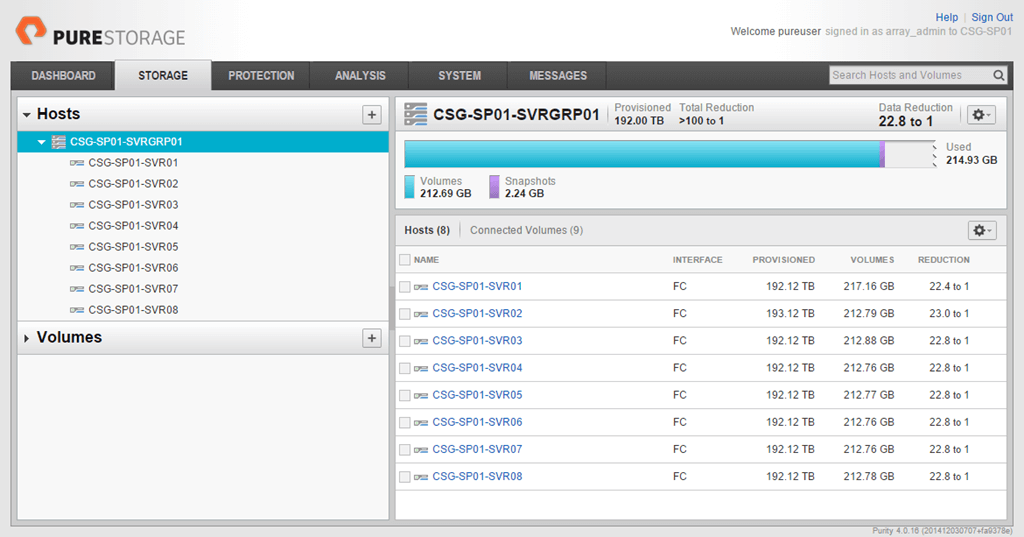
2. Create the Host Group and Hosts and Configure Fibre Channel WWNs. This can be completed using the Web Management GUI but being the PowerShell Guy, let’s see how this is done from script. The following PowerShell will create a new Host with the specified WWNs and then create a new Host Group and add the newly created Host(s).
|
1 2 3 4 5 6 7 8 9 |
Import–Module PureStoragePowerShell $FAToken = Get–PfaApiToken –FlashArray MY–ARRAY –Username pureuser –Password ******* $FASession = Connect–PfaController –FlashArray MY–ARRAY –API_Token $FAToken.api_token New–PfaHost –FlashArray MY–ARRAY –Name CSG–SP01–SVR01 ` –WWNList ’21:00:00:24:FF:59:FC:8C’,’21:00:00:24:FF:59:FC:8D’ –Session $FASession New–PfaHostGroup –FlashArray MY–ARRAY –Name CSG–SP01–SVRGRP01 –HostList CSG–SP01–SVR01 –Session $FASession |
Note
This above script shows just creating a single new Host. Although this can all be done using PowerShell you might find it easier to setup the individual Hosts using the Web Management GUI.
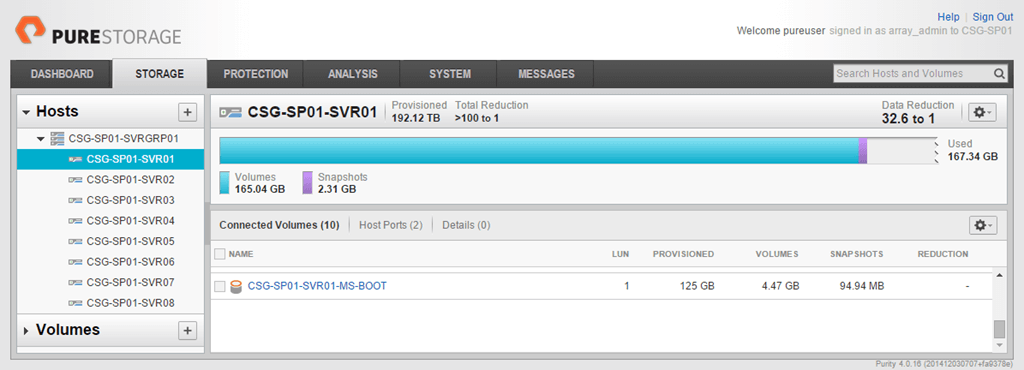
3. Create one (1) boot LUN on the Pure Storage FlashArray and connect to the new Host, CSG-SP01-SVR01. For this example I created a 125GB volume called CSG-SP01-SVR01-MS-BOOT where I will install Windows Server 2012 R2.
|
1 2 3 |
New–PfaVolume –FlashArray MY–ARRAY –Name CSG–SP01–SVR01–MS–BOOT –Size 125G –Session $FASession Connect–PfaVolume –FlashArray MY–ARRAY –Name CSG–SP01–SVR01 –Volume CSG–SP01–SVR01–MS–BOOT –Session $FASession |
Now the Pure Storage FlashArray is ready to be used as a target from the diskless server for SAN booting.
The next few steps need to be performed from the server to setup the fibre channel cards. I am using QLogic QLE2562 cards in my environment. QLogic provides a quick video tutorial on how to configure their cards for SAN booting.
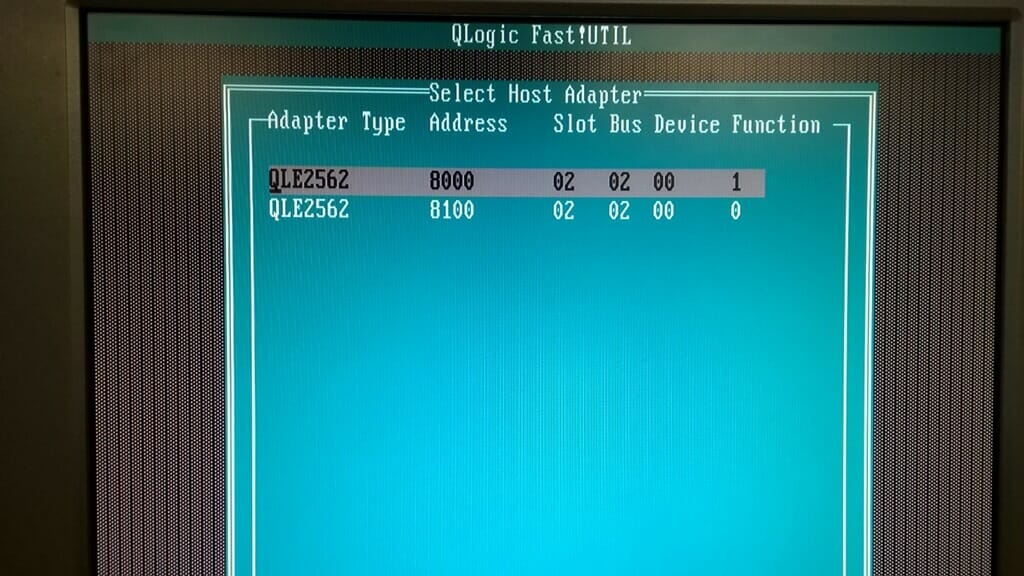
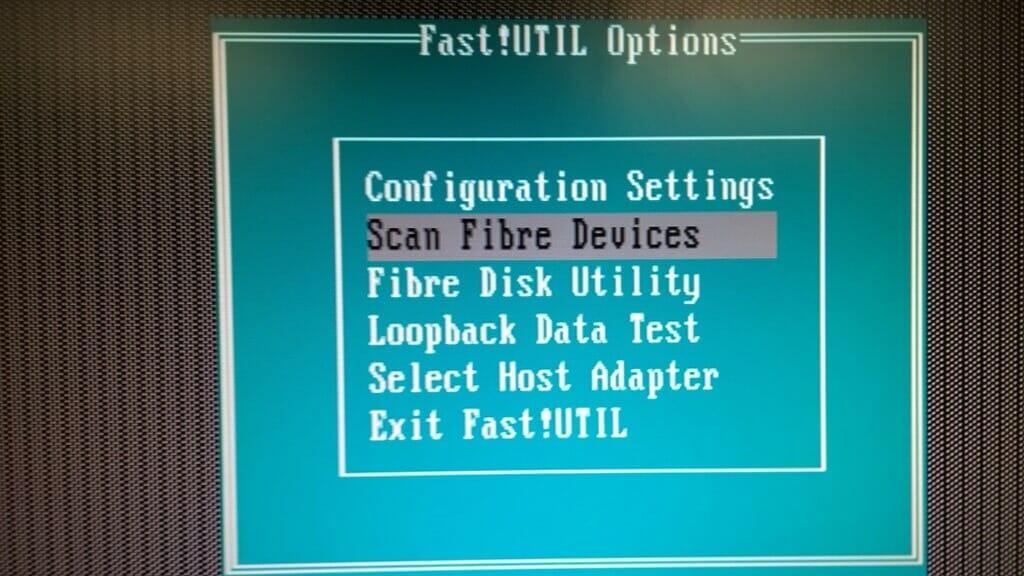
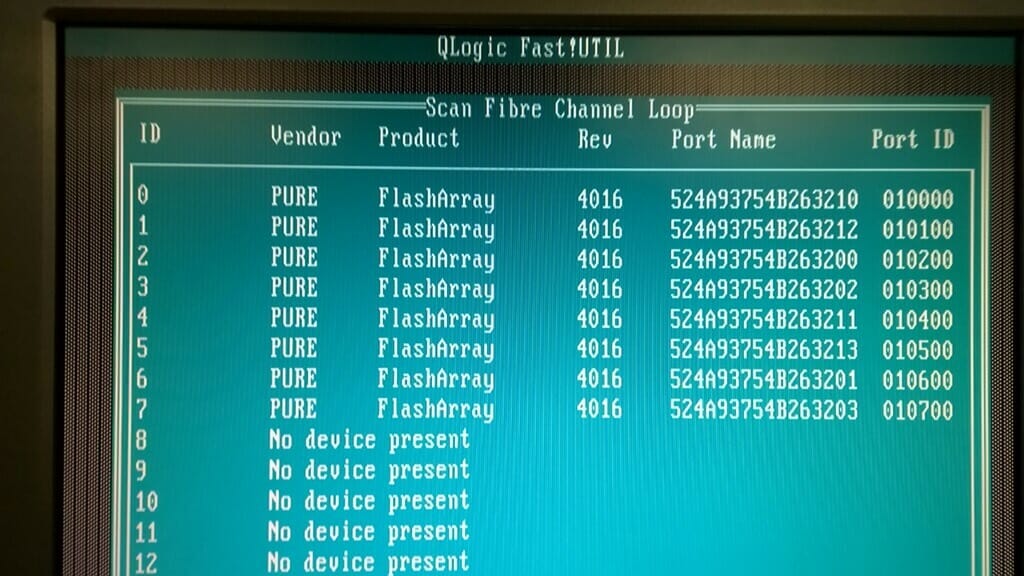
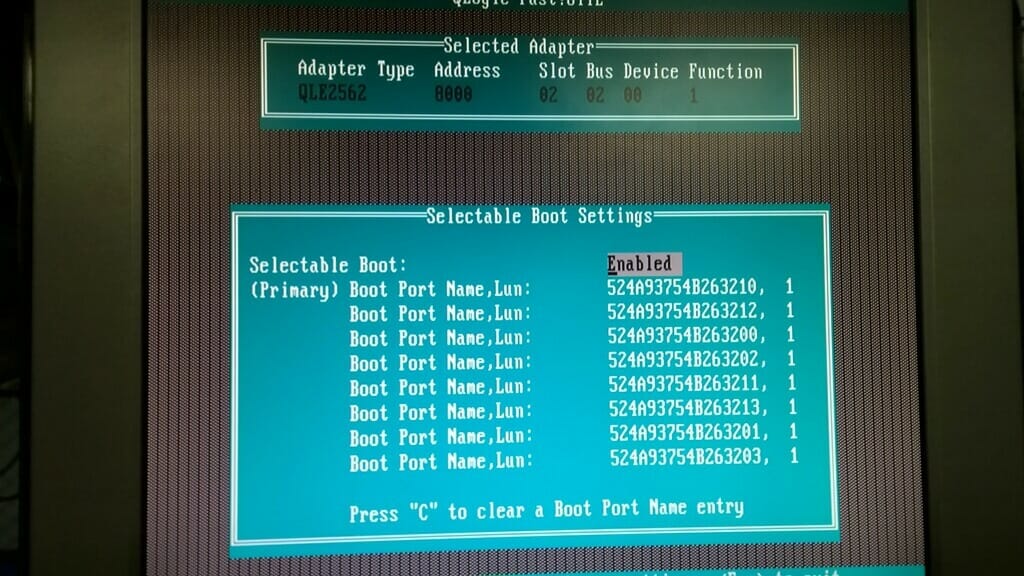
4. When the server boots up watch closely for the QLogic prompt (ALT+Q) to enter the QLE Fast!UTIL configuration. Once the QLogic card has the BIOS enabled (see video tutorial) you can enter the configuration for the individual ports (QLE2562 Function 1). Here we see Scan Fibre Devices once that is selected and a scan completed the QLogic card will show all of the paths to the volume created in Step 2.
Note
A great way to check connectivity is to perform the connection and then on the Pure Storage FlashArray disconnect the previously created volume, CSG-SP01-SVR01-MS-BOOT, from the Host and then perform a Scan Fibre Devices again. All of the paths should be gone, reconnect, rescan and the paths should be displayed.
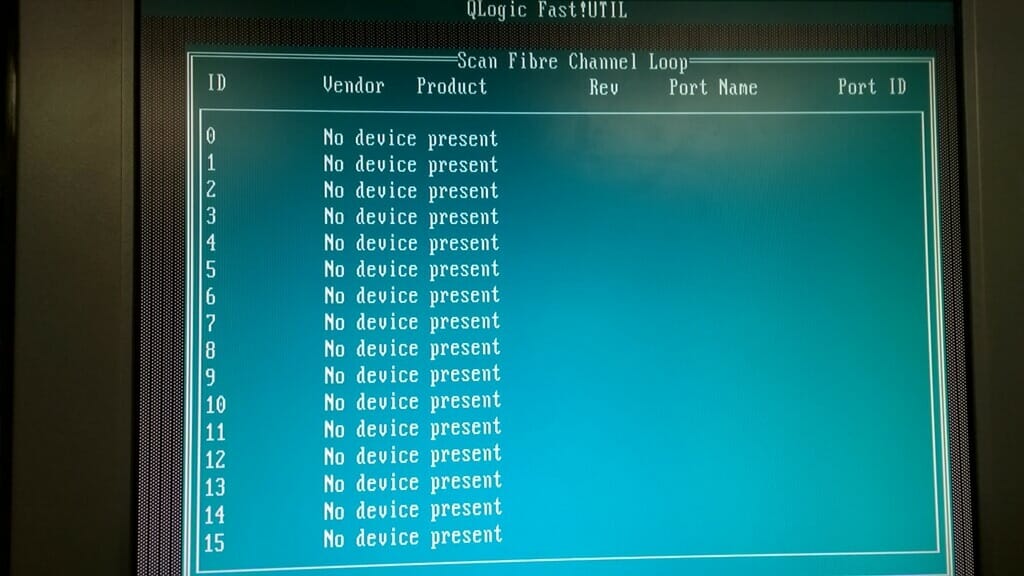
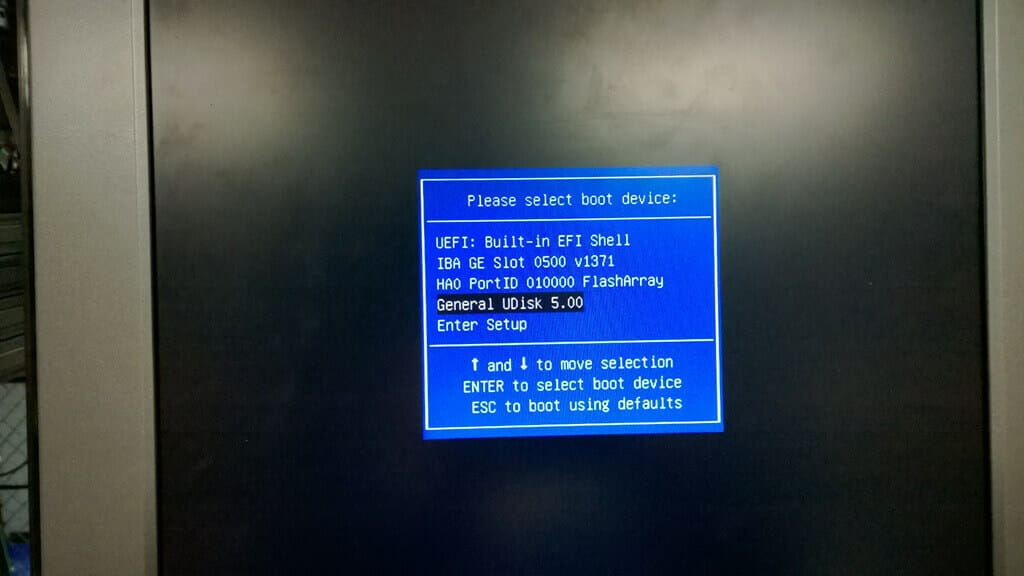
5. Next is to install Windows Server 2012 R2 on the attached SAN boot volume. In Step 1 a bootable USB device was created and we now need to plug that USB device into a port on the server and reboot. Upon rebooting I suggest entering into the servers boot menu to select the USB device.
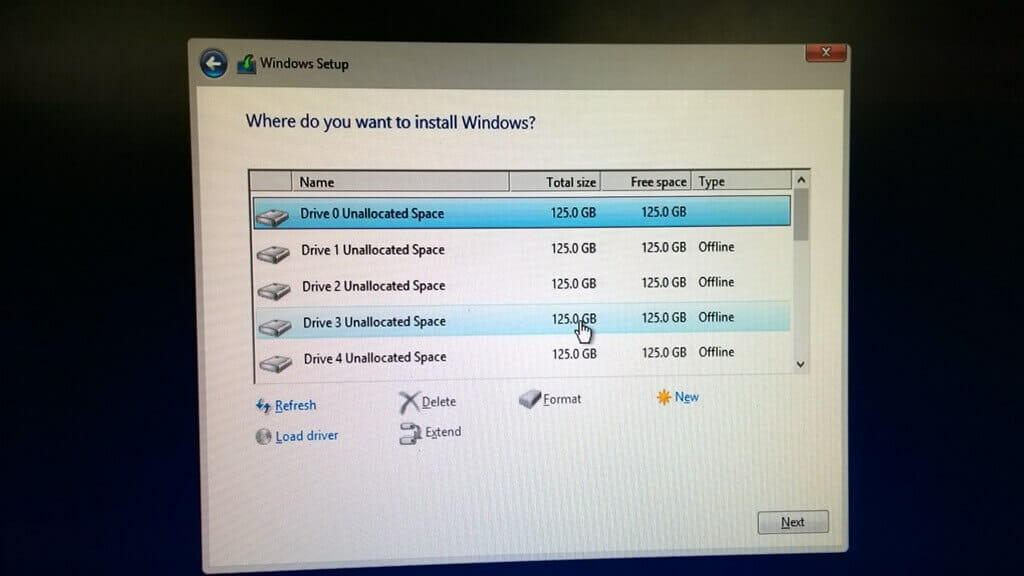
6. Once the server has rebooted and the USB device selected a normal Windows Server setup process will begin. When Windows Setup gets to “Where do you want to install Windows?” there will be multiple Offline paths shown to the 125.0 GB volume and a single Online path, select this path to install Windows Server.
7. After Windows Server completes the setup process then we can configure the install. For the environment I was building I added Failover Cluster, Hyper-V, set IEsec and Remote Desktop features. I did not specify any networking details, system name, or domain.
|
1 2 3 4 5 6 7 8 9 |
Add–WindowsFeature –Name Failover–Clustering Add–WindowsFeature –Name RSAT–Clustering–Mgmt Add–WindowsFeature –Name RSAT–Clustering–PowerShell Add–WindowsFeature –Name RSAT–Clustering–AutomationServer Add–WindowsFeature –Name RSAT–Clustering–CmdInterface Add–WindowsFeature –Name Hyper–V Add–WindowsFeature –Name RSAT–Hyper–V–Tools Add–WindowsFeature –Name Hypev–V–Tools Add–WindowsFeature –Name Hyper–V–PowerShell |
8. Now that we have a base Windows Server 2012 R2 installed and partially configured the next step is to make this boot volume available to the other seven (7) servers. Shutdown the Windows Server 2012 R2 instance just installed.
9. Once Windows Server is confirmed to be shutdown then we can take a snapshot of the volume, CSG-SP01-SVR01-MS-BOOT and create seven (7) new volumes from that snapshot and connect them to the corresponding Host. Notice the ForEach loops starts at 2 since there is already a CSG-SP01-SVR01-MS-BOOT volume created which we are using as the master to create the other volumes.
|
1 2 3 4 5 6 |
New–PfaSnapshot –FlashArray MY–ARRAY –Volumes CSG–SP01–SVR01–MS–BOOT –Suffix MASTER –Session $FASession ForEach ($i in 2..8) { New–PfaVolume –FlashArray MY–ARRAY –Name CSG–SP01–SVR0$i –Source CSG–SP01–SVR01–MS–BOOT.MASTER –Session $FASession Connect–PfaVolume –FlashArray MY–ARRAY –Name CSG–SP01–SVR0$i –Volume CSG–SP01–SVR0$i–MS–BOOT –Session $FASession } |
Once the above PowerShell has been run each of the CSG-SP01-SVR0n, where n = 1-8, will have the volumes attached and ready for use. Simply turn on or reboot the servers and everything should be up and running for further configuration.
Setting up SAN boot for an 8-node Windows Server 2012 R2 failover cluster using Pure Storage was a straightforward process, demonstrating the efficiency and flexibility of modern SAN solutions. By leveraging PowerShell scripting and Pure Storage’s intuitive management tools, the setup process was not only efficient but also scalable for larger clusters.
However, it’s essential to acknowledge that some of the information and steps outlined in this guide may not be entirely relevant for 2025. For instance:
- Operating System: Windows Server 2012 R2 is no longer supported by Microsoft as of October 2023. Users should consider deploying more current server operating systems, such as Windows Server 2019 or 2022, to ensure access to the latest features, security updates, and support.
- Hardware: The guide references QLogic QLE2562 Fibre Channel HBAs, which may not be optimal for newer server hardware. Modern Fibre Channel adapters, such as those supporting NVMe-oF (Non-Volatile Memory Express over Fabrics), can offer significantly improved performance and lower latency.
- Storage Infrastructure: While the Pure Storage FlashArray remains a robust solution, advancements in software-defined storage and hybrid-cloud integration may offer alternative configurations for SAN boot or even render SAN boot unnecessary in certain scenarios, such as deployments leveraging local NVMe storage or diskless compute nodes in cloud-first architectures.
Considerations for Modern Environments
If you’re deploying a similar cluster in 2025 or beyond, here are some additional factors to consider:
- Operating System Compatibility: Ensure your SAN and storage solutions are certified for the latest Windows Server versions and that your hardware drivers are up to date.
- NVMe-over-Fabrics: Evaluate NVMe-oF solutions for faster storage access and enhanced scalability compared to traditional Fibre Channel setups.
- Automation and Orchestration: Modern tools like Ansible, Terraform, and advanced PowerShell modules can further streamline deployment and configuration, especially for larger environments.
- Hybrid and Cloud-Ready Design: Consider hybrid solutions that integrate on-premises SAN environments with cloud platforms, offering more flexibility and disaster recovery options.
As technology continues to evolve, it’s critical to adapt best practices to incorporate advancements in hardware, software, and storage methodologies. The core principles of this guide remain applicable—ensuring reliability, performance, and scalability in your clustered environment. By integrating modern tools and technologies, you can future-proof your infrastructure while maintaining operational efficiency.

How Storage Plays a Role in Optimizing Database Environments


