I’ve been presenting about the integration of Pure Storage® technology with Cisco Intersight at events across the globe. So it’s time to hit the blog and share more details here. Most importantly, I want to show you how to get started using the Pure Storage integration into Cisco Intersight. In this the third post in the series, we’ll cover deployment and configuration of Intersight Assist.
Before deploying the Intersight Assist VM there are some specific dependencies that need to be considered so make sure you have the following before you start:
- Firewall access (to allow external access from the Intersight Assist VM to Intersight over HTTPS/443) – an existing proxy can be used to negate this dependency!
- Internal DNS server access (so you can add/update the required records for Assist to function)
- Intersight Assist Appliance OVA (see this post for more details on how to obtain the right version for the beta)
- vCenter with sufficient credentials (to be able to deploy the Intersight assist OVA)
- Hostname and IP Address details for the Intersight Assist VM (2 hostnames, 1 IP Address).
Intersight Assist is delivered as a virtual appliance that is deployed on-premises and configured to act as a ‘proxy’ between local device instances (in this case FlashArrays) and intersight.com. Intersight Assist collects all inventory/health details from locally claimed devices and provides this information to intersight.com in a secure manner. Intersight Assist also enables intersight.com to orchestrate the configuration of FlashArray.
SYSTEM REQUIREMENTS
The current version of Intersight Assist VM (when this blogpost was published) requires the following system resources:
Supported Hypervisors: VMware ESXi 6.0 and higher VMware vSphere Web Client 6.5 and higher
Storage: 500 GB (thin provisioning is recommended to optimize disk storage usage)
Memory: 32 GB
vCPU Cores: 16
CONNECTIVITY REQUIREMENTS
The Intersight Assist VM uses HTTPS (port 443) for external communications so you’ll need to update your firewall to allow outbound access to the following sites:
svc.intersight.com
svc.ucs-connect.com
svc-static1.intersight.com
svc-static1.ucs-connect.com
cisco.com (for Cisco URLs, licensing and software downloads).
For more details make sure you review the Intersight Assist Getting Started Guide.
DNS CONFIGURATION
Intersight Assist requires an A record (including a PTR record) be created on your DNS server (e.g. intersight-assist.flashstack.int)

Intersight Assist also requires a CNAME with dc- added to the beginning referencing the A record created above (e.g. dc-intersight-assist.flashstack.int)

DEPLOY OVF TEMPLATE
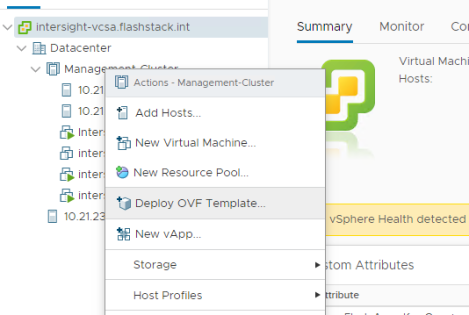
Next we will go through a standard vCenter deployment of a VM via the ‘Deploy OVF Template…’ process:
Right-click on the Cluster/Host object and select Deploy OVF Template.
On the Select an OVF Template page, specify the source location for the Intersight Assist OVA, click Next.

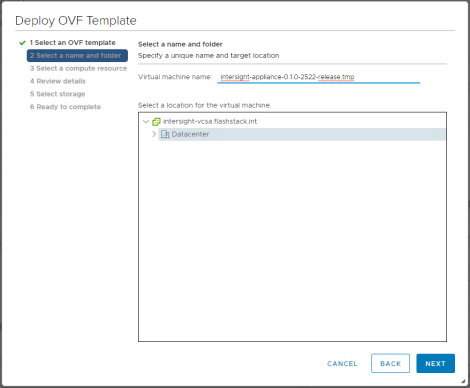
On the Select a name and folder page, add/edit the Name and Location for the virtual appliance and click Next.
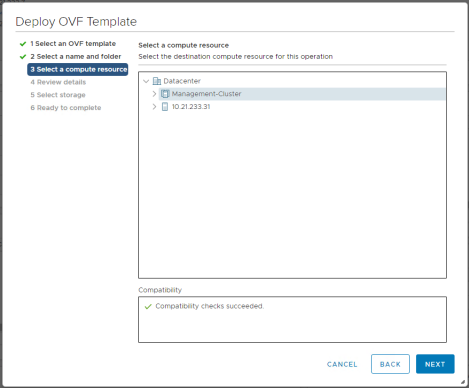
On the Select a compute resource page, select the specific Host (ESX station) or Cluster you want to deploy and click Next.
On the Review details page, verify the OVA template details and click Next (No input is necessary).
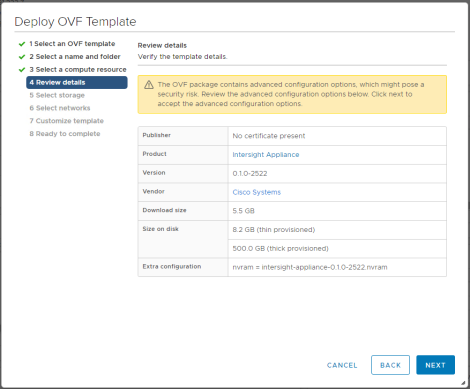
On the select storage page, select a destination datastore for the VM files, use the Thin Provision virtual disk format and click Next.

On the Select networks page, for each network that is specified in the OVF template, select a source network and map it to a destination network and click Next.
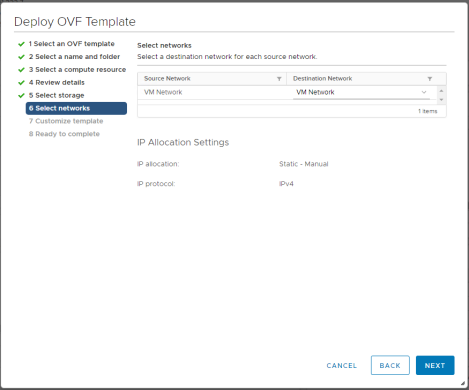
On the Customize Template page, customize the deployment properties of the OVF template, and click Next.

As part of deploying the OVF template make sure you configure networking including:
- IP Address
- Net Mask
- Default Gateway
- DNS Domain
- DNS Servers
- Administrative Password
- NTP Server.
Also don’t forget to check Enable Intersight Assist mode.

On the Ready to complete page, click Finish to start the deployment.
Once you’ve completed the deployment, power-on the VM and give it some time to come up (you might want to head off and do something else here as it can take awhile!). You can copy the FQDN of the VM into a browser to track deployment progress.

CLAIM INTERSIGHT ASSIST
Once the appliance setup has completed, you’ll be redirected to the https://FQDN of the Intersight Assist virtual appliance to start the configuration.
Firstly we need to change the password of the appliance, click Save & Continue.
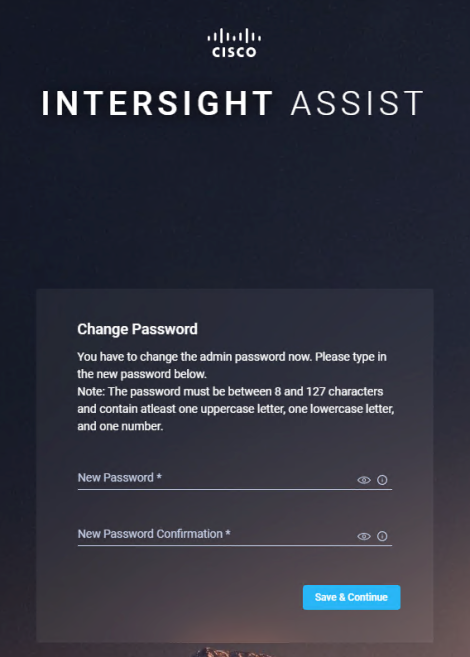
Now we’re ready to claim the Intersight Assist device, at this point you can also go into Settings and configure a proxy if required.

Login to https://intersight.com and in the Devices tab on the left select Claim a new Device.

For the Intersight Assist Virtual Appliance we will perform a Direct Claim just like we would for any other device being connected to intersight. Cut & Paste the Device ID along with the Claim Code and select Claim.

You can now see the Intersight Assist Appliance has been connected. What’s also interesting is that if you look at the menu on the left there are a few new options available Storage and Orchestration.

JOIN THE CISCO INTERSIGHT BETA
You need to sign up for the beta program to get access to the Cisco Intersight Assist virtual appliance. Please contact your Cisco sales team to request access. As part of the beta process, you can try out the new integration if you already have a Cisco Intersight Essentials Subscription. If you haven’t subscribed to Cisco Intersight yet, you can sign up for an “all-you-can-eat” 90-day free trial that provides Essentials-level access, which enables you to try the integration.

Modern Hybrid Cloud Solutions
Seamless Cloud Mobility
Unify cloud and on-premises infrastructure with a modern data platform.
STAY TUNED
This post is the third of a multi-part series. Read my released posts here:
- Cisco Intersight Pure Storage Integration – Overview
- Intersight Signup and Initial Device Claim
- Intersight Assist Deployment and Configuration
Future posts will cover:
Inventory Visibility, Health Status and Active Management of Pure FlashArray.
The AI Takeover
From creating better lives for pets to crafting new solutions for our customers, take a look at how AI is revolutionizing just about everything.


