Summary
If you have a multi-array environment, you can freeze database write I/O to take coordinated snapshots across volumes on two FlashArray systems using the T-SQL snapshot backup feature in SQL Server 2022.


This article first appeared on Anthony Nocentino’s blog. It has been republished with the author’s credit and consent.
In this post, the fourth in the series, I want to share an example demonstrating SQL Server 2022’s T-SQL snapshot backup feature in a scenario where a database spans multiple storage arrays. If you’re dealing with multi-array environments, you’ll appreciate how this technique freezes database write I/O to take coordinated snapshots across volumes on two FlashArray™ systems. In this post, I’ll walk you through the process, point out some of the script’s key elements, and show you how long the write I/O pause takes.
The Scenario
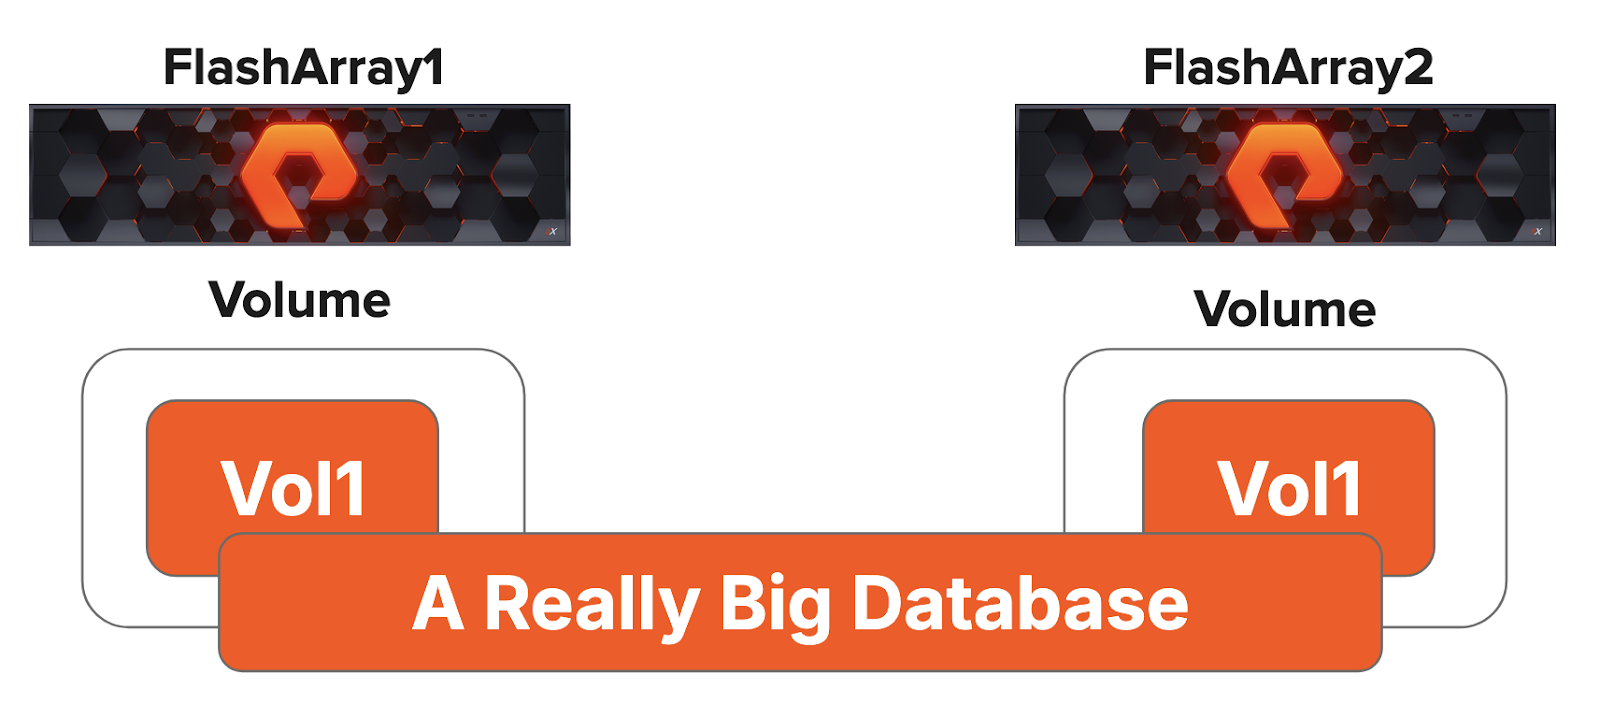
Imagine you have a database called MultiArraySnapshot that is distributed across two separate volumes, each located on its own Pure Storage® FlashArray system. This setup can be beneficial for managing large, mission-critical environments where performance and data consistency are essential. The challenge lies in coordinating a snapshot backup that allows both arrays to capture a consistent view of the data simultaneously. And using SQL Server 2022’s T-SQL snapshot backup feature we can do just that…let’s dig in.
Figure 1: A database with files on two FlashArray systems.
Overview of the Process
The process is straightforward: Freeze the database using T-SQL snapshot, take snapshots of each array, and then execute a metadata-only backup to document the snapshot details. This metadata backup automatically thaws the database.
Setting Up the Environment
First, we import the necessary modules and define connection variables for our SQL Server instance, the two FlashArray systems, and various volumes. Note how we specify details such as the target disk serial numbers and the backup share path:
We establish a PowerShell remoting session using New-Session and create a persistent SMO connection with Connect-DbaInstance. This connection is essential as it remains open until the backup metadata is written.
Examine the Database File Layout
Next, let’s use Get-DbaDbFile to get detailed information about the database files for the specified database. In our example here P:\SQLDATA1\MultiArraySnapshot.mdf is located on FlashArray1 and Q:\SQLLOG1\MultiArraySnapshot_log.ldf is located on FlashArray2.
Connecting to the FlashArray Systems
Now, we authenticate against the REST APIs of our FlashArray systems using credentials stored locally. This enables us to perform snapshot operations on the arrays.
Freezing the Database
To create a point-in-time snapshot across the two FlashArray systems, we first temporarily suspend write I/O by executing the command ALTER DATABASE [MultiArraySnapshot] SET SUSPEND_FOR_SNAPSHOT_BACKUP = ON. This action puts the database in a stable state, preparing it for the snapshots from both FlashArray systems. During this process, you can still read from the database.
Taking the Snapshots
With the database frozen for write I/O, we now take snapshots on both arrays using New-Pfa2ProtectionGroupSnapshot. These snapshots capture the protection group state.
Metadata Backup and Unfreeze
Next, a metadata backup is created. This is the crucial step in generating a backup file (we’ll use this later when restoring this database), automatically unfreezing the database, and recording that snapshot in the database’s backup history.
You can check the status of the snapshot backup by reviewing the backup history from the instance using Get-DbaDbBackupHistory.
Let’s Do Something Not So Great…
Now, for demonstration purposes, let’s drop a table.
Performing a Restore from a Snapshot Backup on Two Arrays
After dropping the table, let’s restore the whole database from a snapshot. The first thing we need to do is take the database offline.
Next, we take the volumes that contain our database files offline using Set-Disk, which targets the disks by their serial numbers over a PowerShell remoting connection. While you can run this locally on the SQL Server instance, I’m executing this code from my jumpbox.
With the database and its volumes offline, we now use the snapshots on each FlashArray to restore the volumes to their state. Before I delete the table from the database, we will use New-Pfa2Volume for this.
After reverting the volumes on each of the FlashArray systems to their previous state via the snapshots, let’s bring the database’s disks online in Windows.
After bringing the disks back online, we restore the database using our metadata backup, using RESTORE DATABASE $DbName FROM DISK = ‘$BackupFile’ WITH METADATA_ONLY, REPLACE.
Once restored, we check the state of the database MultiArraySnapshot and see that it is ONLINE.
And finally, we verify that our dropped table is back in place thanks to the nearly instantaneous restore process.
Why Am I Doing This?
This script is important because it shows a way to snapshot and restore a database from snapshot across multiple storage arrays in a SQL Server environment. Here’s why it matters:
- Consistent snapshots across arrays: This example above utilizes SQL Server 2022’s T-SQL snapshot backup to pause write I/O on a database with files across two volumes on two different FlashArray systems. By doing this, snapshots taken on two separate FlashArray systems capture the database in a stable state, ensuring that the database is restored reliably.
- Minimized write I/O pause: By coordinating a metadata-only backup that automatically unfreezes the database, this process minimizes the window of downtime, which is a critical factor in high-availability/high-performance environments.
- Modern SQL Server capabilities: This section showcases new capabilities in SQL Server 2022 and provides a real-world example of how to use these features to enhance backup strategies and disaster recovery plans in complex deployment scenarios, such as a database spanning two or more arrays.
How Long Does This Take?
This demo runs the code from the freeze until the thaw is around 200ms for the entire snapshot process across both arrays.
Read More from This Series

Using T-SQL Snapshot Backup: Are Snapshots Backups?

Using T-SQL Snapshot Backup: Point-in-time Recovery

Using T-SQL Snapshot Backup: Point-in-time Recovery – Azure Edition

Using T-SQL Snapshot Backup: Multi-array Database Snapshots
Wrapping Things Up
In this post, the fourth in our series, we used the T-SQL snapshot backup feature in a multi-array environment.
You saw how you can:
- Restore quickly using metadata-only backups
- Freeze write I/O on a database
- Coordinate snapshots across multiple storage arrays
You can grab the whole script for this blog post on GitHub.

White Paper, 7 pages
Learn What’s Helping CISOs Sleep Better at Night
And how you can too.
Go Deeper
Learn more in the video “Are Snapshots Backups?”